crwdns2915892:0crwdne2915892:0
Did some water sneak its way into your GoPro and fry the motherboard? This guide will walk you through how to get to the meat of your GoPro and give it new life with a motherboard!
crwdns2942213:0crwdne2942213:0
-
-
Pull the tab on the back of the device to release the back cover. It should come right off.
-
-
-
Use the battery tab to pull the battery out of the device.
-
-
-
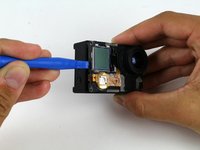
Using a plastic opening tool, pry the gray, front face plate until it can be removed from the housing.
-
-
-
Using your screwdriver, remove the four 8.1mm PH00 screws securing the motherboard to the black housing unit and set them aside.
-
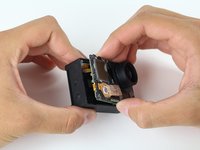
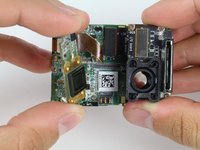
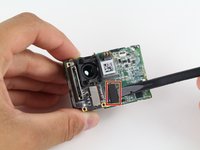
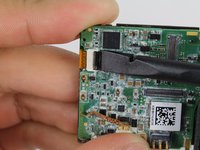
Use the plastic opening tool to help pry the motherboard/midframe up from the main housing. Once you can get a hold of the edge, simply pull the internal components up and out!
-
-
-
-
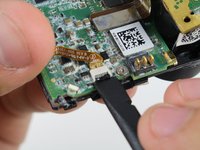
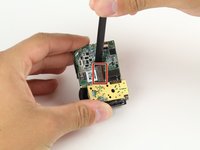
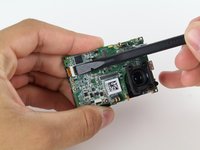
Remove the ribbon cable connecting the housing to the motherboard by flicking up the black clip with the spudger tool and gently pulling the cable out.
-
-
-
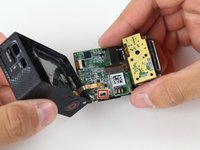
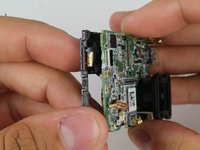
Once the internal components are removed, take out your handy dandy spudger tool and pry off the piece of tape that holds down the image sensor.
-
-
-
Using your screwdriver, remove the four PH00 screws securing the image sensor to the motherboard.
Removing this and attempting to reconnect the connector ribbon will be really difficult when re-assembling. If you are simply replacing the LCD screen I recommend skipping to Step 13.
-
-
-
Using the spudger tool, pry off the connector ribbon from the motherboard (don't worry it comes off pretty easily).
-
Remove the image sensor from the motherboard assembly.
-
-
-
Using your screwdriver, remove the three 4mm PH00 screws that hold down the metal plate.
The threads on the top left screw are different so be sure to take note of which screw is which (although maybe it doesn’t matter that much).
-
-
-
Using the spudger tool, pry off the corresponding ribbon cable from the motherboard.
-
The microSD/accessory board is ready to come off.
-
-
-
Using your trusty screwdriver, remove the single 3.2mm PH00 screw connecting the motherboard to the midframe.
-
-
-
Use the spudger tool to disconnect the front LCD from the motherboard. Gently pull the ribbon cable out.
-
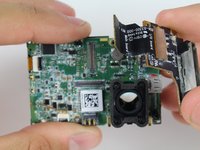
Gently pull the motherboard away from the midframe.
-


To reassemble your device, follow these instructions in reverse order.
To reassemble your device, follow these instructions in reverse order.
crwdns2935221:0crwdne2935221:0
crwdns2935229:018crwdne2935229:0
crwdns2915084:0crwdne2915084:0

Cal Poly, Team 6-15, Maness Spring 2015 crwdns2935289:0Cal Poly, Team 6-15, Maness Spring 2015crwdne2935289:0
CPSU-MANESS-S15S6G15
crwdns2931471:04crwdne2931471:0
crwdns2935297:013crwdne2935297:0
crwdns2947410:01crwdne2947410:0
Hello Chad,
Thanks for the very helpful and detailed guide.
Could you please tell us how you narrowed down the problem to the motherboard and not to other parts? What kind of problems were you having with your GoPro before you repaired it? After you have replaced the motherboard and put the camera back together, did you have to do anything else to make it work like reconfigure the firmware?
Appreciate your help. Thanks!