crwdns2915892:0crwdne2915892:0
Use this guide to check the the condenser of your Frigidaire side-by-side refrigerator. This unit is located behind the rear cover on the back of your refrigerator.
The condenser releases heat from the compressed refrigerant coming from the compressor. This heat ultimately is heat removed from the interior of your fridge.
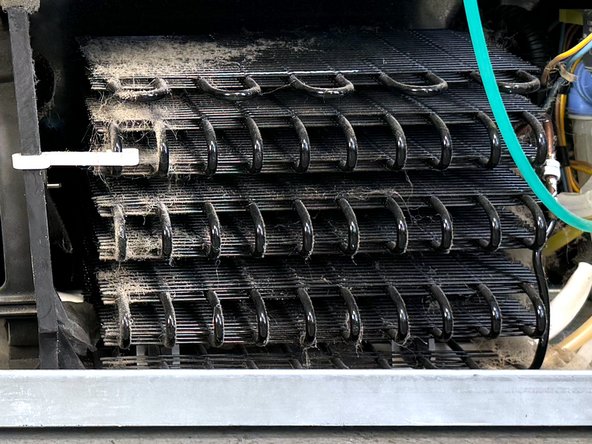
If the condenser gets dirty then airflow over it can't as easily remove heat. This leads to your refrigerator working harder, using more energy and heating up in the fresh food and freezer compartments.
This guide was created using a Frigidaire model FFSS2614QS6A side-by-side refrigerator. Other side-by-side units should be similar.
crwdns2942213:0crwdne2942213:0
-
-
Unplug your refrigerator before you begin your repair.
-
Condenser fan motor
-
Compressor motor and thermal overload device
-
Water supply valve assembly
-
-
-
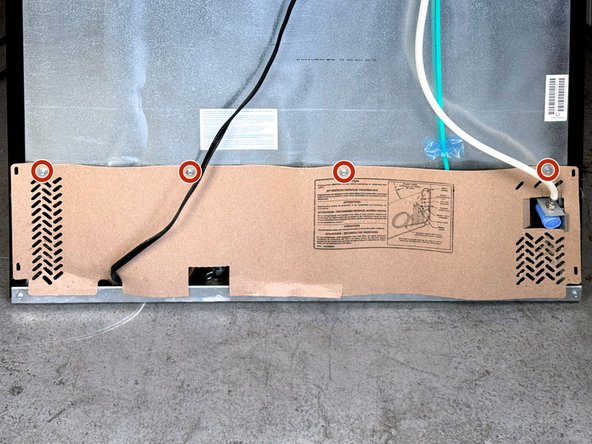
Use a 1/4" nut driver to remove the four screws securing the rear cover to the refrigerator.
-
-
-
-
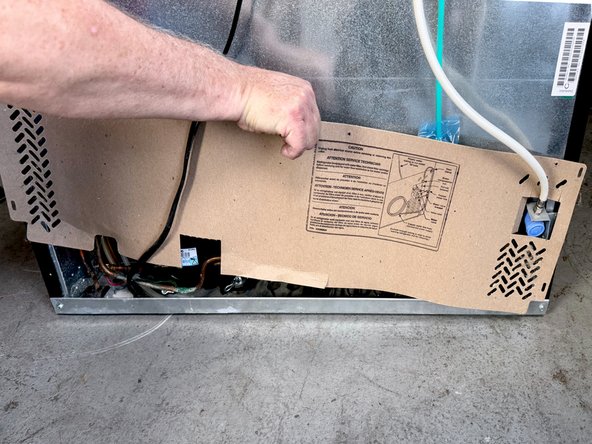
Lift the rear cover until it is free of the tabs.
-
If the water supply hose is not used, pass it through the hole in the cover.
-
-
-
Remove the cover and set it aside.
-
-
-
Use a soft brush to clean the condenser coils.
-
To reassemble your device, follow these instructions in reverse order.
Take your e-waste to an R2 or e-Stewards certified recycler.
Repair didn’t go as planned? Try some basic troubleshooting, or ask our Answers community for help.
To reassemble your device, follow these instructions in reverse order.
Take your e-waste to an R2 or e-Stewards certified recycler.
Repair didn’t go as planned? Try some basic troubleshooting, or ask our Answers community for help.


