crwdns2933423:0crwdne2933423:0
crwdns2947577:0crwdnd2947577:0crwdne2947577:0

Fitbit Charge 2 Touch Screen Assembly Replacement

crwdns2942213:0crwdne2942213:0

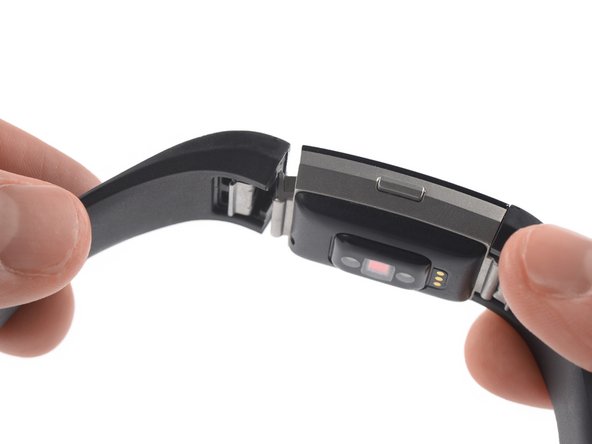
    1. Fitbit Charge 2 Touch Screen Assembly Replacement, Remove the watch band: crwdns2935265:01crwdnd2935265:01crwdnd2935265:01crwdne2935265:0
      • Before starting, take your Fitbit Charge 2 off the charger and power it down.

      • Remove the watch band on both sides.

      crwdns2952109:0crwdne2952109:0

      crwdns2917038:0crwdne2917038:0

    2. Fitbit Charge 2 Touch Screen Assembly Replacement, Heat the touch screen: crwdns2935265:02crwdnd2935265:01crwdnd2935265:01crwdne2935265:0
      • Heat an iOpener and apply it to the touch screen for two minutes.

      • The screen is not glued down, but the heat helps to loosen the touch screen assembly from your watch.

      crwdns2952109:0crwdne2952109:0

      crwdns2917038:0crwdne2917038:0

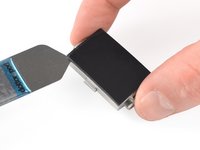
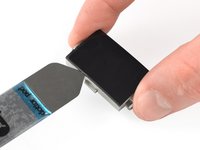
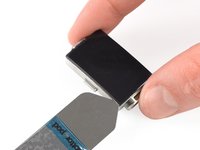
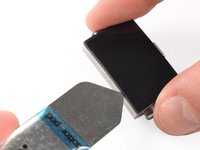
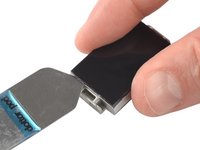
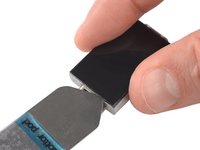
    3. Fitbit Charge 2 Touch Screen Assembly Replacement, Slide along the left edge: crwdns2935265:03crwdnd2935265:01crwdnd2935265:03crwdne2935265:0 Fitbit Charge 2 Touch Screen Assembly Replacement, Slide along the left edge: crwdns2935265:03crwdnd2935265:02crwdnd2935265:03crwdne2935265:0 Fitbit Charge 2 Touch Screen Assembly Replacement, Slide along the left edge: crwdns2935265:03crwdnd2935265:03crwdnd2935265:03crwdne2935265:0
      crwdns2935267:0crwdne2935267:0
      iSesamo Opening Tool
      $10.99
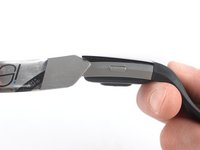
      • Insert an iSesamo into the gap between the touch screen and the watch assembly on the top left corner.

      • Slide the iSesamo along the left edge to the bottom left corner.

      crwdns2952109:0crwdne2952109:0

      crwdns2917038:0crwdne2917038:0

    4. Fitbit Charge 2 Touch Screen Assembly Replacement, Slide along the bottom edge: crwdns2935265:04crwdnd2935265:01crwdnd2935265:02crwdne2935265:0 Fitbit Charge 2 Touch Screen Assembly Replacement, Slide along the bottom edge: crwdns2935265:04crwdnd2935265:02crwdnd2935265:02crwdne2935265:0
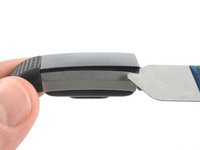
      • Slide the iSesamo around the bottom left corner.

      • Slide it along the edge to the bottom right corner.

      crwdns2952109:0crwdne2952109:0

      crwdns2917038:0crwdne2917038:0

    5. Fitbit Charge 2 Touch Screen Assembly Replacement: crwdns2935265:05crwdnd2935265:01crwdnd2935265:03crwdne2935265:0 Fitbit Charge 2 Touch Screen Assembly Replacement: crwdns2935265:05crwdnd2935265:02crwdnd2935265:03crwdne2935265:0 Fitbit Charge 2 Touch Screen Assembly Replacement: crwdns2935265:05crwdnd2935265:03crwdnd2935265:03crwdne2935265:0
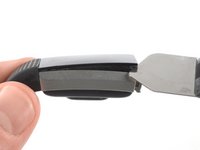
      • Slide the iSesamo around the bottom right corner.

      • Keep sliding it along the right edge to the top right corner.

      crwdns2952109:0crwdne2952109:0

      crwdns2917038:0crwdne2917038:0

    6. Fitbit Charge 2 Touch Screen Assembly Replacement: crwdns2935265:06crwdnd2935265:01crwdnd2935265:02crwdne2935265:0 Fitbit Charge 2 Touch Screen Assembly Replacement: crwdns2935265:06crwdnd2935265:02crwdnd2935265:02crwdne2935265:0
      • Slide the iSesamo around the top right corner.

      • Slide it along the top edge to the top left corner.

      crwdns2952109:0crwdne2952109:0

      crwdns2917038:0crwdne2917038:0

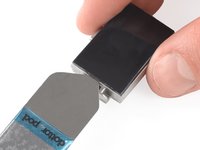
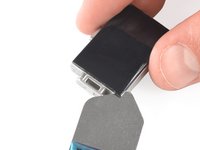
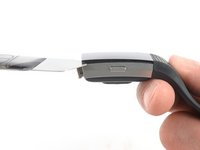
    7. Fitbit Charge 2 Touch Screen Assembly Replacement: crwdns2935265:07crwdnd2935265:01crwdnd2935265:02crwdne2935265:0 Fitbit Charge 2 Touch Screen Assembly Replacement: crwdns2935265:07crwdnd2935265:02crwdnd2935265:02crwdne2935265:0
      • Place the iSesamo under the top left corner.

      • Feel free to reattach the watch band for this and the next step for a better grip.

      • Pry up the touch screen assembly by twisting the iSesamo sideways to create a gap and unhinge the plastic clips which are holding the screen in place.

      crwdns2952109:0crwdne2952109:0

      crwdns2917038:0crwdne2917038:0

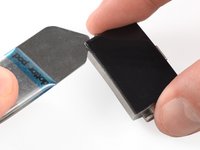
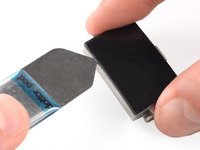
    8. Fitbit Charge 2 Touch Screen Assembly Replacement: crwdns2935265:08crwdnd2935265:01crwdnd2935265:02crwdne2935265:0 Fitbit Charge 2 Touch Screen Assembly Replacement: crwdns2935265:08crwdnd2935265:02crwdnd2935265:02crwdne2935265:0
      • Place the iSesamo under the top right corner.

      • Pry up the touch screen assembly by twisting the iSesamo sideways to create a gap.

      crwdns2952109:0crwdne2952109:0

      crwdns2917038:0crwdne2917038:0

    9. Fitbit Charge 2 Touch Screen Assembly Replacement: crwdns2935265:09crwdnd2935265:01crwdnd2935265:02crwdne2935265:0 Fitbit Charge 2 Touch Screen Assembly Replacement: crwdns2935265:09crwdnd2935265:02crwdnd2935265:02crwdne2935265:0
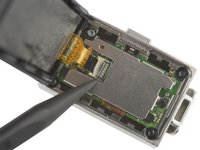
      • Insert a spudger into the gap on the top edge of your Fitbit Charge 2.

      • Use the spudger to pry up the touch screen assembly.

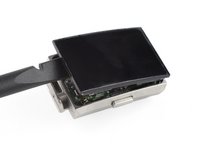
      • Do not remove the touch screen assembly all the way yet—it's still connected to the motherboard.

      crwdns2952109:0crwdne2952109:0

      crwdns2917038:0crwdne2917038:0

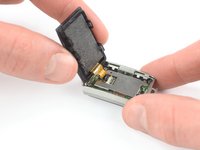
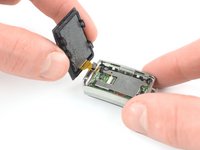
    10. Fitbit Charge 2 Touch Screen Assembly Replacement: crwdns2935265:010crwdnd2935265:01crwdnd2935265:01crwdne2935265:0
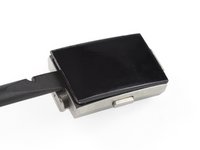
      • Carefully fold the touch screen assembly in the direction of the bottom edge.

      crwdns2952109:0crwdne2952109:0

      crwdns2917038:0crwdne2917038:0

    1. Fitbit Charge 2 Touch Screen Assembly Replacement, Remove the protecting sticker: crwdns2935265:011crwdnd2935265:01crwdnd2935265:02crwdne2935265:0 Fitbit Charge 2 Touch Screen Assembly Replacement, Remove the protecting sticker: crwdns2935265:011crwdnd2935265:02crwdnd2935265:02crwdne2935265:0
      crwdns2935267:0crwdne2935267:0
      Tweezers
      $4.99
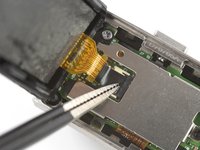
      • Use a pair of blunt nosed tweezers to remove the black sticker which covering the touch screen connector.

      crwdns2952109:0crwdne2952109:0

      crwdns2917038:0crwdne2917038:0

    2. Fitbit Charge 2 Touch Screen Assembly Replacement, Open the ZIF connector: crwdns2935265:012crwdnd2935265:01crwdnd2935265:02crwdne2935265:0 Fitbit Charge 2 Touch Screen Assembly Replacement, Open the ZIF connector: crwdns2935265:012crwdnd2935265:02crwdnd2935265:02crwdne2935265:0
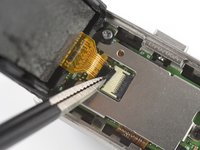
      • Use the pointed end of a spudger to open the ZIF connector by pushing up the black flap.

      crwdns2952109:0crwdne2952109:0

      crwdns2917038:0crwdne2917038:0

    3. Fitbit Charge 2 Touch Screen Assembly Replacement, Remove the touch screen assembly: crwdns2935265:013crwdnd2935265:01crwdnd2935265:03crwdne2935265:0 Fitbit Charge 2 Touch Screen Assembly Replacement, Remove the touch screen assembly: crwdns2935265:013crwdnd2935265:02crwdnd2935265:03crwdne2935265:0 Fitbit Charge 2 Touch Screen Assembly Replacement, Remove the touch screen assembly: crwdns2935265:013crwdnd2935265:03crwdnd2935265:03crwdne2935265:0
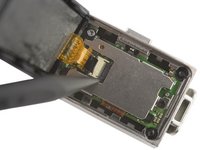
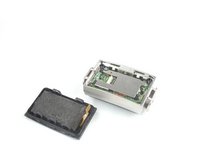
      • Pull the touch screen flex cable straight out its socket.

      • Remove the touch screen assembly.

      crwdns2952109:0crwdne2952109:0

      crwdns2917038:0crwdne2917038:0

crwdns2915888:0crwdne2915888:0

If possible, turn on your device and test your repair before reassemble.

To reassemble your device, follow these instructions in reverse order.

Take your e-waste to an R2 or e-Stewards certified recycler.

Opening didn’t go as planned? Ask our Answers community for help.

crwdns2935221:0crwdne2935221:0

crwdns2935229:012crwdne2935229:0

Adriana Zwink

crwdns2935283:012/18/19crwdne2935283:0

69.026 crwdns2915208:0crwdne2915208:0

crwdns2935297:0167crwdne2935297:0

crwdns2935287:0crwdne2935287:0

iFixit crwdns2935289:0iFixitcrwdne2935289:0

Staff

crwdns2931471:0122crwdne2931471:0

crwdns2935297:072.401crwdne2935297:0

crwdns2947410:01crwdne2947410:0

crwdns2917038:0crwdne2917038:0

crwdns2936625:0crwdne2936625:0:

crwdns2936751:024crwdne2936751:0 8

crwdns2936753:07crwdne2936753:0 42

crwdns2936753:030crwdne2936753:0 150

crwdns2942667:0crwdne2942667:0 17,889