crwdns2915892:0crwdne2915892:0
Follow this guide to replace the back buttons in your Sony DualSense Edge controller.
crwdns2942213:0crwdne2942213:0
-
-
Place the controller on a work surface with the joysticks facing down.
-
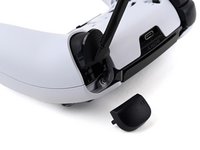
Use a spudger or your finger to slide the Release tab to the left. The front trim should fall to the table.
-
Lift the controller up, leaving the front trim on the table.
-
-
-
Flip the controller over so the joysticks are facing up.
-
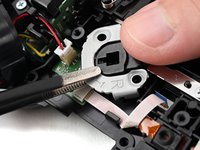
Lift the metal lever that holds the joystick in place until the joystick slides out slightly.
-
Slide the joystick out from its slot.
-
-
-
Repeat this process to remove the other joystick.
-
-
-
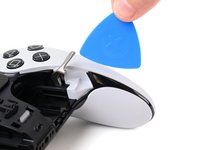
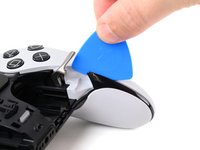
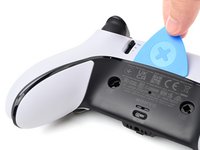
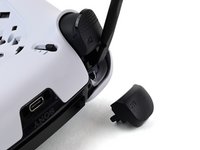
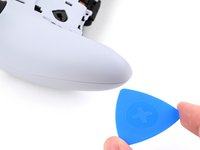
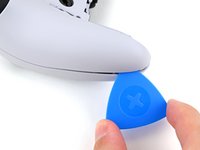
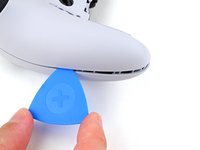
Insert the flat edge of an opening pick between the black portion of the rear trim and the top cover, near the joystick lever.
-
Slide the opening pick towards the bottom of the grip to release the clips.
-
-
-
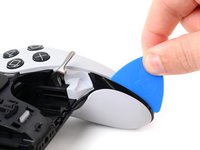
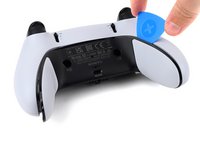
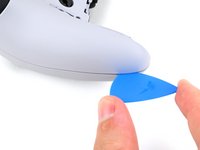
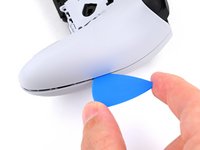
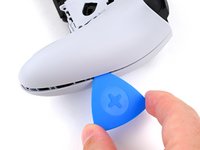
Slide the pick around to the rear of the controller and flip the controller over so the buttons are facing down.
-
Slide the opening pick around the edge of the rear trim to release the clips.
-
-
-
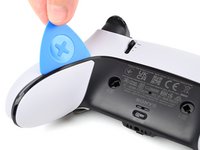
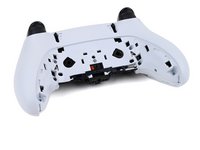
Slide the opening along the edge of the trim on the other grip.
-
Once all clips are released, remove the trim.
-
-
-
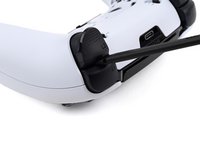
Insert the flat end of a spudger in the gap between the L1 and L2 buttons.
-
Use the spudger to pry out the L1 button.
-
Repeat this process to remove the R1 button.
-
-
-
-
Remove the two 6.4 mm screws behind the L1 and R1 buttons.
-
-
-
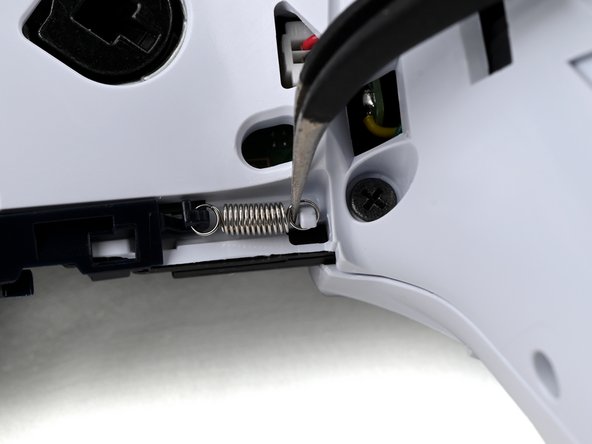
Rotate the controller so the grips are pointing towards you.
-
Use a pair of angled tweezers to lift the right end of the release bar spring off of the white post.
-
-
-
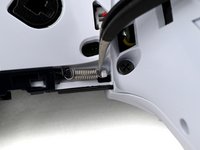
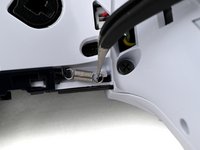
Use a pair of tweezers or your fingers to slide the release bar to the left.
-
Slide the release bar away from the controller to remove it.
-
-
-
Remove the nine screws securing the rear case:
-
Seven 6.4 mm‑long screws
-
Two 10.5 mm‑long screws
-
-
-
Insert the point an opening pick in the gap along the outside edge of one of the controller grips, near the bottom.
-
-
-
Pry with the opening pick to separate the rear case from the front case by releasing the clips that hold them together.
-
Continue prying along the edge of the controller until one side is separated.
-
-
-
Repeat this process to separate the other side of the rear case.
-
-
-
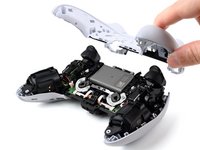
Hold the main body of the controller with one hand.
-
Lift the rear case with your other hand. It should lift at an angle.
-
Pushing slightly towards the L and R buttons, lift the rear case off of the controller and remove it.
-
-
-
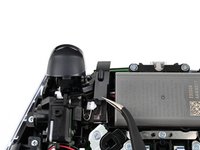
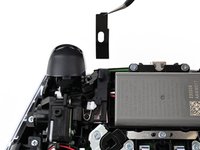
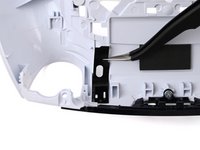
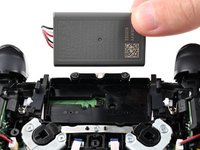
Use a pair of tweezers or your fingers to lift the cover from the controller.
-
Slide the flat end of the cover under the plastic tab in the rear case.
-
-
-
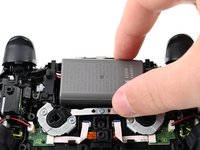
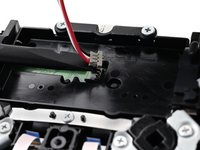
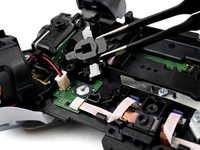
Lift the battery and move it to the right, so the connector underneath the battery is accessible.
-
-
-
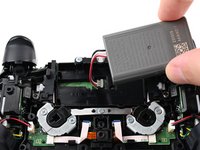
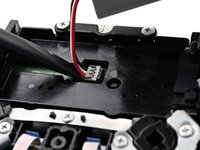
Use the flat end of a spudger to pry up the low profile connector.
-
Remove the battery.
-
-
-
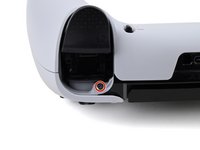
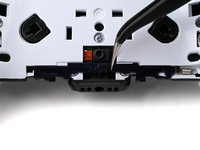
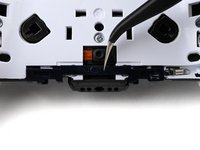
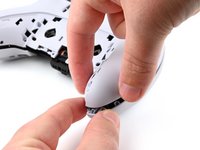
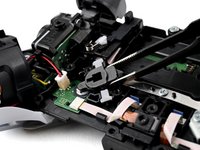
While holding the back button switch down, remove the two 6.4 mm‑long screws securing the back button bracket.
-
-
-
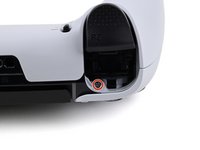
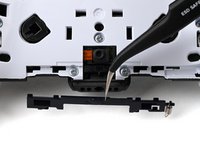
While holding the back button switch down, use a pair of tweezers or your fingers to lift and remove the back button bracket.
-
-
-
Use a pair of tweezers or your fingers to lift and remove the back button switch, being careful not to lose the plastic covers on the sides of the switch.
my back button switch broke… do you sell / have any replacement?
-


To reassemble your device, follow these instructions in reverse order.
Take your e-waste to an R2 or e-Stewards certified recycler.
Repair didn’t go as planned? Try some basic troubleshooting, or ask our Answers community for help.
To reassemble your device, follow these instructions in reverse order.
Take your e-waste to an R2 or e-Stewards certified recycler.
Repair didn’t go as planned? Try some basic troubleshooting, or ask our Answers community for help.
crwdns2935221:0crwdne2935221:0
crwdns2935227:0crwdne2935227:0


crwdns2947412:019crwdne2947412:0
Hey! Great video! By the way, any luck finding a source to buy the black piece you pick up at 8:07 in the video? I was able to glue them back in place, but I know that will just be temporary.
Same here,where can we buy that black piece
I also need that black piece, if someone knows where to buy it please let me know!
extremrate is about to release this fixing piece
I also need this black piece :(
Me too, need this piece as well.
the mechanical Rocker that sits on top of the Module with the two pins sticking out at 8:09... are you able to 3D print these and or make some out of carbon fiber... that way they are more durable for constant wear and tear...
Need the black, two prong piece
I am looking for taht same piece
Is there no answer to the question of where to get the black piece?
Folks, I heard that extremrate is about to release this fixing piece. Can't wait to fix my back buttons.
Any idea where to get the back button circuit board? The thing that allows the button to pop back up deflated and I'm unable to get to reflate and keep it flated.
What I did with the black piece to fix it is. Drill a hole and insert a screw, cut off the end of the screw so it's the same way as the other arm and file it down. That piece broke on me on the second day of having a controller. Be back button mechanics was pretty poorly made.
Can you fix playstation edge controller back buttons mine just stopped working and only had it since Christmas
I need the black piece too. Please let me know where to buy it!
Hi, any Idea where to buy the PCB for the back paddles, my left won't click anymore and although functional I reckon it needs replacing.
hello there,
first of all thank you so much for take the time to teach how to open and change the back botton but might i ask where you buy the back botton intertnal panel ?
Is there a link for the replacement button?
Link to the replacement parts in amazon Australia: https://www.amazon.com.au/eXtremeRate-Re...