crwdns2933423:0crwdne2933423:0
crwdns2947577:0crwdnd2947577:0crwdne2947577:0
Dremel 8200 Disassembly

Dremel 8200 Disassembly

mitchellbarnhart

crwdns2944107:0crwdnd2944107:0mitchellbarnhartcrwdnd2944107:0crwdnd2944107:0crwdnd2944107:03crwdnd2944107:0crwdne2944107:0

crwdns2944111:0Sun 8, 2018crwdne2944111:0

15 - 20 crwdns2931279:0crwdne2931279:0
crwdns2937801:0crwdne2937801:0
crwdns2944444:0crwdne2944444:0

crwdns2915892:0crwdne2915892:0
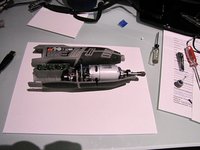
crwdns2942287:0crwdne2942287:0

Disassembling your Dremel 8200.

crwdns2942213:0crwdne2942213:0

crwdns2943215:0crwdne2943215:0

  1. Dremel 8200 Disassembly, Dremel 8200 Disassembly: crwdns2935265:01crwdnd2935265:01crwdnd2935265:02crwdne2935265:0 Dremel 8200 Disassembly, Dremel 8200 Disassembly: crwdns2935265:01crwdnd2935265:02crwdnd2935265:02crwdne2935265:0
    • Take off the screw cap at the top

  2. Dremel 8200 Disassembly: crwdns2935265:02crwdnd2935265:01crwdnd2935265:02crwdne2935265:0 Dremel 8200 Disassembly: crwdns2935265:02crwdnd2935265:02crwdnd2935265:02crwdne2935265:0
    • Take out the battery

    • Remove oblong belt clip

  3. Dremel 8200 Disassembly: crwdns2935265:04crwdnd2935265:01crwdnd2935265:01crwdne2935265:0
    • Unscrew screws

    • Take back u clip out carefully

    • Be very careful to not injure yourself

  4. Dremel 8200 Disassembly: crwdns2935265:06crwdnd2935265:01crwdnd2935265:02crwdne2935265:0 Dremel 8200 Disassembly: crwdns2935265:06crwdnd2935265:02crwdnd2935265:02crwdne2935265:0
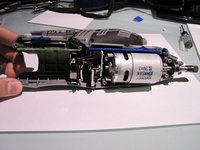
    • The casing should just open right up and be easily accessible

  5. Dremel 8200 Disassembly: crwdns2935265:07crwdnd2935265:01crwdnd2935265:01crwdne2935265:0
    • You can remove the buttons except for the sliding one that adjusts the speed

  6. Dremel 8200 Disassembly: crwdns2935265:08crwdnd2935265:01crwdnd2935265:02crwdne2935265:0 Dremel 8200 Disassembly: crwdns2935265:08crwdnd2935265:02crwdnd2935265:02crwdne2935265:0
    • You can take the motor out first and it will be a little hard to do so

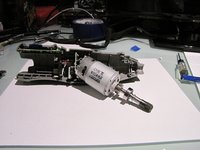
    • Work your way down and take out each successive circuit board

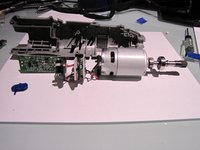
    • The last thing to be out should be the sliding speed adjustment and the button for that should fall right out

crwdns2915888:0crwdne2915888:0

To reassemble your device, follow these instructions in reverse order.

crwdns2935229:03crwdne2935229:0

mitchellbarnhart

crwdns2935283:002/18/15crwdne2935283:0

86 crwdns2915208:0crwdne2915208:0

crwdns2935295:0crwdne2935295:0

crwdns2947412:02crwdne2947412:0

It will be handy to have either a can of compressed air or an air directional nozzle on your compressor. Be careful of the circuits and small parts that can blow away. You'll be amazed how even with a maintenance schedule, how much dirt will be on the motor fins

m. D. w. - crwdns2934203:0crwdne2934203:0

How do you replace just the bearing in this assembly?

Andre Da Silva - crwdns2934203:0crwdne2934203:0

crwdns2917038:0crwdne2917038:0

crwdns2936625:0crwdne2936625:0:

crwdns2936751:024crwdne2936751:0 4

crwdns2936753:07crwdne2936753:0 9

crwdns2936753:030crwdne2936753:0 40

crwdns2942667:0crwdne2942667:0 4,117