crwdns2915892:0crwdne2915892:0
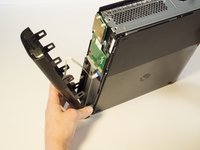
You will need to remove the top body of your Xbox 360 E in order to get inside your Xbox and replace other parts, such as the CD drive or motherboard.
crwdns2942213:0crwdne2942213:0
-
-
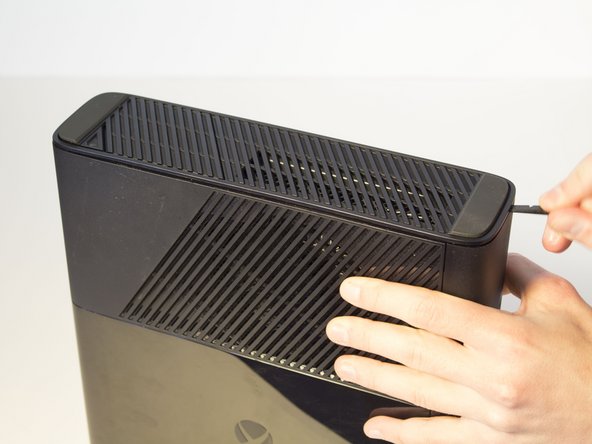
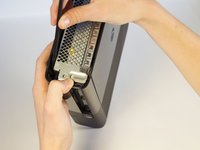
Push the Spudger into the crevice between the grated top panel of the Xbox and the bottom body with the rubber feet.
-
Pull back on the spudger like a lever, keeping it pressed firmly into the crevice.
-
-
-
Slide the spudger along the separation you have created between the grated panel and the bottom body of the Xbox.
-
Periodically pull back on the spudger like a lever, keeping it pressed firmly into the crevice.
-
-
-
Continue sliding the spudger along the perimeter of the left grated face of the Xbox.
-
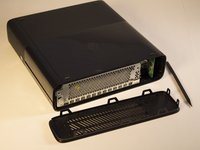
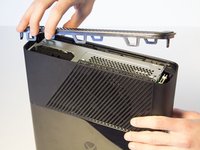
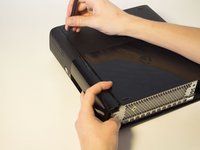
Pull the top panel off.
-
-
-
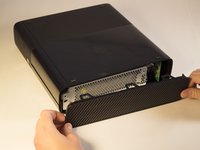
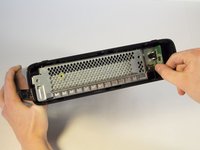
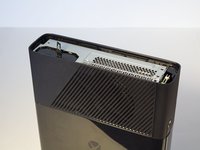
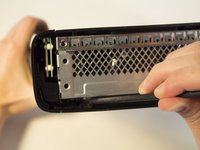
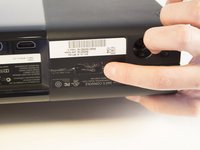
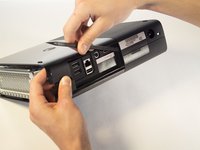
Remove the 11 mm screw left of the green wifi-card using the T9 Torx screw bit.
-
-
-
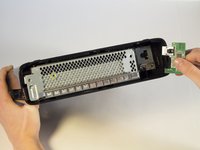
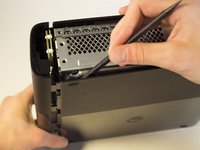
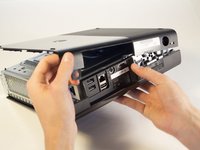
Firmly grip the green Wi-Fi card and pull it out of the Xbox.
On that wifi card there is a little port that you can plug and old router antena into. Any idea what its called?
-
-
-
Push the spudger into the crevice between the right grated face and the top body of the Xbox. It's easier to begin away from the vent.
-
Pull up on the spudger like a lever, keeping it pressed firmly into the crevice.
-
-
-
Slide the spudger along the crevice to separate the grated face and the top body.
-
-
-
-
Wiggle the spudger in the crevice as you slide the spudger to loosen the bottom plate.
-
Slide the spudger along the crevice, going completely about the perimeter of the bottom panel.
-
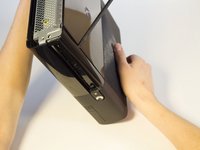
Pull the bottom panel off.
-
-
-
In front of the CD drive you will find the Xbox logo. Press on the area left of the Xbox logo, and the disk tray panel will pop off.
Does not work
Doesn’t work for me either
Yeah.... If possible, better to just turn the machine on. Open the tray, unplug the console. Then lift it off. Closer the tray afterwards.
Better go from behind... This way inside is hard as hell and wondering if you break something... :-(
-
-
-
Beginning on the left side without the grate, run the spudger along the crevice until you've reached the grated part, while holding the part that's being separated as you go.
-
-
-
Keep holding the partially separated panel open. It's easiest to do this by wedging a spudger into the opening but can also be held open by your hands.
-
Rotate the Xbox to the left to locate the clip connecting the front panel to the body. Insert the spudger inside the gap to release the clip. This may require wiggling the spudger. The clip will pop off, making the front panel looser.
My actual disk tray came off the track looking into the best way to repair it
-
-
-
Flip the Xbox so the opposite side is towards you. Make sure to keep the separation open.
-
Locate the other clip and insert the spudger to remove it.
-
-
-
Continue to run the spudger along the crease to release any further clips that may still be attatched.
-
Now that the front panel has been released from its clips you can pull off the front panel.
-
-
-
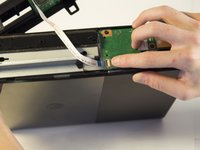
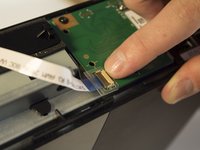
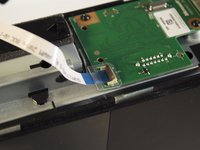
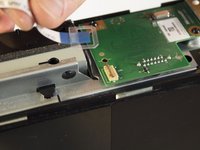
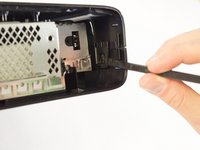
Find the brown section where the ribbon cable enters the green board. Flip the brown part up and pull out the plastic tab at the end of the ribbon.
-
-
-
Orient the Xbox so the bottom body is facing upwards. Make sure you see the rubber feet to know you have the correct side of the device.
-
Lift the bottom body slightly away from the core at a 45 degree angle.
-
-
-
Rotate the Xbox so you are now looking at the back of the device.
-
Remove the sticker from the back of the Xbox.
-
-
-
Turn the Xbox to the left to locate the clip holding the body together.
-
With a spudger, press up on the clip like a latch. Move to the far end to undo the other clip the same way.
-
-
-
Push the spudger into the crevice. Slide the spudger along the vertical crevice to detach the last clip. The bottom body should slide off after this.
-
-
-
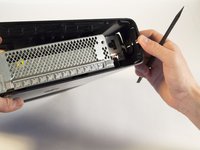
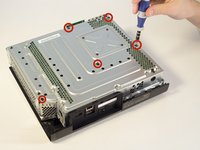
Remove the five long black 55 mm screws labeled C2-5 and C7 with a T9 Torx screwdriver.
-
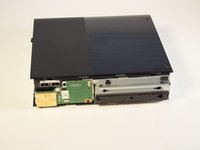
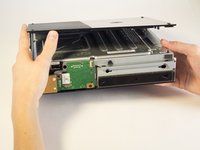
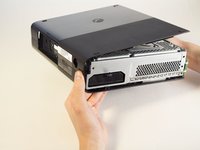
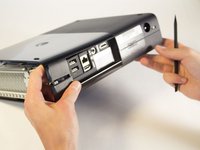
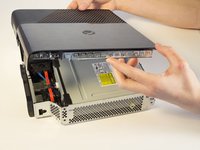
Carefully flip the device and pull off the body by lifting from the metal section that is attached to the plastic exterior.
C1 - C5 screws
And not T9 - the're T10 screws
Missing some steps here…. Where are the clips holding the sides together? To go straight from “Remove bottom cover” to “Device is apart” is a bit… lacking.
Yes, Aksel Barnes is correct. There are missing pictures and steps showing the removal of the plastic exterior from the metal section.
another "manual" missing the hardest steps
Just wanted to share my experience: after you "spudge" off the top and bottom you have to "spudge" off the front as well. Then you can follow the rest of the steps
-


To reassemble your device, follow these instructions in reverse order.
To reassemble your device, follow these instructions in reverse order.
crwdns2935221:0crwdne2935221:0
crwdns2935229:021crwdne2935229:0
crwdns2915084:0crwdne2915084:0

Cal Poly, Team 2-11, Amido Winter 2014 crwdns2935289:0Cal Poly, Team 2-11, Amido Winter 2014crwdne2935289:0
CPSU-AMIDO-W14S2G11
crwdns2931471:04crwdne2931471:0
crwdns2935297:044crwdne2935297:0
crwdns2947412:03crwdne2947412:0
Thank you for sharing your instructions. I'd just like to ask if dismantelling the Xbox and cleaning out dust and dirt would help with the overheating message problem that I have? I know that there are videos etc on how to redo the solder connection that often leads to this fault, but my soldering skills are a bit "rusty" ! Do you have any other suggestions for this fault?
De - dusting certainly wouldn't hurt.
Wystarczy dac nowa paste termo przewodzącą na procesor