crwdns2933423:0crwdne2933423:0

Digital2 Platinum Pad 9 Motherboard Replacement

crwdns2942213:0crwdne2942213:0

  1. Digital2 Platinum Pad 9 Motherboard Replacement, External Cover: crwdns2935265:01crwdnd2935265:01crwdnd2935265:01crwdne2935265:0
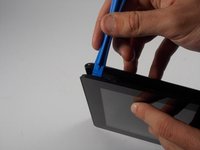
    • Take the plastic opening tool and insert it into the crease between the screen and the plastic casing and press down.

  2. Digital2 Platinum Pad 9 Motherboard Replacement: crwdns2935265:02crwdnd2935265:01crwdnd2935265:02crwdne2935265:0 Digital2 Platinum Pad 9 Motherboard Replacement: crwdns2935265:02crwdnd2935265:02crwdnd2935265:02crwdne2935265:0
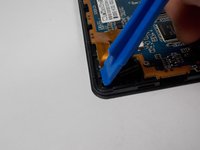
    • After inserting the plastic opening tool, run it around the device a few times to loosen the external cover.

  3. Digital2 Platinum Pad 9 Motherboard Replacement: crwdns2935265:03crwdnd2935265:01crwdnd2935265:02crwdne2935265:0 Digital2 Platinum Pad 9 Motherboard Replacement: crwdns2935265:03crwdnd2935265:02crwdnd2935265:02crwdne2935265:0
    • Once you've gone around a few times a corner will pop up, insert the opening tool there and repeat step 2 with slightly more pressure. Do this until every section of the backing has popped up.

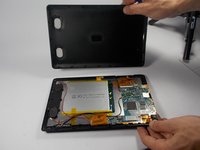
    • Then just remove the backing.

  4. Digital2 Platinum Pad 9 Motherboard Replacement, External Speaker: crwdns2935265:04crwdnd2935265:01crwdnd2935265:01crwdne2935265:0
    • The external speakers are located in the black plastic fixture near the battery as pointed to in the image.

  5. Digital2 Platinum Pad 9 Motherboard Replacement: crwdns2935265:05crwdnd2935265:01crwdnd2935265:01crwdne2935265:0
    • Use a J0 sized Phillips head screwdriver to remove the two 3.175mm long Phillips head screws from the speaker fixture.

  6. Digital2 Platinum Pad 9 Motherboard Replacement: crwdns2935265:06crwdnd2935265:01crwdnd2935265:01crwdne2935265:0
    • Then lift up the cover holding the speakers down.

    • Remove the actual speakers along with the cover.

  7. Digital2 Platinum Pad 9 Motherboard Replacement: crwdns2935265:07crwdnd2935265:01crwdnd2935265:01crwdne2935265:0
    • Remove the tape holding the wires down.

  8. Digital2 Platinum Pad 9 Motherboard Replacement: crwdns2935265:08crwdnd2935265:01crwdnd2935265:01crwdne2935265:0
    • The two wires that connect the speakers to the motherboard must be removed next. In order to replace the speakers you will need to solder them back into place.

  9. Digital2 Platinum Pad 9 Motherboard Replacement: crwdns2935265:09crwdnd2935265:01crwdnd2935265:01crwdne2935265:0
  10. Digital2 Platinum Pad 9 Motherboard Replacement, Battery: crwdns2935265:010crwdnd2935265:01crwdnd2935265:01crwdne2935265:0
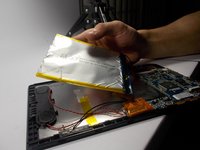
    • The battery is the bigger square object in the center of the device held down by 3 pieces of yellow tape.

  11. Digital2 Platinum Pad 9 Motherboard Replacement: crwdns2935265:011crwdnd2935265:01crwdnd2935265:01crwdne2935265:0
    • Carefully remove the tape that is holding down the battery.

  12. Digital2 Platinum Pad 9 Motherboard Replacement: crwdns2935265:012crwdnd2935265:01crwdnd2935265:02crwdne2935265:0 Digital2 Platinum Pad 9 Motherboard Replacement: crwdns2935265:012crwdnd2935265:02crwdnd2935265:02crwdne2935265:0
    • Lift up the battery it will be glued to the device.
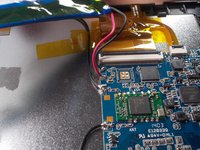
    • Be sure to gently work it to loosen and remove so that you do not damage your device.

  13. Digital2 Platinum Pad 9 Motherboard Replacement: crwdns2935265:013crwdnd2935265:01crwdnd2935265:01crwdne2935265:0
  14. Digital2 Platinum Pad 9 Motherboard Replacement, Volume Buttons: crwdns2935265:014crwdnd2935265:01crwdnd2935265:01crwdne2935265:0
    • You can locate the volume buttons on one of the longer sides of the tablet.

  15. Digital2 Platinum Pad 9 Motherboard Replacement: crwdns2935265:015crwdnd2935265:01crwdnd2935265:01crwdne2935265:0
    • Lift up the ZIF connector that is attached to the volume buttons ribbon cable.

  16. Digital2 Platinum Pad 9 Motherboard Replacement: crwdns2935265:016crwdnd2935265:01crwdnd2935265:01crwdne2935265:0
    • Then remove the ribbon cable from the ZIF connector.

  17. Digital2 Platinum Pad 9 Motherboard Replacement: crwdns2935265:017crwdnd2935265:01crwdnd2935265:01crwdne2935265:0
    • Make sure to separate the volume button's cable from the cable connecting the motherboard to the screen

  18. Digital2 Platinum Pad 9 Motherboard Replacement: crwdns2935265:018crwdnd2935265:01crwdnd2935265:02crwdne2935265:0 Digital2 Platinum Pad 9 Motherboard Replacement: crwdns2935265:018crwdnd2935265:02crwdnd2935265:02crwdne2935265:0
    crwdns2935267:0crwdne2935267:0
    Tweezers
    $4.99
    crwdns2942207:0crwdne2942207:0
    • Then use the precision tweezers to grab the volume buttons.

    • Pull until the buttons come out.

  19. Digital2 Platinum Pad 9 Motherboard Replacement, Front/Rear Facing Camera: crwdns2935265:019crwdnd2935265:01crwdnd2935265:01crwdne2935265:0
    • The front/rear facing cameras are located in the corner of the device one is facing toward you and is black. The other is facing away so you will see the white backing.

  20. Digital2 Platinum Pad 9 Motherboard Replacement: crwdns2935265:020crwdnd2935265:01crwdnd2935265:02crwdne2935265:0 Digital2 Platinum Pad 9 Motherboard Replacement: crwdns2935265:020crwdnd2935265:02crwdnd2935265:02crwdne2935265:0
    • Use the plastic opening tool to pop up the cameras from their slot in the Tablet.

    • Then use your hand to lift up the cameras.

    • Make sure not to tear the ribbon cables.

  21. Digital2 Platinum Pad 9 Motherboard Replacement: crwdns2935265:021crwdnd2935265:01crwdnd2935265:01crwdne2935265:0
    • Use a smaller plastic opening tool to lift up the ZIF connector in which the cameras are plugged into.

  22. Digital2 Platinum Pad 9 Motherboard Replacement: crwdns2935265:022crwdnd2935265:01crwdnd2935265:01crwdne2935265:0
    • Finally remove the cameras.

  23. Digital2 Platinum Pad 9 Motherboard Replacement, Motherboard: crwdns2935265:023crwdnd2935265:01crwdnd2935265:02crwdne2935265:0 Digital2 Platinum Pad 9 Motherboard Replacement, Motherboard: crwdns2935265:023crwdnd2935265:02crwdnd2935265:02crwdne2935265:0
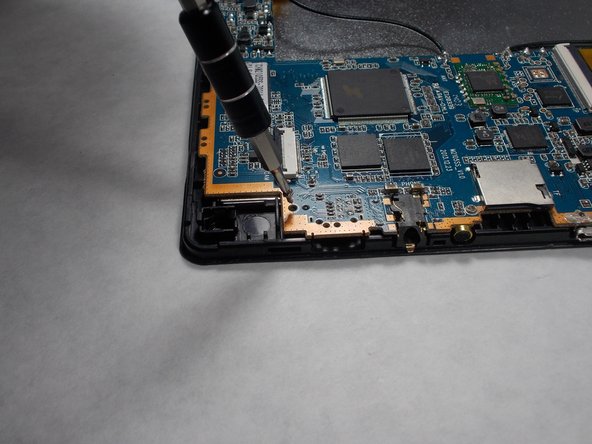
    • Use a J0 sized Phillips head screwdriver to remove the three 3.175mm long Phillips head screws from the motherboard.

  24. Digital2 Platinum Pad 9 Motherboard Replacement: crwdns2935265:024crwdnd2935265:01crwdnd2935265:02crwdne2935265:0 Digital2 Platinum Pad 9 Motherboard Replacement: crwdns2935265:024crwdnd2935265:02crwdnd2935265:02crwdne2935265:0
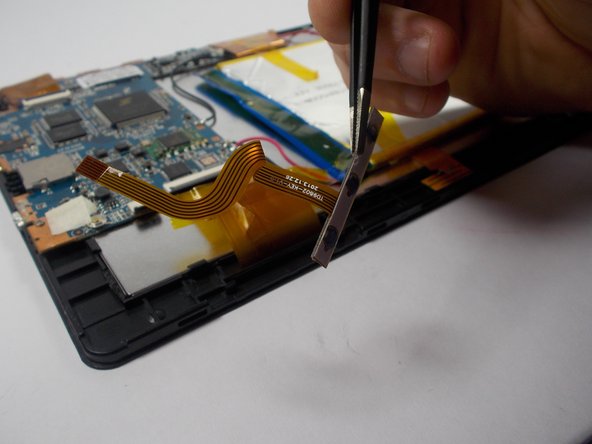
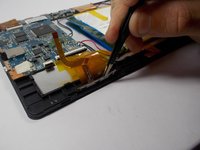
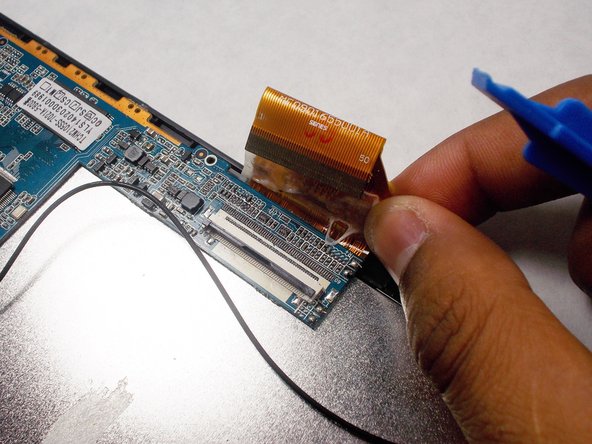
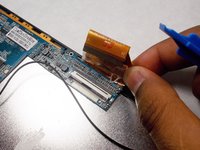
    • Insert the plastic opening tool to pop up the ZIF connector holding the ribbon cable down.

    • Remove the ribbon cable.

  25. Digital2 Platinum Pad 9 Motherboard Replacement: crwdns2935265:025crwdnd2935265:01crwdnd2935265:01crwdne2935265:0
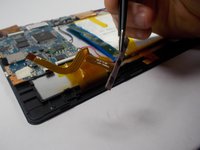
    • Remove the ribbon cable from the ZIF connector, it is next to the volume buttons.

  26. Digital2 Platinum Pad 9 Motherboard Replacement: crwdns2935265:026crwdnd2935265:01crwdnd2935265:01crwdne2935265:0
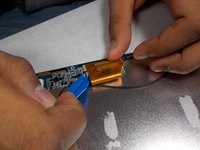
    • Desolder the connections that are soldered to the motherboard. For soldering help, check out iFixit's How to Solder and Desolder Connections guide.

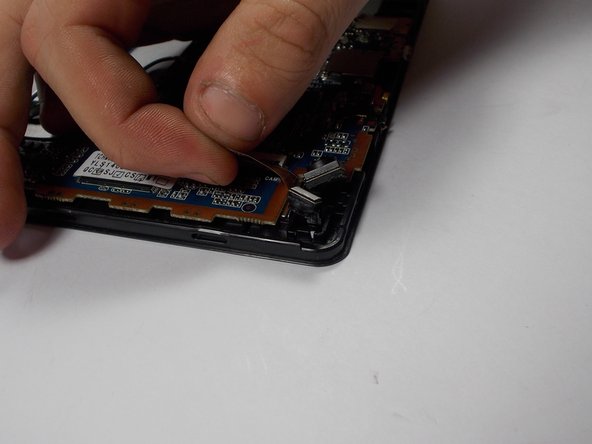
    • Then remove the motherboard by lifting it away.

crwdns2915888:0crwdne2915888:0

To reassemble your device, follow these instructions in reverse order.

David DeMeritt

crwdns2935283:003/08/16crwdne2935283:0

637 crwdns2915208:0crwdne2915208:0

crwdns2935297:06crwdne2935297:0

crwdns2915084:0crwdne2915084:0

UMass Dartmouth, Team 5-6, Landers Spring 2016 crwdns2935289:0UMass Dartmouth, Team 5-6, Landers Spring 2016crwdne2935289:0

UMASSD-LANDERS-S16S5G6

crwdns2931471:03crwdne2931471:0

crwdns2935297:06crwdne2935297:0

crwdns2944067:00crwdne2944067:0

crwdns2917038:0crwdne2917038:0

crwdns2936625:0crwdne2936625:0:

crwdns2936751:024crwdne2936751:0 0

crwdns2936753:07crwdne2936753:0 0

crwdns2936753:030crwdne2936753:0 7

crwdns2942667:0crwdne2942667:0 230