crwdns2915892:0crwdne2915892:0
A broken heat sink can have a result of overheating to your device. This guide shows how to replace the heat sink under the fans within the Dell XPS 15 9510. Allowing the heatsink to cool down the device along with the fans.
Make sure to power off your laptop completely and disconnect from any external power source before to begin the process.
crwdns2942213:0crwdne2942213:0
-
-
Remove eight 3 mm screws from the underside of the case using a T5 Torx screwdriver.
-
-
-
Wedge the case apart with a nylon spudger.
-
Slide spudger along each side of the laptop
-
-
-
Lift the back panel of the laptop off and set it aside.
-
-
-
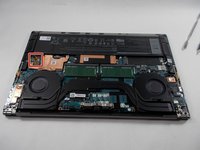
Using the small battery pull tab, disconnect the battery connector from the motherboard.
-
-
-
Remove eight 2.5 mm from around the perimeter of the battery using a Phillips #0 screwdriver.
-
-
-
-
Remove the old battery from the laptop.
-
-
-
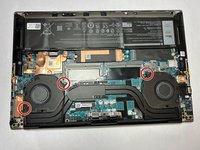
Remove two 4.3 mm screws from the left fan and one 4.3 mm screw from the right fan using a JIS #000 screwdriver.
-
-
crwdns2935267:0crwdne2935267:0Tweezers$4.99
-
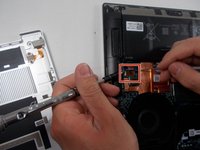
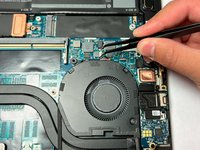
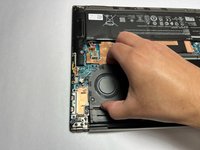
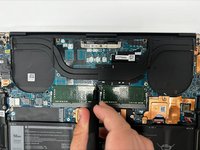
Gently unplug the motherboard fan connector using a pair of tweezers.
-
-
-
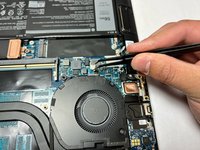
Unplug the motherboard connector on the other fan using a pair of tweezers.
-
-
-
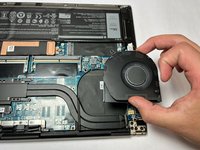
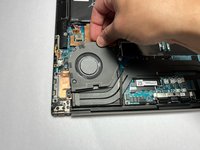
Gently slide and then lift the fans out of their positions.
-
-
-
Repeat the previous step and remove the other fan.
-
-
-
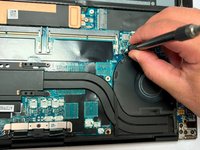
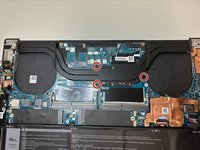
Remove the three 4.6 mm screws that secure the heat sink with a Phillips #1 screwdriver.
-
-
-
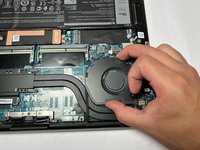
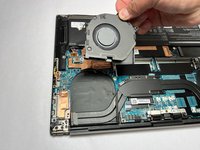
Lift and remove the heat sink.
-
Be sure to reapply thermal paste before replacing the heat sink.
-


To reassemble your device, follow the above steps in reverse order.
Take your e-waste to an R2 or e-Stewards certified recycler.
Repair didn’t go as planned? Try some basic troubleshooting or ask our Answers community for help.
crwdns2935221:0crwdne2935221:0
crwdns2935227:0crwdne2935227:0

crwdns2935287:0crwdne2935287:0

University of North Texas, Team 3-5, Coppersmith Fall 2024 crwdns2935289:0University of North Texas, Team 3-5, Coppersmith Fall 2024crwdne2935289:0
UNT-COPPERSMITH-F24S3G5
crwdns2931471:04crwdne2931471:0
crwdns2935297:05crwdne2935297:0