crwdns2942213:0crwdne2942213:0
-
-
Turn over the laptop so that the bottom is facing upwards, and the Inspiron logo is upside-down.
-
-
-
Remove the seven 7 mm screws from the bottom using a Phillips #0 screwdriver.
-
Loosen the two captive back corner screws using a Phillips #0 screwdriver.
-
-
-
-
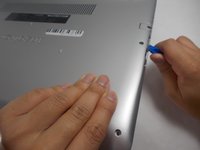
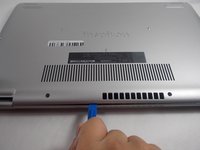
Slide an iFixit opening tool underneath the right side USB port and the keyboard.
-
Gently trace the iFixit opening tool along the entire outer rim of the laptop, carefully applying an upwards pressure.
-
-
-
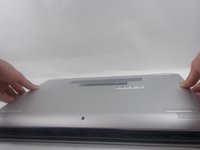
Gently pry off the bottom cover from the laptop.
-
Use the iFixit opening tool to loosen any spots you may have missed from Step 3.
-
-
-
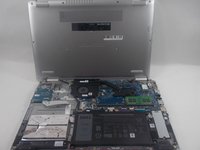
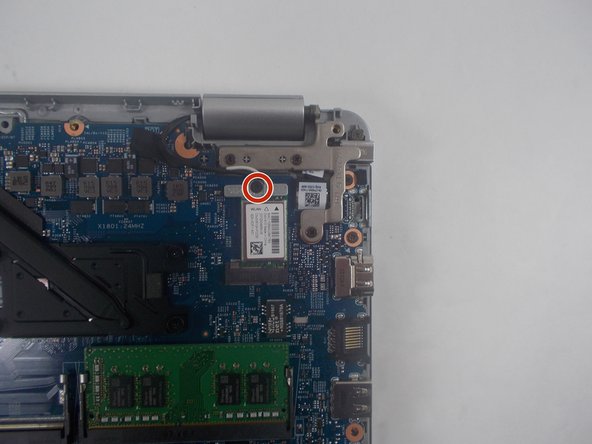
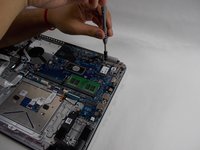
Remove the single 3 mm screw that holds down the Wi-Fi card using a Phillips #0 screwdriver.
-
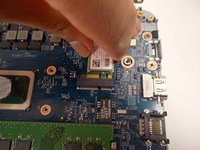
Remove the Wi-Fi card from the motherboard.
-


To reassemble your device, follow these instructions in reverse order.
To reassemble your device, follow these instructions in reverse order.
crwdns2935221:0crwdne2935221:0
crwdns2935227:0crwdne2935227:0


crwdns2947410:01crwdne2947410:0
The problem isn't taking the card out. It's putting it in and especially attaching the micro connectors to the card without messing them up. This is a poor design which literally requires a electron microscope to see what your doing. I would like ot know how one does this and with what tools.