crwdns2915892:0crwdne2915892:0
If your Dell Chromebook 3110 won’t hold a charge, drains quickly, or only works when plugged in, you likely need a battery replacement.
This step-by-step guide will show you how to safely remove and replace the battery in a Dell Chromebook 3110.
For safety:
- Discharge the battery below 25% before starting the repair. This lowers the risk of fire if the battery is damaged.
- If your old battery looks swollen, puffy, or smells unusual, use caution—swollen lithium-ion batteries can be hazardous. See our wiki: What to Do With a Swollen Battery.
Before beginning your Dell Chromebook 3110 battery replacement, unplug the charger and completely power off your device.
crwdns2942213:0crwdne2942213:0
-
-
Set the laptop upside down on a clean work space.
-
-
-
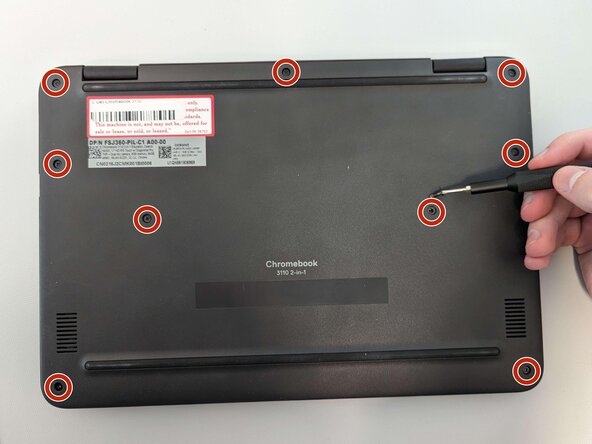
Remove nine 4 mm screws from the back cover of the laptop using a Phillips #00 screwdriver.
-
-
-
-
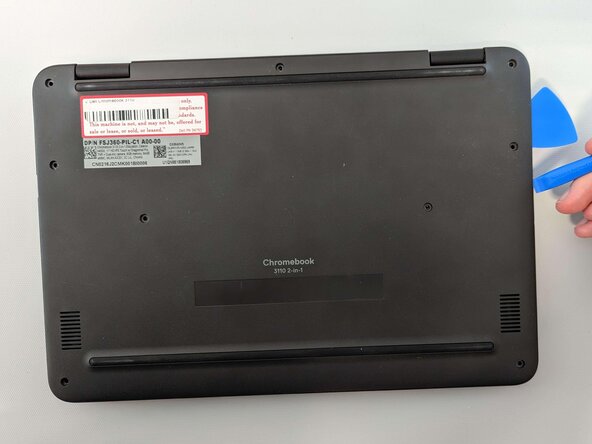
Using an opening pick and a plastic opening tool, begin to separate the back cover from the laptop.
-
Using your hands, fully remove the back cover.
-
-
-
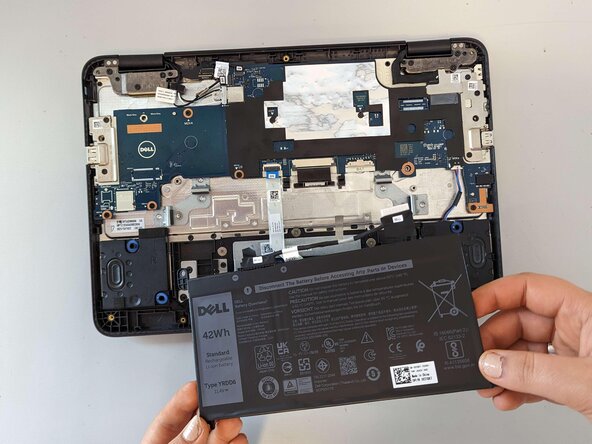
Unplug the battery from the motherboard by gently pulling on the cable header from the motherboard toward the battery.
-
Using the Phillips #0 screwdriver, remove the three screws from the battery.
-
-
-
Carefully lift the battery out of the laptop.
-


To reassemble your device, follow these instructions in reverse order. For optimal performance, calibrate your newly installed battery after completing this guide.
Take your e-waste to an R2 or e-Stewards certified recycler.
To reassemble your device, follow these instructions in reverse order. For optimal performance, calibrate your newly installed battery after completing this guide.
Take your e-waste to an R2 or e-Stewards certified recycler.
crwdns2935221:0crwdne2935221:0
crwdns2935229:03crwdne2935229:0

crwdns2915084:0crwdne2915084:0

Marist, Team 1-6, Chaterdon Spring 2023 crwdns2935289:0Marist, Team 1-6, Chaterdon Spring 2023crwdne2935289:0
MARS-CHATERDON-S23S1G6
crwdns2931471:02crwdne2931471:0
crwdns2935297:02crwdne2935297:0