crwdns2915892:0crwdne2915892:0
This guide shows the necessary steps for removing the mother board from a DOSS SoundBox.
This motherboard controls the connection between Bluetooth and Auxiliary devices so signals transmitted by Bluetooth or Auxiliary can be processed and played over the loudspeakers. If the motherboard fails in the DOSS SoundBox, diagnostic symptoms can include static, intermittent connection issues or failure to play music.
Minimal knowledge is required for soldering as uninstalling the motherboard requires two contacts to be unsoldered.
There is also some adhesive holding the motherboard in place, so caution is recommended during removal to prevent breaks or cracks.
crwdns2942213:0crwdne2942213:0
-
-
Use a small plastic opening tool to gently lift the side of the grille.
-
Gently slide the tool to the front of the speaker.
-
Repeat the process on the bottom of the grille.
-
Gently pull the grille off of the speaker enclosure.
-
-
-
Use the JIS #00 screwdriver to remove the 3/32" screws that secure the speaker to the body.
-
Remove the smaller 3/32" screws that secure the left side of the speaker with a JIS #1 screwdriver.
-
-
-
Use the Plastic Opening Tool to gently lift the speaker enough to see the connected wires.
-
-
-
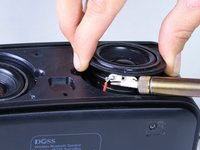
Use a soldering iron to de-solder the two speaker wires from the speaker itself.
-
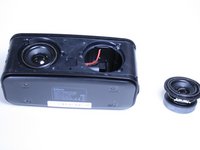
The speakers are ready to be removed and replaced.
Try to not melt your speaker with the shaft of the soldering iron like the person in the picture is doing…ouch!
-
-
-
-
Use a JIS #00 screwdriver to remove the four 3/32" screws that attach the base-plate to the speaker enclosure.
Wait, wait, wait!… Were the previous 4 steps even necessary or are you suggesting we take the same trial and error exploratory approach to this that the author seems to have instead of just going for what has already been determined (through said trial and error exploration) as the proper ingress point for a motherboard replacement…the bottom plate?
-
-
-
Use a JIS #1 screwdriver to remove the six 3/32" screws marked with a red circle.
-
Remove the two 1/16" screws marked with orange circles using a JIS #000 screwdriver.
-
-
-
Remove the six 3/32" screws marked with red circles using a JIS #00 screwdriver.
-
Remove the larger 3/32" screw indicated by an orange circle using a JIS #1 screwdriver.
-
Once the screws are removed, gently lift the top (where the touch controls are) off of the speaker.
-
-
-
De-solder the connections from the battery to the circuit board.
Thank you. It's 2023 and I needed to get my speaker up and running again.
-
-
crwdns2935267:0crwdne2935267:0Tweezers$4.99
-
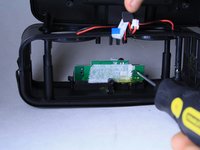
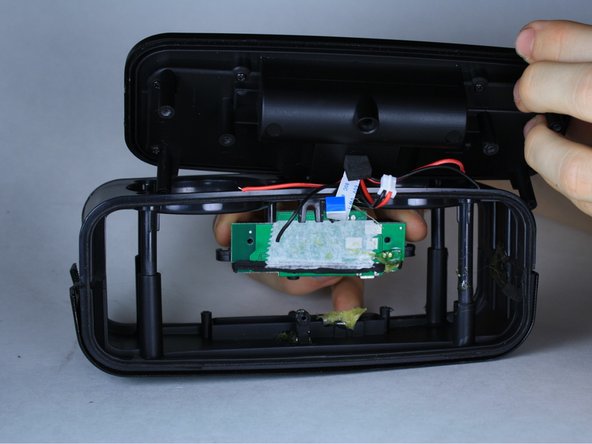
Remove the two 3/32" screws that attach the motherboard to the battery compartment using a JIS #00 screwdriver.
-
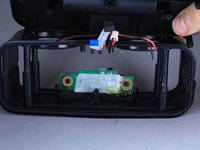
Use your fingers or a pair of tweezers to remove the clip holding the ribbon connector in place. The connector is indicated with an orange marker.
-
Find the speaker connector, indicated by a yellow circle, and using your fingers disconnect it.
Wait, wait, wait! …again! Why aren’t we disconnecting the battery? That’s supposed to be THE FIRST THING you do when you’re doing any internal repairs on electronics, once you have access to it. Since this is a motherboard repair guide…DISCONNECT THE BATTERY!! Do not start disconnecting other connectors while the board is still receiving power from the battery! Sparks! Shocks! Damaged components…etc! Disconnect the battery first, always!
Making sure nobody else misunderstands “…don’t remove the battery,” as “Don’t disconnect the battery.” Yes, Disconnect…No, remove. My bad. It’s just that, “remove the battery” was never actually said in this guide, so doing everything up until removing the battery came across as “everything up to …” what actually was said, which was disconnecting the battery.
Ifixit!!! Why can’t you give us more time to edit our comments? Disqus gives 7 days, but iFixit gives a whopping 5 minutes. 5 minutes?! Seriously, I fart longer than that.
Not only does iFixit not offer a way to edit comments after 5 minutes, but even if you do catch a typo and begin editing within 5 min., if you don’t complete the edit within the same time frame, 5 min., then it’ll be rejected and the edit can’t take place. That is stupid on top of stupid. A stupid sandwich.
So, I guess since we’re disconnecting the speakers at the board, the first 4 steps really were unnecessary after all. Huh. I hope nobody needing motherboard work accidentally messed up their speaker with their hot soldering iron unnecessarily, but I’m sure someone did somewhere.
-
-
-
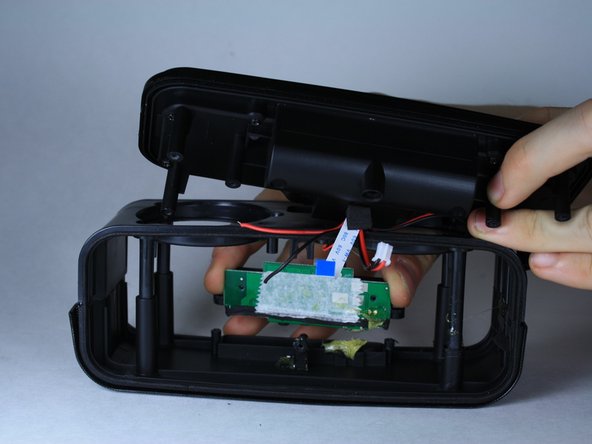
Locate and remove the two 3/32" screws, indicated by red markers, that fix the motherboard to the speaker enclosure.
-
-
-
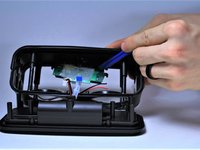
Using the plastic opening tool, gently begin to pry the circuit card away from the speaker enclosure.
-
Using your fingers, you can now remove the motherboard.
I’m sorry, I was under the impression that this was a motherboard replacement guide, but I guess it’s a mislabeled full tear down guide…?
-


To reassemble your device, follow these instructions in reverse order.
To reassemble your device, follow these instructions in reverse order.
crwdns2935221:0crwdne2935221:0
crwdns2935227:0crwdne2935227:0
crwdns2915084:0crwdne2915084:0

Linn Benton Community College, Team S1-G3, Johnson Fall 2018 crwdns2935289:0Linn Benton Community College, Team S1-G3, Johnson Fall 2018crwdne2935289:0
LBCC-JOHNSON-F18S1G3
crwdns2931471:04crwdne2931471:0
crwdns2935297:07crwdne2935297:0
crwdns2947412:06crwdne2947412:0
Cassandra, the million dollar question is dWhere can i buy the motherboard for the SiundBox Doos.
please let me know at rubenalexander2611@hotmail.com, ahora todo lo mandan de la china please, a ver si me das una pagina web.
As Cassandra said before,,,,WHere we can find the parts??? is it any possibilities ?
bunker1312@gmail.com
Where to buy your motherboard for doss torch Bluetooth speaker
Ffs, Where do you get the board? Pretty useless writeup if there's no known location to aquire parts.
I have taken the motherboard out. Where can I purchase another one as I don't see any link for that?
Gostaria de saber como posso comprar os auto falante para minha DOSS, Moro em cotia São Paulo
Where do you get board replacement?
mannkettle - crwdns2934203:0crwdne2934203:0
Before you actually do as this guide suggests, I suggest even more so to read the whole guide first and make certain that there aren’t any superfluous steps that you can skip rather that doing unnecessary steps that will involve an element of risk of damaging your speaker. There’s always a risk of damaging whatever you are working on trying to fix, so unnecessary steps should be avoided, always. With that idea in mind, if what you’re in need of is a motherboard replacement, then please put down the screwdriver, you’ll need to search the web for a replacement, and it doesn’t seem like iFixit, or the author(s) of this guide are any help in that regard. There’s no link, no site name, store name, nothing. So, before you completely disassemble your speaker, as this guide suggests, and lose parts trying to store them loose while waiting for EBay to ship your replacement, buy the replacement first.
Thousand Sunny - crwdns2934203:0crwdne2934203:0