crwdns2915892:0crwdne2915892:0
This guide is not for any specific repair, rather it is for cracking the device open in order to diagnose and treat your its inefficiencies.
crwdns2942213:0crwdne2942213:0
-
-
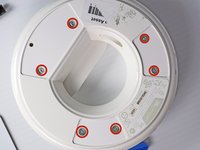
Turn the device upside down so that the three rubber pads are facing up.
-
-
-
Use a heat gun (set to low) to apply heat to one of the rubber pads until you can easily remove the pad. This step takes around 5-7 minutes.
-
-
-
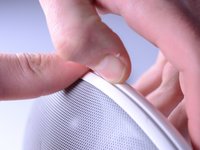
Remove the heated rubber pad with a plastic opening tool.
-
Repeat steps 2 and 3 for the two remaining rubber pads.
-
-
-
-
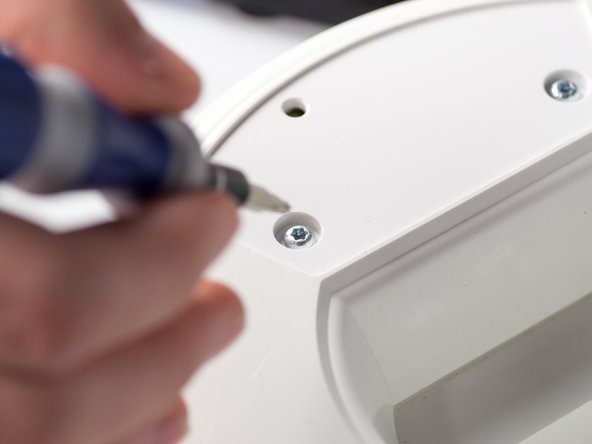
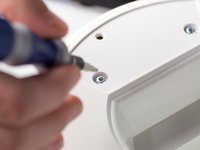
Remove the six 1cm T-10 torx screws on the bottom of the device (found under the rubber pads) using a T-10 Torx screwdriver.
-
-
-
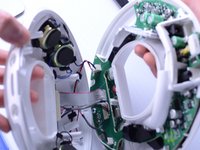
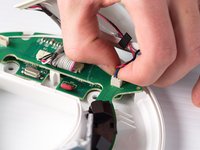
Disconnect the ribbon cable connector from the top half of the device by pulling outward and parallel to the connecting pins.
-
-
-
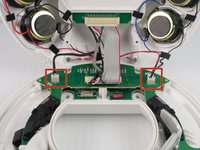
Locate and disconnect the two molex connectors found on either side of the ribbon cable connector on the bottom half of the device.
-


To reassemble your device, follow these instructions in reverse order.
To reassemble your device, follow these instructions in reverse order.
crwdns2915084:0crwdne2915084:0

Cal Poly, Team 9-28, Maness Winter 2014 crwdns2935289:0Cal Poly, Team 9-28, Maness Winter 2014crwdne2935289:0
CPSU-MANESS-W14S9G28
crwdns2931471:04crwdne2931471:0
crwdns2935297:08crwdne2935297:0
crwdns2947410:01crwdne2947410:0
My product is On Stage I. It's too old. The screw fixing posts protruding from the plastic casing have broken on their own. As a result, the upper and lower shells cannot be completely sealed. When music is played, sound waves leak out of the gaps. It sounds thin and has no depth. It's like placing four speaker units directly outside the enclosure. Bass cannot resonate inside the enclosure, but travels through the bass hole in the middle. I really like this speaker. There's no way I'm giving it up. Is there any way to solve this? Should I look for a used case or use an existing case to rebuild the screw mounting posts? What should I do if I choose to rebuild?