crwdns2915892:0crwdne2915892:0
I'd you need a guide to take the front of the mouse off first, view this: (Disassembling Corsair Vengeance M65 Mouse Body).
crwdns2942213:0crwdne2942213:0
-
-
Let's begin!
-
First, flip it over.
-
Find two Torx screws. Use a T6 Torx driver to unscrew these. I used a small flat head screw driver to unscrew these because I did not have a T6 Torx driver.
-
-
-
Push down where I am pointing out here. It should come apart fairly easily.
-
To open it bare handed, hold M65 with USB cord running straight downwards and force top surface of M65 upwards with your palm then pull M65's rear edge upwardly with your "hooked" fingers of the same hand.
Can be quite a tight fit. Carefully increase force with finger tips.
You must also do the same on the two sides of the mouse in the middle/near back to open the top fully. This is applicable at least for the M65 Pro which looks almost the same as this mouse.
-
-
-
BE GENTLE!
-
Wiggle the front of the mouse and gently pull the top half towards the back.
-
YAY! You got them apart!
Ribbon cable may have a black ‘flip up’ tab on the connector.
-
-
-
-
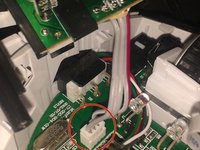
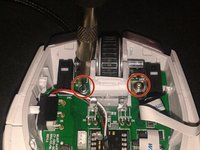
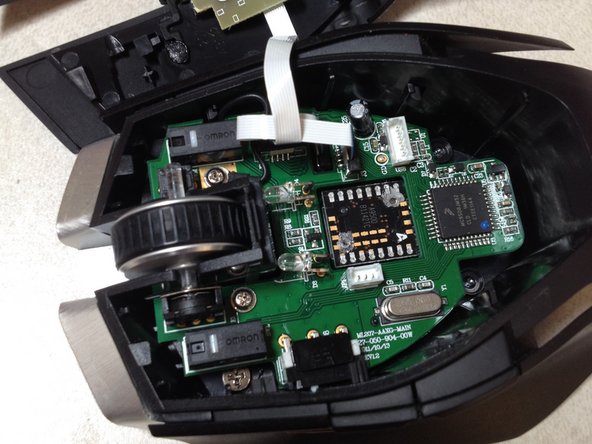
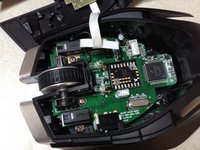
There are two screws that hold the PCB in place. One is longer than the other. The SHORT one goes to where I am pointing. The long screw holds down a grounding wire. Move the wire out of the way as you take out the board.
-
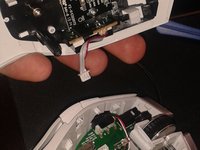
There is a ribbon cable that I am pointing at which you can pull out. There are some multi-colored wires that are plugged into the board. Wiggle it out. Move it to the side when you take the board out.
-
Now lift the PCB out along with the scroll wheel. There should be some more screws which hold the metal to the plastic. Undo those if you want to.
-
The sides come apart. You must take the mainboard out in order to take the sides off. There are two latches for the left side and four on the right side. The left side also has two screws securing it to the rest of the body.
Some M65 mice may have more than two screws and a separate PCB for the side buttons. The small PCB for the side buttons simply pulls out vertically.
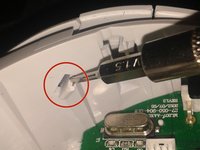
Small block that’s mounted on main PCB with pins (10) just showing through the top, this connects main PCB to the PCB that has the laser on. The main PCB pulls vertically off after the 2 or 3 screws have been removed. A shim or slim plastic pry tool will probably be needed (I used the handle to a plastic tea spoon). Push the pry tool gently under the side where the pin block is and ease the PCB vertically out of the mouse.
-
-
-
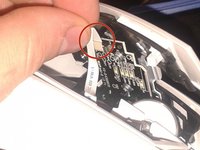
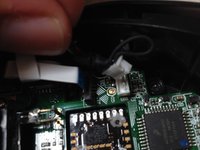
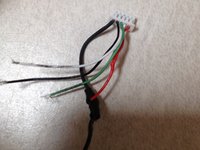
Once you've opened the mouse remove the power connector.
-
Remove the other connector present gently, as they're fragile.
-
-
-
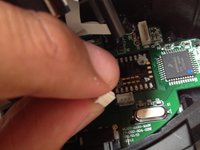
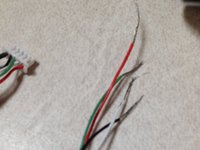
When I first opened this, I found my power connector in this sorry state but I guess it could have been worse.
-
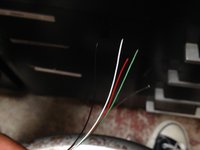
Start stripping the wires so that you can solder them, then run the wires through the hole.
-
-
-
Don't forget to wrap the exposed wires in electrical tape (Will post pictures of repaired mouse later)
-
Hopefully you have done everything you could and now your mouse is working again!
-


To reassemble your device, follow these instructions in reverse order.
To reassemble your device, follow these instructions in reverse order.
crwdns2935221:0crwdne2935221:0
crwdns2935229:04crwdne2935229:0

crwdns2947410:01crwdne2947410:0
Would the PCB boards for the M65 work for the M45 Raptor? My scroll wheel is currently hindering the left and right buttons to work properly. figured I could find a replacement PCB board and swap it out.
T7 torx fits better
acessoigor - crwdns2934203:0crwdne2934203:0
Later models with RGB has Phillips instead of Torqx, and are recessed deeper in the mouse.
Adam Honse - crwdns2934203:0crwdne2934203:0
Thanks all. Trying clean my bargain bin find. Hoping to get the fire button panel off to clean the buttons. Managed to release the two snaps but didn't release it. Gunna let that go and just use alcohol wipes, a spudger tool, and a small paint brush
Bobfixit - crwdns2934203:0crwdne2934203:0