crwdns2933423:0crwdne2933423:0
crwdns2947577:0crwdnd2947577:0crwdne2947577:0

Core Assembly Removal

crwdns2869540:0crwdne2869540:0: 1771

crwdns2959988:0crwdne2959988:0

crwdns2959990:0crwdne2959990:0
1
crwdns2959992:0crwdne2959992:0
16
crwdns2959994:0crwdne2959994:0
71
crwdns2959996:0crwdne2959996:0
1.771
crwdns2955950:0crwdne2955950:0: 6

crwdns2960004:05crwdne2960004:0, crwdns2960006:01crwdne2960006:0

crwdns2960000:0crwdne2960000:0
crwdns2959984:0crwdne2959984:0: 4

crwdns2959974:04crwdne2959974:0

crwdns2959986:0crwdne2959986:0: 0

crwdns2959958:0crwdne2959958:0

crwdns2955944:0crwdne2955944:0: 15 - 30 crwdns2931279:0crwdne2931279:0
crwdns2955970:0crwdne2955970:0: crwdns2937801:0crwdne2937801:0
Core Assembly Removal

crwdns2915892:0crwdne2915892:0

crwdns2959928:0crwdne2959928:0 ↓

Use this guide to remove the core assembly in your TicWatch Pro.

crwdns2959930:0crwdne2959930:0

crwdns2943215:0crwdne2943215:0

    1. Core Assembly Removal, Unfasten the screws: crwdns2935265:01crwdnd2935265:01crwdnd2935265:01crwdne2935265:0
      • Before starting repairs, take your watch off the charger and power it down.

      • Remove the four 3.9 mm-long Torx T3 screws.

      • Depending on the condition of your driver, a Torx T4 bit may fit better.

      • Don't try to detach the back cover yet. It is still connected to the watch assembly.

      crwdns2952109:0crwdne2952109:0

      crwdns2917038:0crwdne2917038:0

    2. Core Assembly Removal, Open the watch: crwdns2935265:02crwdnd2935265:01crwdnd2935265:02crwdne2935265:0 Core Assembly Removal, Open the watch: crwdns2935265:02crwdnd2935265:02crwdnd2935265:02crwdne2935265:0
      • Be careful not to strain the sensor flex cable during this procedure.

      • Carefully lift the back cover by the watch crown edge and swing it open to an upward position.

      crwdns2952109:0crwdne2952109:0

      crwdns2917038:0crwdne2917038:0

    3. Core Assembly Removal, Disconnect the sensor cable: crwdns2935265:03crwdnd2935265:01crwdnd2935265:02crwdne2935265:0 Core Assembly Removal, Disconnect the sensor cable: crwdns2935265:03crwdnd2935265:02crwdnd2935265:02crwdne2935265:0
      • Use the flat end of a spudger to pry up and disconnect the sensor flex cable.

      crwdns2952109:0crwdne2952109:0

      crwdns2917038:0crwdne2917038:0

    4. Core Assembly Removal, Remove the back cover: crwdns2935265:04crwdnd2935265:01crwdnd2935265:01crwdne2935265:0
      • Remove the back cover.

      crwdns2952109:0crwdne2952109:0

      crwdns2917038:0crwdne2917038:0

    1. Core Assembly Removal, Core Assembly Removal: crwdns2935265:05crwdnd2935265:01crwdnd2935265:01crwdne2935265:0
      • Remove the three 3.7 mm-long Phillips #00 screws.

      crwdns2952109:0crwdne2952109:0

      crwdns2917038:0crwdne2917038:0

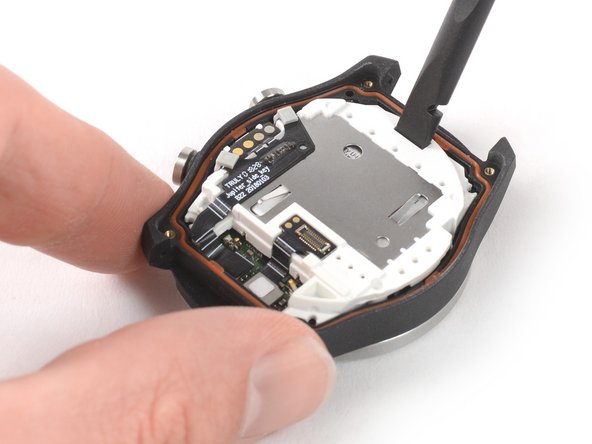
    2. Core Assembly Removal: crwdns2935265:06crwdnd2935265:01crwdnd2935265:03crwdne2935265:0 Core Assembly Removal: crwdns2935265:06crwdnd2935265:02crwdnd2935265:03crwdne2935265:0 Core Assembly Removal: crwdns2935265:06crwdnd2935265:03crwdnd2935265:03crwdne2935265:0
      • Insert the flat end of a spudger into the notch at the upper end of the white plastic frame.

      • Use your spudger as a lever and pry up the core assembly.

      • Don't try to remove the core assembly all the way yet—it is still connected to the watch body.

      crwdns2952109:0crwdne2952109:0

      crwdns2917038:0crwdne2917038:0

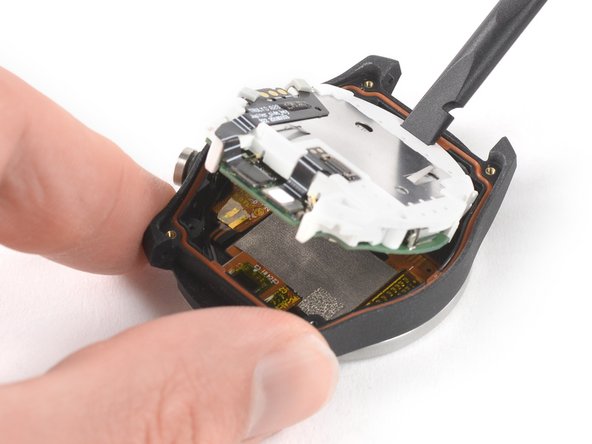
    3. Core Assembly Removal: crwdns2935265:07crwdnd2935265:01crwdnd2935265:02crwdne2935265:0 Core Assembly Removal: crwdns2935265:07crwdnd2935265:02crwdnd2935265:02crwdne2935265:0
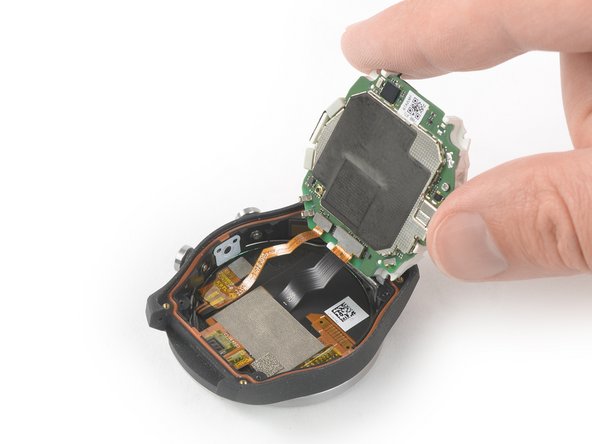
      • Carefully lift the loose edge of the core assembly up and swing it to a 100-degree angle.

      • Be careful not to strain the display and sensor flex cables during this procedure.

      crwdns2952109:0crwdne2952109:0

      crwdns2917038:0crwdne2917038:0

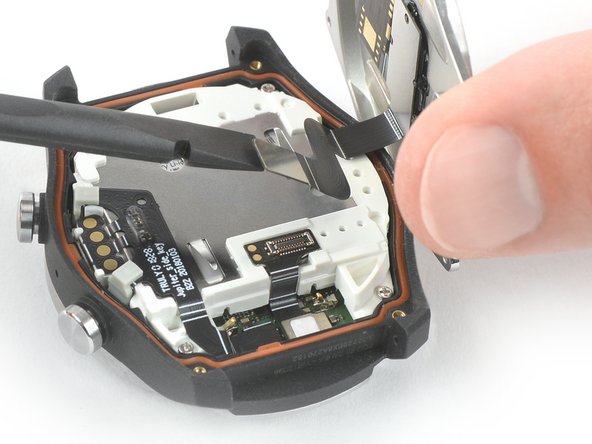
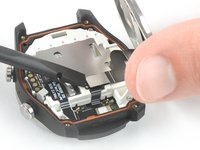
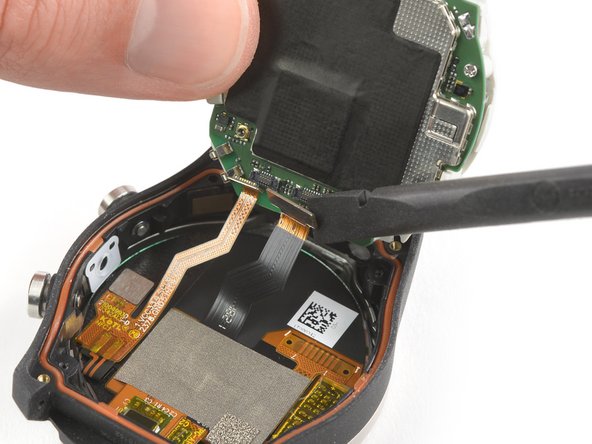
    4. Core Assembly Removal: crwdns2935265:08crwdnd2935265:01crwdnd2935265:02crwdne2935265:0 Core Assembly Removal: crwdns2935265:08crwdnd2935265:02crwdnd2935265:02crwdne2935265:0
      • Use the flat end of a spudger to pry up and disconnect the sensor flex cable from the core assembly.

      crwdns2952109:0crwdne2952109:0

      crwdns2917038:0crwdne2917038:0

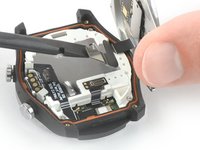
    5. Core Assembly Removal: crwdns2935265:09crwdnd2935265:01crwdnd2935265:02crwdne2935265:0 Core Assembly Removal: crwdns2935265:09crwdnd2935265:02crwdnd2935265:02crwdne2935265:0
      • Use the flat end of a spudger to pry up and disconnect the display flex cable from the core assembly.

      crwdns2952109:0crwdne2952109:0

      crwdns2917038:0crwdne2917038:0

    6. Core Assembly Removal: crwdns2935265:010crwdnd2935265:01crwdnd2935265:01crwdne2935265:0
      • Remove the core assembly.

      crwdns2952109:0crwdne2952109:0

      crwdns2917038:0crwdne2917038:0

crwdns2915888:0crwdne2915888:0

To reassemble your device, follow these instructions in reverse order.

Repair didn’t go as planned? Check out our Answers community for help.

crwdns2935221:0crwdne2935221:0

crwdns2935229:04crwdne2935229:0

Dominik Schnabelrauch

crwdns2935283:011/23/16crwdne2935283:0

266.179 crwdns2915208:0crwdne2915208:0

crwdns2935297:0682crwdne2935297:0

crwdns2935287:0crwdne2935287:0

iFixit crwdns2935289:0iFixitcrwdne2935289:0

Staff

crwdns2931471:0121crwdne2931471:0

crwdns2935297:072.885crwdne2935297:0

crwdns2947410:01crwdne2947410:0

Hello... in the event that you have submerged the smartwatch in salt water and it does not work, is there a solution?

luciano.alonso84@gmail.com - crwdns2934203:0crwdne2934203:0 crwdns2950251:0crwdne2950251:0

crwdns2917038:0crwdne2917038:0

crwdns2936625:0crwdne2936625:0:

crwdns2936751:024crwdne2936751:0 1

crwdns2936753:07crwdne2936753:0 16

crwdns2936753:030crwdne2936753:0 71

crwdns2959996:0crwdne2959996:0 1,771