crwdns2915892:0crwdne2915892:0
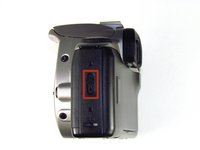
The bottom panel can be easily removed, and allows access for replacement on other parts of the camera.
crwdns2942213:0crwdne2942213:0
-
-
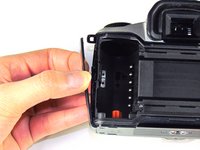
Remove the batteries from the camera by sliding them out into your palm.
-
-
-
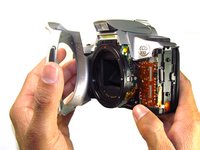
Release the side latch to open the back panel.
-
-
-
Remove the two black 4.5mm screws above and below the latch.
-
-
-
-
Using your finger, carefully pry open the side panel from the top of camera.
-
Pull panel downwards to remove.
-
-
-
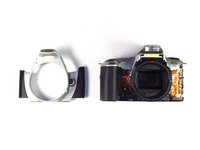
Remove the two silver 6mm Phillips #1 screws.
-
-
-
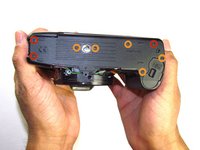
Flip camera over to the bottom.
-
Remove the one 5mm Phillips #1 silver screw.
-
-
-
Remove the front panel by pulling away from the side with the lever.
There is another loose part here that can come off on the side of the latch. It's also off in the picture. When reassembling, make sure to reconnect it to the spring as well, otherwise the back panel opening mechanism will not work correctly.
-
-
-
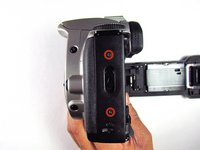
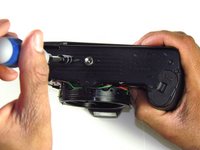
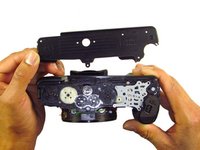
Remove three black 7.3mm Phillips #1 screws located on the corners of the camera.
-
Remove five black 4.8mm Phillips #1 screws.
When reassembling, make sure that the hole on the bottom panel for the rightmost 4.8mm Phillips #1 screw (orange) goes underneath the hole still attached to the camera.
-
-
-
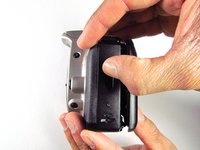
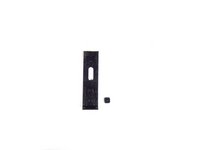
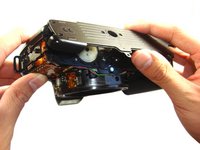
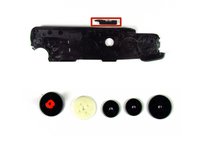
Simply remove the bottom panel by prying it off with your finger.
-
Be wary of a loose piece of foam attached to the bottom panel.
-


To reassemble your device, follow these instructions in reverse order.
To reassemble your device, follow these instructions in reverse order.
crwdns2935221:0crwdne2935221:0
crwdns2935227:0crwdne2935227:0
crwdns2915084:0crwdne2915084:0

Cal Poly, Team 6-20, Maness Winter 2014 crwdns2935289:0Cal Poly, Team 6-20, Maness Winter 2014crwdne2935289:0
CPSU-MANESS-W14S6G20
crwdns2931471:04crwdne2931471:0
crwdns2935297:032crwdne2935297:0
crwdns2947410:01crwdne2947410:0
muy buena la explicacion de como desmontar la maquina. Te has gadano los 30 puntos