crwdns2933423:0crwdne2933423:0

Blink Video Doorbell Back Panel Replacement

crwdns2942213:0crwdne2942213:0

  1. Blink Video Doorbell Back Panel Replacement, Battery: crwdns2935265:01crwdnd2935265:01crwdnd2935265:03crwdne2935265:0 Blink Video Doorbell Back Panel Replacement, Battery: crwdns2935265:01crwdnd2935265:02crwdnd2935265:03crwdne2935265:0 Blink Video Doorbell Back Panel Replacement, Battery: crwdns2935265:01crwdnd2935265:03crwdnd2935265:03crwdne2935265:0
    • Push the opening key into the small opening with the two gray buttons on the bottom of the device.

    • The device will click off the mount.

    • Push the device up from the mount and slide it off.

  2. Blink Video Doorbell Back Panel Replacement: crwdns2935265:02crwdnd2935265:01crwdnd2935265:03crwdne2935265:0 Blink Video Doorbell Back Panel Replacement: crwdns2935265:02crwdnd2935265:02crwdnd2935265:03crwdne2935265:0 Blink Video Doorbell Back Panel Replacement: crwdns2935265:02crwdnd2935265:03crwdnd2935265:03crwdne2935265:0
    • Use your finger to slide the gray tab, located near the bottom of the device, upwards.

    • Remove the battery cover.

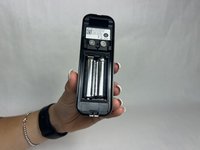
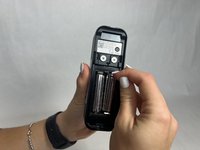
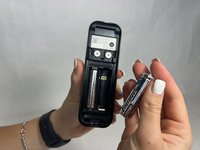
  3. Blink Video Doorbell Back Panel Replacement: crwdns2935265:03crwdnd2935265:01crwdnd2935265:03crwdne2935265:0 Blink Video Doorbell Back Panel Replacement: crwdns2935265:03crwdnd2935265:02crwdnd2935265:03crwdne2935265:0 Blink Video Doorbell Back Panel Replacement: crwdns2935265:03crwdnd2935265:03crwdnd2935265:03crwdne2935265:0
    • Remove the right battery by pushing the positive end down and pulling the battery out toward yourself.

    • Repeat the procedure for the left battery.

    • Do not mix used and new batteries or batteries of different types (for example, lithium and alkaline batteries).

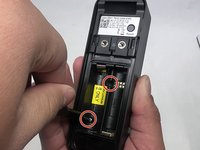
  4. Blink Video Doorbell Back Panel Replacement, Back Panel: crwdns2935265:04crwdnd2935265:01crwdnd2935265:03crwdne2935265:0 Blink Video Doorbell Back Panel Replacement, Back Panel: crwdns2935265:04crwdnd2935265:02crwdnd2935265:03crwdne2935265:0 Blink Video Doorbell Back Panel Replacement, Back Panel: crwdns2935265:04crwdnd2935265:03crwdnd2935265:03crwdne2935265:0
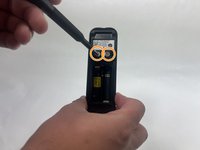
    • Remove the two 6 mm screws in the battery compartment using a JIS #1 screwdriver.

    • Remove the two 7 mm screws above the battery compartment using a JIS #1 screwdriver.

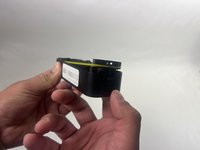
    • Starting from the bottom of the device, pry the back plate away from the rest of the doorbell.

crwdns2915888:0crwdne2915888:0

To reassemble your device, follow these instructions in reverse order.

Kristen Gismondi

crwdns2935283:011/12/14crwdne2935283:0

93.005 crwdns2915208:0crwdne2915208:0

crwdns2935297:0241crwdne2935297:0

crwdns2915084:0crwdne2915084:0

iFixit crwdns2935289:0iFixitcrwdne2935289:0

Staff

crwdns2931471:0121crwdne2931471:0

crwdns2935297:019.812crwdne2935297:0

crwdns2947412:00crwdne2947412:0

crwdns2917038:0crwdne2917038:0

crwdns2936625:0crwdne2936625:0:

crwdns2936751:024crwdne2936751:0 0

crwdns2936753:07crwdne2936753:0 7

crwdns2936753:030crwdne2936753:0 41

crwdns2942667:0crwdne2942667:0 79