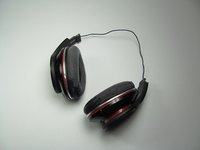
crwdns2915892:0crwdne2915892:0
Use this guide to replace the motherboard on the first generation Beats Studio.
crwdns2942213:0crwdne2942213:0
-
-
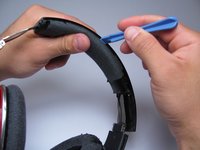
Using the T5 Torx screwdriver, remove the black screws on both sides of the outside of the headband.
-
4 (2 per side) Torx type T5, 3.5mm long screws.
-
-
-
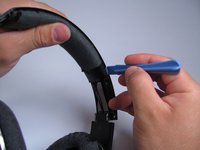
Use the plastic opening tool to gently pry the black plastic hinge piece directly away from the headband as shown.
not necessary !!
where can i find this piece?
-
-
-
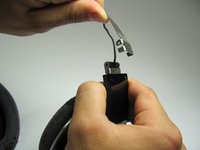
Remove the small metal hinges from their housings. There are a total of 4 hinges, two per side of the headphones.
i need to buy one hinge pin for my beats by dre 1.0 studio
This is DEFINITELY NOT necessary !
-
-
-
Using a T5 Torx screwdriver, remove the silver screws from the silver segment of the headband.
-
4 (2 per side) Torx type T5, 4.0mm long screws.
-
-
-
Using the plastic opening tool, gently pry the headband cushion directly away from the plastic portion of the headband as shown. Pry the plastic portion a small amount and then move the opening tool sideways along on the headband. Repeat on both sides until the cushion separates from the top plastic part of the headband.
-
-
-
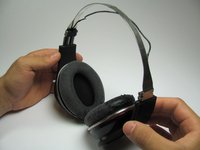
Carefully remove the metal band from each of the hinge housings on each side. These should come off quite easily, provided that you have removed the hinges as instructed in step 3.
-
Congratulations, you have completely removed the headband! This will allow for ease of accessibility to the speakers should you choose to delve further into the depths of your headphones.
-
-
-
-
Pinch the ear cushion between your thumb and forefinger.
-
Carefully pull the cushion directly away from the earpiece.
-
Repeat for the other ear cushion.
i have torn my cuson inside part that helps to hold the out soft part. and i lost it how to do it
-
-
-
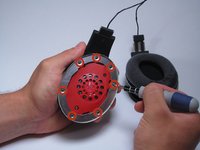
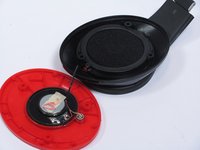
Use the plastic opening tool to remove the black ring from the speaker. This will allow you to access the screws on the metal ring.
-
Congratulations, you now have access to the rest of the speaker!
-
The black lip is located on the back side of the ear cushion.
Hi does this work for the beats studio wireless?
I bought the parts two (2) ear cushions and a head band replacement on eBay for about $10 USD
the process described here works well if the ear pad is old and you do not mind destroying the old one to gain access - however you will destroy the ear cushion pad assembly to separate it from the headphones - so be prepared to buy replacement cushion assemblies - when you disassemble you cannot re-install the original cushions
the disassembly process tears the plastic cover that goes around the ear cushion plastic ring
-
-
-
Make sure you are working on the speaker that has the label "R" for the right ear. This speaker is the one you must disassemble in order to access the motherboard.
-
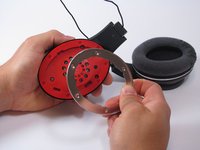
Use a 00 Phillips head screwdriver to remove the screws holding down the metal ring.
-
7 Phillips type 00, 3.9mm long screws.
-
Set aside the metal ring.
-
-
-
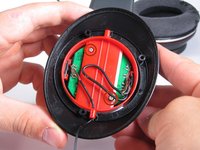
Using the 0 Phillips head screwdriver, remove the 3 screws holding down the red speaker assembly.
-
3 Phillips type 0, 8.0mm long screws.
-
-
-
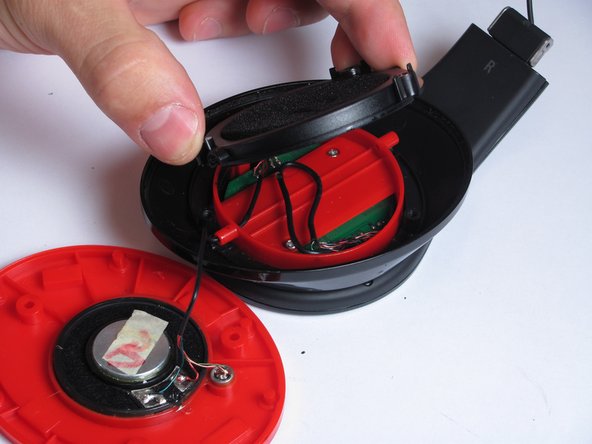
The screws removed in the previous step held the cover in place so, go ahead and just lift it out!
-
Easy as 1-2-3!
-
-
-
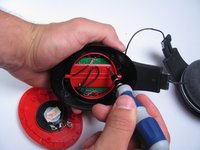
Use the 0 Philips screwdriver to remove the two 6.0 mm screws screws that hold the motherboard and cover.
-
2 Philips type 0, 6.0mm long screws.
-
-
-
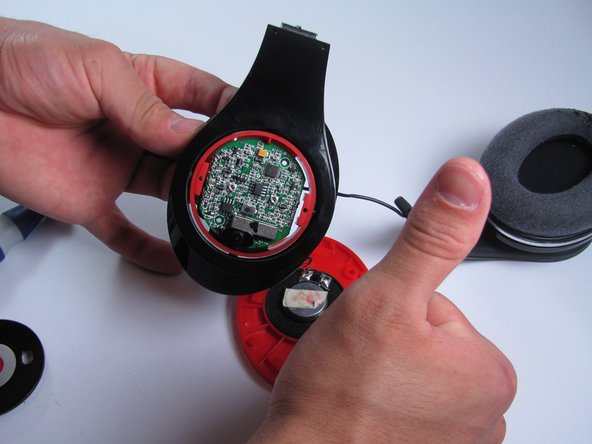
Once the screws have been removed from the other side, turn the speaker housing around.
-
Simply lift the cover with the beats logo off.
-
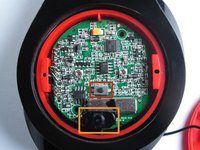
Congratulations! You have uncovered the motherboard!!
-
-
crwdns2935267:0crwdne2935267:0Tweezers$4.99
-
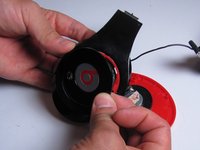
Locate the black power button switch, then gently remove it with a pair of tweezers.
-
The mute button
-
Power switch.
-
-
-
Congratulations, you now have access to the motherboard!
-
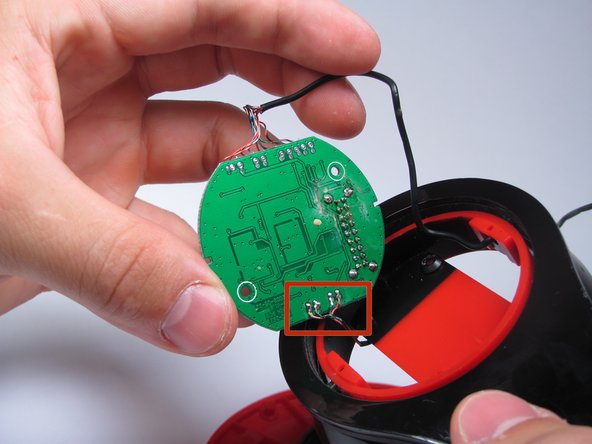
The wires can now be de-soldered and the old motherboard can be replaced with a new one.
-
Before you begin soldering, make sure to mark or label all of the wires so that you remember exactly where they go.
-


To reassemble your device, follow these instructions in reverse order.
To reassemble your device, follow these instructions in reverse order.
crwdns2935221:0crwdne2935221:0
crwdns2935229:012crwdne2935229:0
crwdns2915084:0crwdne2915084:0

Cal Poly, Team 9-18, Regan Spring 2014 crwdns2935289:0Cal Poly, Team 9-18, Regan Spring 2014crwdne2935289:0
CPSU-REGAN-S14S9G18
crwdns2931471:04crwdne2931471:0
crwdns2935297:011crwdne2935297:0
crwdns2947412:08crwdne2947412:0
Did you know what is the model or tipe of cable? I need to replace it
I would love to know as well what kind of cable I need to buy.
I mean the one that is multi colored there, very thin.
Where is the Bluetooth Adapter? Is it welded to the mother board? Or is it stand alone with like a flex cable connection? Basically, can the Bluetooth Adapter alone be replaced? Thanks.
There isn’t any Bluetooth. These are WIRED headphones, the model is named “Beats Studio” and these are the FIRST generation.
Do you do beats mixrs electrical wires replacements for the headphones ?
PS MY NAME IS JOEY WILSON and i and 17 teen years old and i was just couries if you can fix the replacement wires for my beats mixrs and they are white and the problems with them are one side works and the other side doesn't work and ut starts to get hot and gets overheat way to easy and they make weird noise so can you please helpme or even tell me what to do to fix my headphones so please send me a response ok thank have a great day .
I believe a revision needs to be made to this guide.
I have a Beats Studio headphone with a “v1.8” revision motherboard, and there is an additional wire in play. Look at the picture of the motherboard in step 14 of this guide. In the upper-right “corner” is one of the screw holes that holds the motherboard to the housing, and directly above it is a large round solder pad. On the v1.6 motherboard this pad is empty, but on the v1.8 motherboard there’s a single-conductor wire that goes from that pad to the very tip of the metal “spring band” that goes over your head while wearing the headphones. Yes, it’s soldered directly to that “spring band”. I suspect this is some kind of grounding wire.
Where can i buy the motherboard mine is damaged and i need to replace it
Don't remove the ear pads in this manner, you'll most likely ruin them if you do it this way. The black plastic ring is designed to stay inside of the ear cup for disassembly and reassembly. Push against the clips towards the middle of the ear cup from the outside to release them 1 by 1. Just a word of advice, I now have to buy new pads because of this crappy guide.
not necessary !!
John Coops - crwdns2934203:0crwdne2934203:0