crwdns2933423:0crwdne2933423:0

Battery Disconnect

crwdns2862623:0crwdne2862623:0
crwdns2942641:0crwdne2942641:0

crwdns2942213:0crwdne2942213:0

  1. Battery Disconnect, Prepare your laptop for disassembly: crwdns2935265:01crwdnd2935265:01crwdnd2935265:02crwdne2935265:0 Battery Disconnect, Prepare your laptop for disassembly: crwdns2935265:01crwdnd2935265:02crwdnd2935265:02crwdne2935265:0
    • Allow your laptop's battery to drain below 25% before starting this repair—a charged battery may catch fire if damaged.

    • Unplug all cables and fully shut down your laptop.

  2. Battery Disconnect, Flip your laptop over: crwdns2935265:02crwdnd2935265:01crwdnd2935265:01crwdne2935265:0
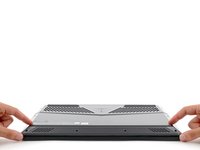
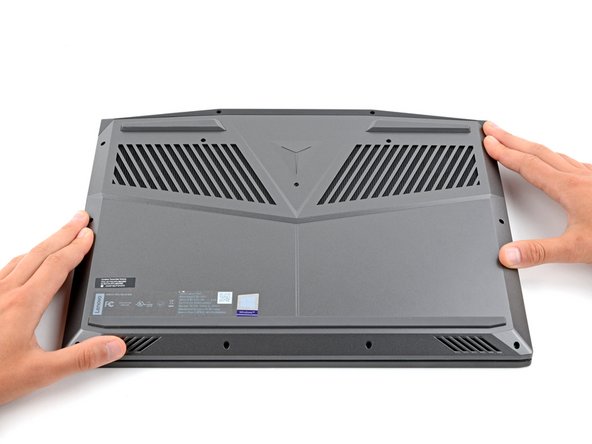
    • Flip your laptop over so the rubber feet are facing up.

  3. Battery Disconnect, Unfasten the back cover: crwdns2935265:03crwdnd2935265:01crwdnd2935265:02crwdne2935265:0 Battery Disconnect, Unfasten the back cover: crwdns2935265:03crwdnd2935265:02crwdnd2935265:02crwdne2935265:0
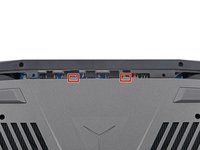
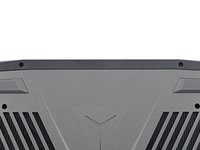
    • Use a Phillips screwdriver to remove the 11 screws securing the back cover:

    • Five 11.5 mm‑long screws

    • Six 4.7 mm-long screws

  4. Battery Disconnect, Insert an opening pick: crwdns2935265:04crwdnd2935265:01crwdnd2935265:02crwdne2935265:0 Battery Disconnect, Insert an opening pick: crwdns2935265:04crwdnd2935265:02crwdnd2935265:02crwdne2935265:0
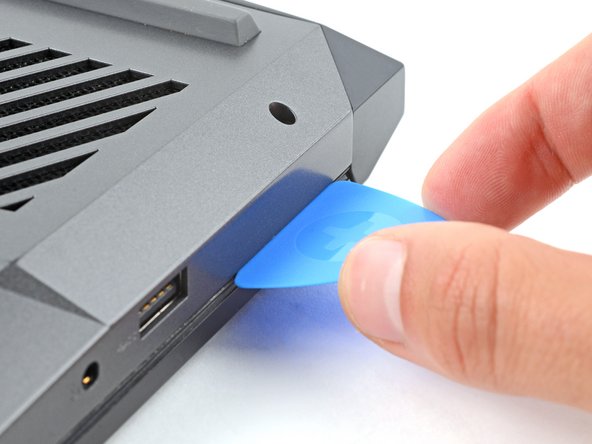
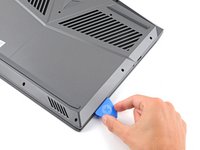
    • Insert the flat side of an opening pick between the top right corner of the back cover and frame.

  5. Battery Disconnect, Release the back cover's clips: crwdns2935265:05crwdnd2935265:01crwdnd2935265:03crwdne2935265:0 Battery Disconnect, Release the back cover's clips: crwdns2935265:05crwdnd2935265:02crwdnd2935265:03crwdne2935265:0 Battery Disconnect, Release the back cover's clips: crwdns2935265:05crwdnd2935265:03crwdnd2935265:03crwdne2935265:0
    • Plastic clips secure the back cover to the frame. You'll hear and feel them release as you work.

    • Keep the pick angled upwards while sliding to help release the clips.

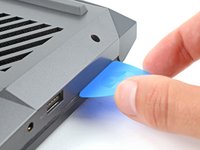
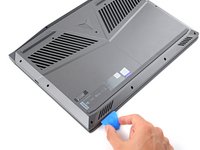
    • Slide the opening pick down the right edge and around the bottom right corner to release the clips.

  6. Battery Disconnect: crwdns2935265:06crwdnd2935265:01crwdnd2935265:03crwdne2935265:0 Battery Disconnect: crwdns2935265:06crwdnd2935265:02crwdnd2935265:03crwdne2935265:0 Battery Disconnect: crwdns2935265:06crwdnd2935265:03crwdnd2935265:03crwdne2935265:0
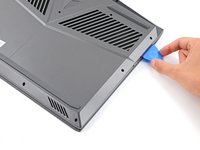
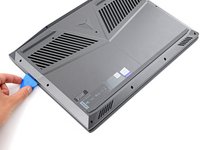
    • Slide the opening pick along the front edge and up to the top left corner to release the remaining clips securing the back cover.

  7. Battery Disconnect, Remove the back cover: crwdns2935265:07crwdnd2935265:01crwdnd2935265:03crwdne2935265:0 Battery Disconnect, Remove the back cover: crwdns2935265:07crwdnd2935265:02crwdnd2935265:03crwdne2935265:0 Battery Disconnect, Remove the back cover: crwdns2935265:07crwdnd2935265:03crwdnd2935265:03crwdne2935265:0
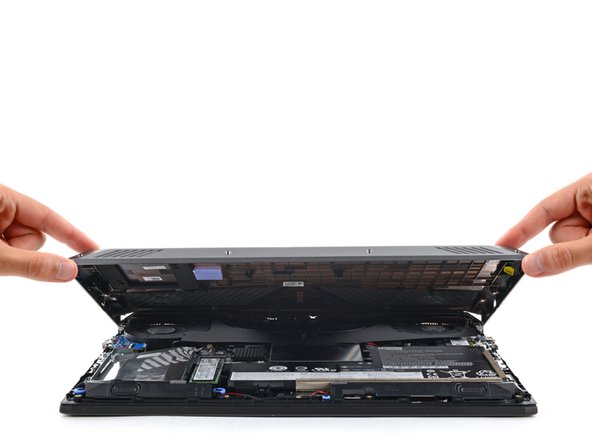
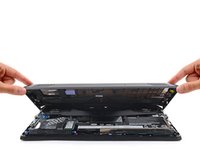
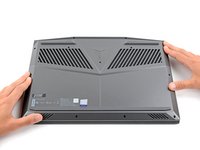
    • Remove the back cover.

  8. Battery Disconnect, Reassembly information: crwdns2935265:08crwdnd2935265:01crwdnd2935265:03crwdne2935265:0 Battery Disconnect, Reassembly information: crwdns2935265:08crwdnd2935265:02crwdnd2935265:03crwdne2935265:0 Battery Disconnect, Reassembly information: crwdns2935265:08crwdnd2935265:03crwdnd2935265:03crwdne2935265:0
    • During reassembly:

    • Slide the two tabs near the center of the back cover's top edge under the hinge cover.

    • Press down firmly around the perimeter of the back cover to engage all the clips.

  9. Battery Disconnect, Heat the black cover: crwdns2935265:09crwdnd2935265:01crwdnd2935265:02crwdne2935265:0 Battery Disconnect, Heat the black cover: crwdns2935265:09crwdnd2935265:02crwdnd2935265:02crwdne2935265:0
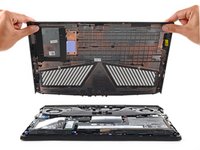
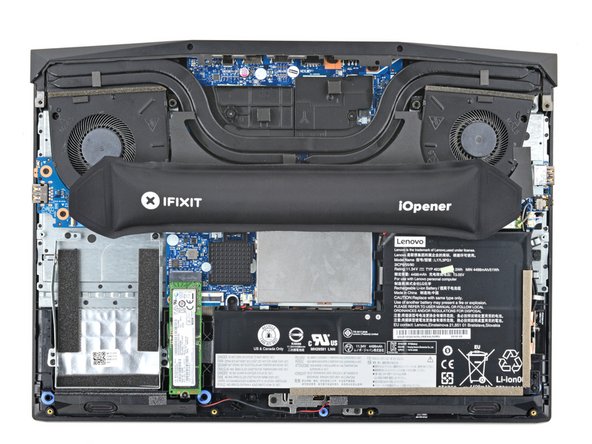
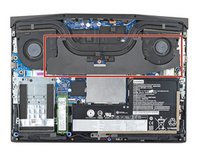
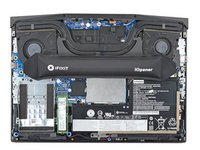
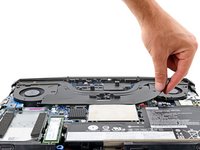
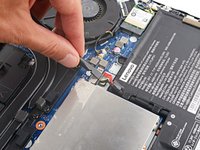
    • A stiff, black cover runs across the heatsink and fans.

    • Removing the cover makes repairs much easier, but isn't required. If you don't want to remove the cover, you can roll it onto itself to keep it out of the way and skip the next two steps.

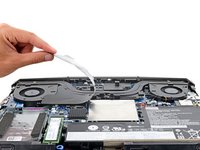
    • Heat an iOpener and apply it to the cover for two minutes.

    • You can also use a hair dryer. Follow this guide for more instructions.

  10. Battery Disconnect, Remove the cover: crwdns2935265:010crwdnd2935265:01crwdnd2935265:03crwdne2935265:0 Battery Disconnect, Remove the cover: crwdns2935265:010crwdnd2935265:02crwdnd2935265:03crwdne2935265:0 Battery Disconnect, Remove the cover: crwdns2935265:010crwdnd2935265:03crwdnd2935265:03crwdne2935265:0
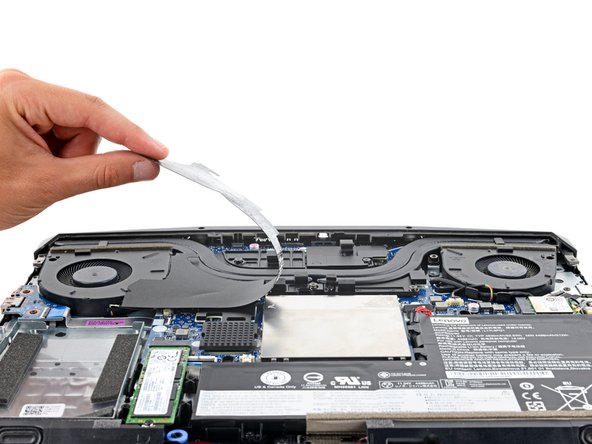
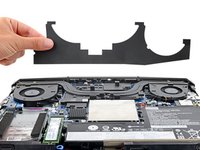
    • Gently peel up and remove the black cover.

    • During reassembly, press the cover back into place using the residual adhesive.

  11. Battery Disconnect, Disconnect the battery: crwdns2935265:011crwdnd2935265:01crwdnd2935265:03crwdne2935265:0 Battery Disconnect, Disconnect the battery: crwdns2935265:011crwdnd2935265:02crwdnd2935265:03crwdne2935265:0 Battery Disconnect, Disconnect the battery: crwdns2935265:011crwdnd2935265:03crwdnd2935265:03crwdne2935265:0
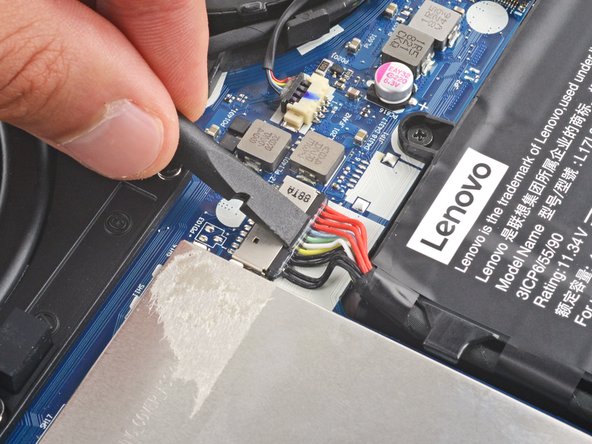
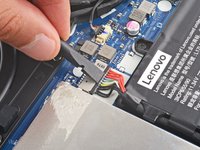
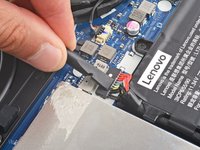
    • Use the flat end of a spudger to push the battery connector straight out of its socket.

    • Push the tab on top of the battery connector, not the wires themselves.

crwdns2915888:0crwdne2915888:0

To reassemble your device, follow these instructions in reverse order.

Spencer Day

crwdns2935283:009/14/22crwdne2935283:0

112.013 crwdns2915208:0crwdne2915208:0

crwdns2935297:0811crwdne2935297:0

crwdns2915084:0crwdne2915084:0

iFixit crwdns2935289:0iFixitcrwdne2935289:0

Staff

crwdns2931471:0120crwdne2931471:0

crwdns2935297:020.021crwdne2935297:0

crwdns2947412:00crwdne2947412:0

crwdns2917038:0crwdne2917038:0

crwdns2936625:0crwdne2936625:0:

crwdns2936751:024crwdne2936751:0 0

crwdns2936753:07crwdne2936753:0 0

crwdns2936753:030crwdne2936753:0 5

crwdns2942667:0crwdne2942667:0 26