crwdns2933423:0crwdne2933423:0

Battery Disconnect

crwdns2862623:0crwdne2862623:0
crwdns2942641:0crwdne2942641:0

crwdns2942213:0crwdne2942213:0

  1. Battery Disconnect, Back Cover: crwdns2935265:01crwdnd2935265:01crwdnd2935265:01crwdne2935265:0
    • Before you begin, switch off your phone.

    • Apply a heated iOpener to the back of the phone to loosen the adhesive beneath the back cover. Apply the iOpener for at least two minutes.

  2. Battery Disconnect: crwdns2935265:02crwdnd2935265:01crwdnd2935265:03crwdne2935265:0 Battery Disconnect: crwdns2935265:02crwdnd2935265:02crwdnd2935265:03crwdne2935265:0 Battery Disconnect: crwdns2935265:02crwdnd2935265:03crwdnd2935265:03crwdne2935265:0
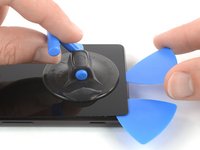
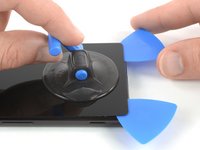
    • Secure a suction handle to the bottom of the back cover, as close to the edge as possible.

    • Lift the back cover with the suction handle to create a small gap between the cover and the frame.

    • Insert an opening pick into the gap.

    • If you have trouble, apply more heat to further soften the adhesive. Follow the iOpener instructions to avoid overheating.

    • Slide the opening pick to the bottom left corner.

  3. Battery Disconnect: crwdns2935265:03crwdnd2935265:01crwdnd2935265:02crwdne2935265:0 Battery Disconnect: crwdns2935265:03crwdnd2935265:02crwdnd2935265:02crwdne2935265:0
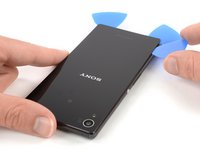
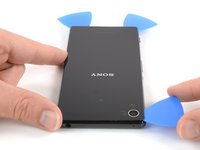
    • Insert a second opening pick and slide it to the bottom right corner to cut the adhesive.

    • Leave the opening picks in place to prevent the adhesive from resealing.

  4. Battery Disconnect: crwdns2935265:04crwdnd2935265:01crwdnd2935265:03crwdne2935265:0 Battery Disconnect: crwdns2935265:04crwdnd2935265:02crwdnd2935265:03crwdne2935265:0 Battery Disconnect: crwdns2935265:04crwdnd2935265:03crwdnd2935265:03crwdne2935265:0
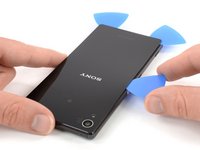
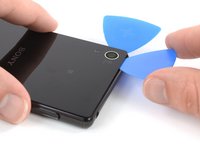
    • Insert a third opening pick at the bottom left corner.

    • In the next few steps whilst cutting around the rear camera make sure you only use the tip of the opening pick to avoid smearing the lens or damaging the camera.

    • Start to slide the tip of the opening pick from the bottom left corner along the side of the phone to cut the adhesive.

    • Leave the opening pick in its place at the top left corner to prevent the adhesive from resealing.

  5. Battery Disconnect: crwdns2935265:05crwdnd2935265:01crwdnd2935265:02crwdne2935265:0 Battery Disconnect: crwdns2935265:05crwdnd2935265:02crwdnd2935265:02crwdne2935265:0
    • If the adhesive becomes hard to cut it most likely cooled down. Use your iOpener to reheat it.

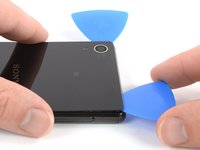
    • Insert a fourth opening pick under the top left corner of the back cover.

    • Slide the opening pick along the top edge of the phone to cut the adhesive.

    • Leave the opening pick in the top right corner to prevent the adhesive from resealing.

  6. Battery Disconnect: crwdns2935265:06crwdnd2935265:01crwdnd2935265:02crwdne2935265:0 Battery Disconnect: crwdns2935265:06crwdnd2935265:02crwdnd2935265:02crwdne2935265:0
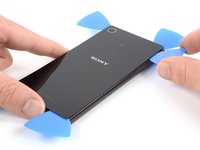
    • Insert a fifth opening pick at the top right corner of the phone.

    • Slide the opening pick along the right side to cut the remaining adhesive.

  7. Battery Disconnect: crwdns2935265:07crwdnd2935265:01crwdnd2935265:02crwdne2935265:0 Battery Disconnect: crwdns2935265:07crwdnd2935265:02crwdnd2935265:02crwdne2935265:0
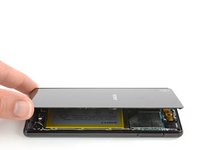
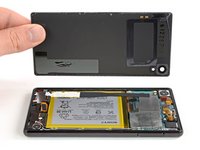
    • Lift and remove the back cover.

    • After installing the back cover, apply strong, steady pressure to your phone for several minutes to help the adhesive form a good bond, such as by placing it under a stack of heavy books.

  8. Battery Disconnect, Battery Disconnect: crwdns2935265:08crwdnd2935265:01crwdnd2935265:03crwdne2935265:0 Battery Disconnect, Battery Disconnect: crwdns2935265:08crwdnd2935265:02crwdnd2935265:03crwdne2935265:0 Battery Disconnect, Battery Disconnect: crwdns2935265:08crwdnd2935265:03crwdnd2935265:03crwdne2935265:0
    crwdns2935267:0crwdne2935267:0
    Tweezers
    $4.99
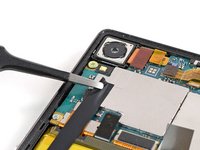
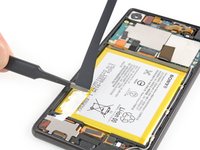
    • Use a pair of tweezers to carefully peel the adhesive strip off the mother board and the battery and remove it.

  9. Battery Disconnect: crwdns2935265:09crwdnd2935265:01crwdnd2935265:02crwdne2935265:0 Battery Disconnect: crwdns2935265:09crwdnd2935265:02crwdnd2935265:02crwdne2935265:0
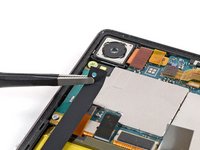
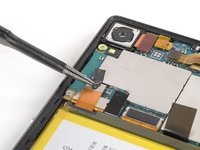
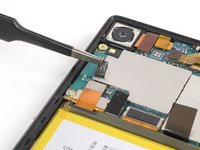
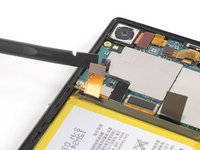
    • Use a pair of tweezers to peel the black adhesive strip off the battery connector and fold it out of the way.

  10. Battery Disconnect: crwdns2935265:010crwdnd2935265:01crwdnd2935265:02crwdne2935265:0 Battery Disconnect: crwdns2935265:010crwdnd2935265:02crwdnd2935265:02crwdne2935265:0
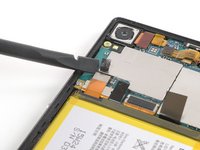
    • Use a spudger to pry up and disconnect the battery connector.

crwdns2915888:0crwdne2915888:0

To reassemble your device, follow these instructions in reverse order.

Dominik Schnabelrauch

crwdns2935283:011/23/16crwdne2935283:0

231.400 crwdns2915208:0crwdne2915208:0

crwdns2935297:0682crwdne2935297:0

crwdns2915084:0crwdne2915084:0

iFixit crwdns2935289:0iFixitcrwdne2935289:0

Staff

crwdns2931471:0121crwdne2931471:0

crwdns2935297:019.715crwdne2935297:0

crwdns2947412:00crwdne2947412:0

crwdns2917038:0crwdne2917038:0

crwdns2936625:0crwdne2936625:0:

crwdns2936751:024crwdne2936751:0 0

crwdns2936753:07crwdne2936753:0 1

crwdns2936753:030crwdne2936753:0 3

crwdns2942667:0crwdne2942667:0 22