crwdns2933423:0crwdne2933423:0

Audio Technica ATH-AD500 Driver Replacement

crwdns2942213:0crwdne2942213:0

  1. Audio Technica ATH-AD500 Driver Replacement, Speaker Assembly: crwdns2935265:01crwdnd2935265:01crwdnd2935265:01crwdne2935265:0
    • Remove the ear pads by peeling them away from the grill.

  2. Audio Technica ATH-AD500 Driver Replacement: crwdns2935265:02crwdnd2935265:01crwdnd2935265:01crwdne2935265:0
    • Remove all four 1cm screws on the inside of the headphone using a #1 Phillips head.

  3. Audio Technica ATH-AD500 Driver Replacement: crwdns2935265:03crwdnd2935265:01crwdnd2935265:01crwdne2935265:0
    • Remove the speaker from the grill by pulling it out.

    • Remove the speaker carefully so you do not rip the wires out.

  4. Audio Technica ATH-AD500 Driver Replacement, Driver: crwdns2935265:04crwdnd2935265:01crwdnd2935265:01crwdne2935265:0
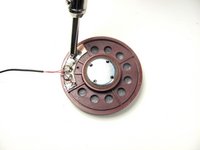
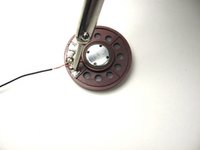
    • With a #0 phillips head, unscrew the three, 1 cm screws which are holding the driver (red wafer) in its bracket.

  5. Audio Technica ATH-AD500 Driver Replacement: crwdns2935265:05crwdnd2935265:01crwdnd2935265:01crwdne2935265:0
    • Pull the driver out of its bracket.

  6. Audio Technica ATH-AD500 Driver Replacement: crwdns2935265:06crwdnd2935265:01crwdnd2935265:02crwdne2935265:0 Audio Technica ATH-AD500 Driver Replacement: crwdns2935265:06crwdnd2935265:02crwdnd2935265:02crwdne2935265:0
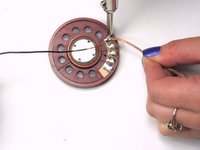
    • Remove the two wires, red and yellow, by de-soldering them from the driver using a soldering iron and desoldering wick. Reference How To Solder and Desolder Connections.

    • The areas where you solder will be hot so wait until the solder joints are cool before handling the wires again.

  7. Audio Technica ATH-AD500 Driver Replacement: crwdns2935265:07crwdnd2935265:01crwdnd2935265:02crwdne2935265:0 Audio Technica ATH-AD500 Driver Replacement: crwdns2935265:07crwdnd2935265:02crwdnd2935265:02crwdne2935265:0
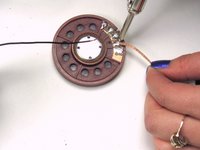
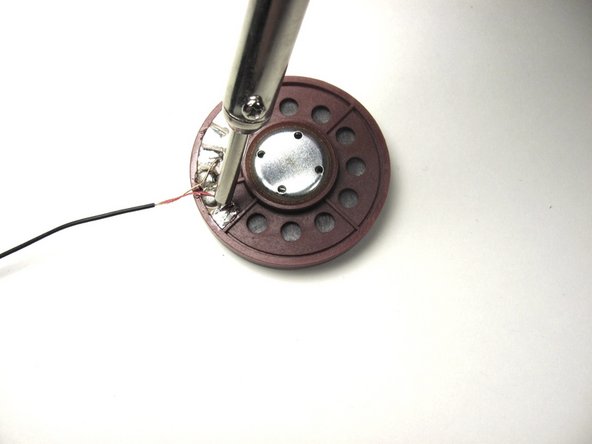
    • Connect the existing wires to the new driver by re-soldering the wires using the soldering iron.

    • Using the copper as a reference, re-solder the yellow wire to the top left solder joint and the red to the bottom left solder joint.

    • The areas where you solder will be hot so wait until the solder joints are cool before handling the wires again.

crwdns2915888:0crwdne2915888:0

To reassemble your device, follow these instructions in reverse order.

crwdns2935229:02crwdne2935229:0

Nick Levy

crwdns2935283:001/13/13crwdne2935283:0

177 crwdns2915208:0crwdne2915208:0

crwdns2935295:0crwdne2935295:0

crwdns2915084:0crwdne2915084:0

Cal Poly, Team 17-19, Forte Winter 2013 crwdns2935289:0Cal Poly, Team 17-19, Forte Winter 2013crwdne2935289:0

CPSU-FORTE-W13S17G19

crwdns2931471:06crwdne2931471:0

crwdns2935297:017crwdne2935297:0

crwdns2944067:02crwdne2944067:0

where can i buy a replacement driver?

acidxgangster - crwdns2934203:0crwdne2934203:0

You can order parts directly from PARTS@ATUS.COM

Nick Levy -

crwdns2917038:0crwdne2917038:0

crwdns2936625:0crwdne2936625:0:

crwdns2936751:024crwdne2936751:0 4

crwdns2936753:07crwdne2936753:0 12

crwdns2936753:030crwdne2936753:0 41

crwdns2942667:0crwdne2942667:0 10,886