crwdns2915892:0crwdne2915892:0
This guide will show you how to replace the hard drive on your Asus Zen AiO Pro Z240IC to increase total memory storage and improve boot times.
crwdns2942213:0crwdne2942213:0
-
-
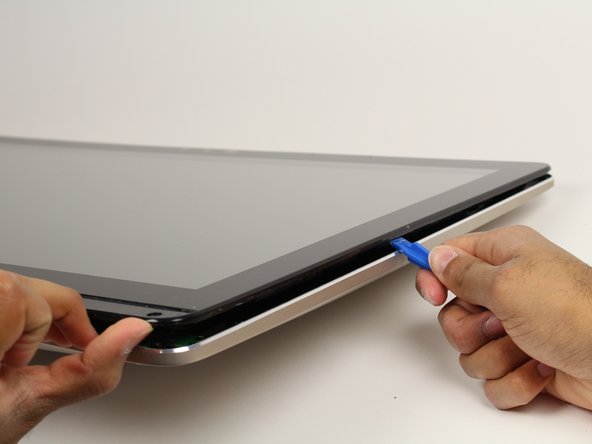
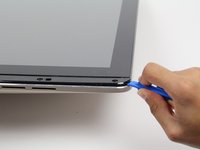
Use the plastic opening tool to pry off the black plastic strip at the bottom of the screen by wiggling the tool between the strip and the screen.
-
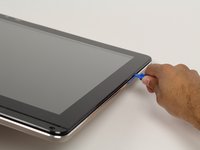
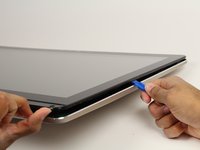
Run the opening tool slowly along the base of the screen, peeling the black strip back, until the opposite end of the screen is reached.
-
-
-
Use a Phillips #1 screwdriver to remove the seven (7) 4.8 mm screws from the base of the screen.
-
-
-
Place the computer on its back, facing up.
-
Wedge the plastic opening tool in between the screen and the bezel of the aluminum computer casing.
-
Move the tool along the entire edge of the screen with an up-and-down prying motion to loosen the screen from the casing. Do not lift the entire screen away from the computer yet.
It’s a lot easier to use two suction cups on the bottom corners, and then slide some cards in between the screen and the case.
-
-
-
-
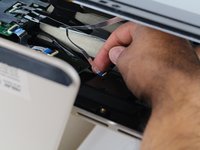
Lift the screen from the bottom edge by about 6 inches. Prop it open with one hand.
-
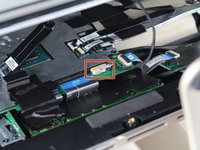
Look inside the computer and locate five (5) cables that connect the embedded components of the screen (camera, microphone, etc.) to the rest of the computer.
I have this model, but I only found 4 cables, 2 were ribbon cables. Just look inside and unplug anything that is connecting the display to the motherboard.
Same here my model just had 4 cables.
-
-
-
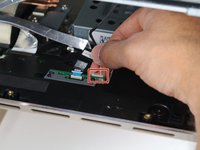
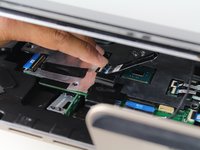
Remove the two (2) cables that are connected to the computer by white, rectangular terminal blocks by pulling straight out on the plug.
-
-
-
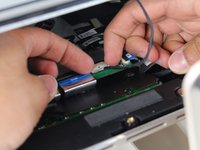
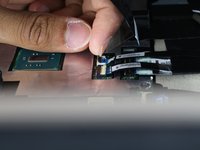
Use a finger to lift the plastic locking flaps that hold the remaining three (3) ribbon cables in place.
-
Remove the cables from their terminals by slipping them away from their connectors.
When re-connecting take great care to ensure the ribbon cables are square and flat - I had to take mine apart again to re-seat one as the screen was blank - worked fine once re-seated properly.
-
-
-
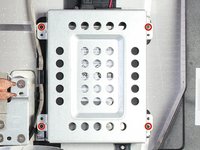
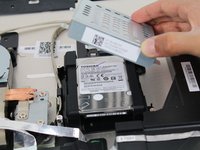
Use a Phillips #0 to remove the four (4) 3.2 mm screws on the metal casing enclosing the hard drive.
-
Remove the metal casing by lifting it up.
-
-
-
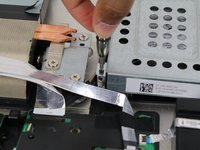
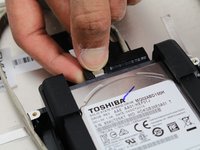
Remove the SATA cable by pushing down on the metal tab and pulling the cable away from the drive.
-
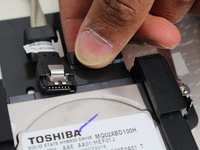
Remove the power cable by pinching the black connector and pulling the cable out.
-
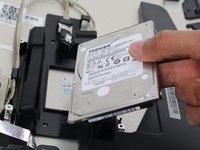
Take out the drive by lifting it out of its rubber seat.
-


To reassemble your device, follow these instructions in reverse order.
To reassemble your device, follow these instructions in reverse order.
crwdns2935221:0crwdne2935221:0
crwdns2935229:017crwdne2935229:0
crwdns2915084:0crwdne2915084:0

Cal Poly, Team S4-G1, Livingston Fall 2017 crwdns2935289:0Cal Poly, Team S4-G1, Livingston Fall 2017crwdne2935289:0
CPSU-LIVINGSTON-F17S4G1
crwdns2931471:05crwdne2931471:0
crwdns2935297:025crwdne2935297:0
crwdns2947412:018crwdne2947412:0
Does the black strip help in place with adhesive go back on easily or do you need to use new tape to help back in place?
Pas de souci pour remettre la bande adhésive, elle reste collante.
I have reused adhesive strip without any special
After step 5 its possible to raise screen and unscrew hard
dose it has space for 2 hdd or only one
If you want both, hdd and sdd buy an hybrid drive (SSHD), just have one slot and one sata wire for drive. look. https://d3nevzfk7ii3be.cloudfront.net/ig...
Just one drive space
Brilliant, thank you Anthony!
Is it possible to change the SSD and how is it possible?
Yes, it’s possible. Just buy a SATA SDD, not m2. The conector an size is the same of laptop hdd
Hi, isnt an M2 Faster?
Can’t seem to be able to remove the black strip (step 1), tried everything it’s not coming off and using the tool kit from iFix it, is there a trick I’m missing?
I would add some slight heat to the sticky strip, otherwise this can easily bend and not reattach properly. You can’t access the HD without taking the whole thing off, which is %#*@ annoying and fiddly due to the rear stand.
Est-il possible sur ce PC de remplacer le SATA par seulement un SSD ?
LC
Non, j’ai essayé de remplacer le SSD M2 qui est derrière la carte mère par un autre modèle, et il n’est pas reconnu, l’écran ne s’allume même pas. J’ai essayé 2 modèles différents et c’est pareil, de plus ce n’est pas simple car il faut démonter la carte mère.
Thank you very much for this guide. It was very helpful and I’m successful in replacing my HD with SSD! :D
Well I cracked the screen trying to get the bottom strip off. This is on a Z240IE
What type of SSD TO BE ADDED M.2 SSD OR NVME.........The exisitng was hdd can i add m.2 or nvme ssd
On my machine, it was positively impossible to use a plastic opening tool, or even a razor to get under the plastic strip - even after heating up with a heat gun. However, I found another method that will also help prevent damage to the plastic strip: in pictures for Steps 2 and 3, you can see that under the plastic strip, next to some of the screws there are square holes in the plastic body. I was able to shape a sturdy paper clip into an “L” shape, and feed it through the right-most exhaust vent at the bottom to insert into this square hole from below. From there, you can use the paper clip to try to push the plastic strip up from below. It still required some heat from the heat gun, but eventually I was able to push the plastic strip up enough to be able to slip a razor blade under it.
Alexander V Trofimuk - crwdns2934203:0crwdne2934203:0
I too was unable to do this with the plastic tools, but used a small flat screwdriver to ply up the corned on the bottom curved corner and plastic tools form there - just left a small blemish on the plastic besel, but I can live with that.
Andy Monaghan - crwdns2934203:0crwdne2934203:0