crwdns2933423:0crwdne2933423:0
crwdns2947577:0crwdnd2947577:0crwdne2947577:0

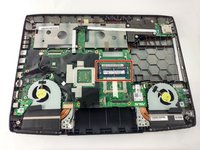
Asus ROG G751JL-BB17T29 RAM Replacement

crwdns2942213:0crwdne2942213:0

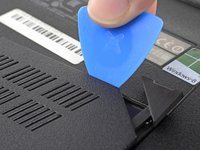
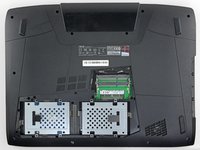
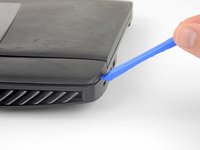
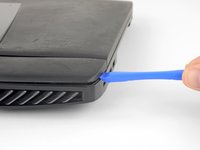
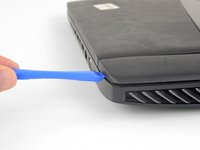
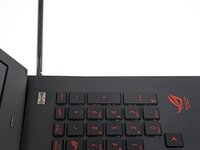
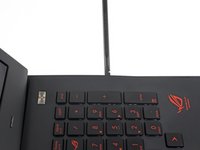
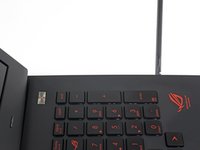
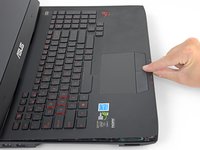
    1. Asus ROG G751JL-BB17T29 RAM Replacement, Remove the RAM access door: crwdns2935265:01crwdnd2935265:01crwdnd2935265:02crwdne2935265:0 Asus ROG G751JL-BB17T29 RAM Replacement, Remove the RAM access door: crwdns2935265:01crwdnd2935265:02crwdnd2935265:02crwdne2935265:0
      • Use an opening tool to pry up the small rubber cover on the upper right corner of the RAM access door.

      crwdns2952109:0crwdne2952109:0

      crwdns2917038:0crwdne2917038:0

    2. Asus ROG G751JL-BB17T29 RAM Replacement: crwdns2935265:02crwdnd2935265:01crwdnd2935265:01crwdne2935265:0
      • Remove the 5.3 mm Phillips #00 screw securing the RAM access door.

      • This screw is held in the hole in the door with a washer and will not come out of the hole, even after you unscrew it.

      crwdns2952109:0crwdne2952109:0

      crwdns2917038:0crwdne2917038:0

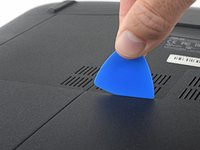
    3. Asus ROG G751JL-BB17T29 RAM Replacement: crwdns2935265:03crwdnd2935265:01crwdnd2935265:02crwdne2935265:0 Asus ROG G751JL-BB17T29 RAM Replacement: crwdns2935265:03crwdnd2935265:02crwdnd2935265:02crwdne2935265:0
      • Insert the point of an opening pick in the seam near the top right corner of the RAM access door and gently pry the door up slightly.

      • The door is held in place by small clips around its edges. Pry until you feel the nearest clips release.

      crwdns2952109:0crwdne2952109:0

      crwdns2917038:0crwdne2917038:0

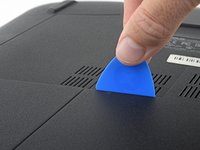
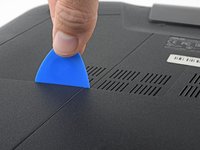
    4. Asus ROG G751JL-BB17T29 RAM Replacement: crwdns2935265:04crwdnd2935265:01crwdnd2935265:03crwdne2935265:0 Asus ROG G751JL-BB17T29 RAM Replacement: crwdns2935265:04crwdnd2935265:02crwdnd2935265:03crwdne2935265:0 Asus ROG G751JL-BB17T29 RAM Replacement: crwdns2935265:04crwdnd2935265:03crwdnd2935265:03crwdne2935265:0
      • Insert the wide edge of an opening pick into a new part of the seam between the door and the computer.

      • Pry the door up to release the clips closest to the pick.

      • Continue to slide the pick along the seam all the way around the door, prying as you go, until all the clips holding the door down have been released.

      crwdns2952109:0crwdne2952109:0

      crwdns2917038:0crwdne2917038:0

    5. Asus ROG G751JL-BB17T29 RAM Replacement: crwdns2935265:05crwdnd2935265:01crwdnd2935265:01crwdne2935265:0
      • Remove the RAM access door.

      crwdns2952109:0crwdne2952109:0

      crwdns2917038:0crwdne2917038:0

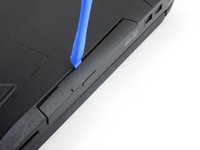
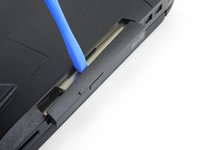
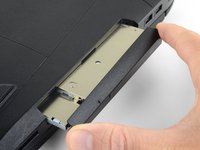
    1. Asus ROG G751JL-BB17T29 RAM Replacement, Remove the optical drive: crwdns2935265:06crwdnd2935265:01crwdnd2935265:01crwdne2935265:0
      • Remove the 5.2 mm Phillips #00 screw securing the optical drive.

      crwdns2952109:0crwdne2952109:0

      crwdns2917038:0crwdne2917038:0

    2. Asus ROG G751JL-BB17T29 RAM Replacement: crwdns2935265:07crwdnd2935265:01crwdnd2935265:03crwdne2935265:0 Asus ROG G751JL-BB17T29 RAM Replacement: crwdns2935265:07crwdnd2935265:02crwdnd2935265:03crwdne2935265:0 Asus ROG G751JL-BB17T29 RAM Replacement: crwdns2935265:07crwdnd2935265:03crwdnd2935265:03crwdne2935265:0
      • Insert an opening tool into the gap between the optical drive and the laptop.

      • Pry the optical drive straight out of the laptop.

      • Remove the optical drive.

      crwdns2952109:0crwdne2952109:0

      crwdns2917038:0crwdne2917038:0

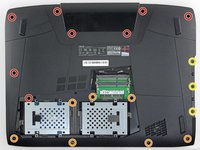
    1. Asus ROG G751JL-BB17T29 RAM Replacement, Remove the case screws: crwdns2935265:08crwdnd2935265:01crwdnd2935265:01crwdne2935265:0
      • Use the point of a spudger to pry out eleven rubber plugs covering the screws on the bottom of the laptop.

      • Some plugs have a hole or notch into which you can insert the point of a spudger to more easily pry out the plugs.

      crwdns2952109:0crwdne2952109:0

      crwdns2917038:0crwdne2917038:0

    2. Asus ROG G751JL-BB17T29 RAM Replacement: crwdns2935265:09crwdnd2935265:01crwdnd2935265:02crwdne2935265:0 Asus ROG G751JL-BB17T29 RAM Replacement: crwdns2935265:09crwdnd2935265:02crwdnd2935265:02crwdne2935265:0
      • Remove 18 Phillips #00 screws of the following lengths:

      • Eight 8.8 mm screws

      • Seven 5.2 mm screws

      • Three screws

      crwdns2952109:0crwdne2952109:0

      crwdns2917038:0crwdne2917038:0

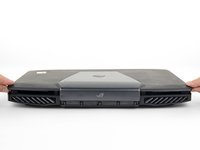
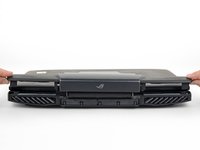
    3. Asus ROG G751JL-BB17T29 RAM Replacement, Remove the battery cover: crwdns2935265:010crwdnd2935265:01crwdnd2935265:03crwdne2935265:0 Asus ROG G751JL-BB17T29 RAM Replacement, Remove the battery cover: crwdns2935265:010crwdnd2935265:02crwdnd2935265:03crwdne2935265:0 Asus ROG G751JL-BB17T29 RAM Replacement, Remove the battery cover: crwdns2935265:010crwdnd2935265:03crwdnd2935265:03crwdne2935265:0
      • Flip the laptop right-side up.

      • Use an opening pick to pry the left and right edges of the battery cover away from the laptop enough that you can grip the cover with your fingers.

      crwdns2952109:0crwdne2952109:0

      crwdns2917038:0crwdne2917038:0

    4. Asus ROG G751JL-BB17T29 RAM Replacement: crwdns2935265:011crwdnd2935265:01crwdnd2935265:02crwdne2935265:0 Asus ROG G751JL-BB17T29 RAM Replacement: crwdns2935265:011crwdnd2935265:02crwdnd2935265:02crwdne2935265:0
      • Lift the battery cover straight up from the laptop.

      • Do not try to completely remove the cover yet, it is still tethered by a speaker cable.

      crwdns2952109:0crwdne2952109:0

      crwdns2917038:0crwdne2917038:0

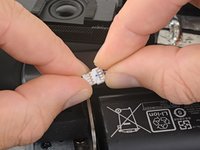
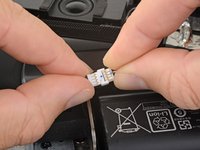
    5. Asus ROG G751JL-BB17T29 RAM Replacement, Disconnect the speaker cable: crwdns2935265:012crwdnd2935265:01crwdnd2935265:02crwdne2935265:0 Asus ROG G751JL-BB17T29 RAM Replacement, Disconnect the speaker cable: crwdns2935265:012crwdnd2935265:02crwdnd2935265:02crwdne2935265:0
      • Pull the speaker connectors straight away from each other to disconnect the speaker cable.

      • Make sure the speaker cable is out of the way before you reinstall the battery cover.

      crwdns2952109:0crwdne2952109:0

      crwdns2917038:0crwdne2917038:0

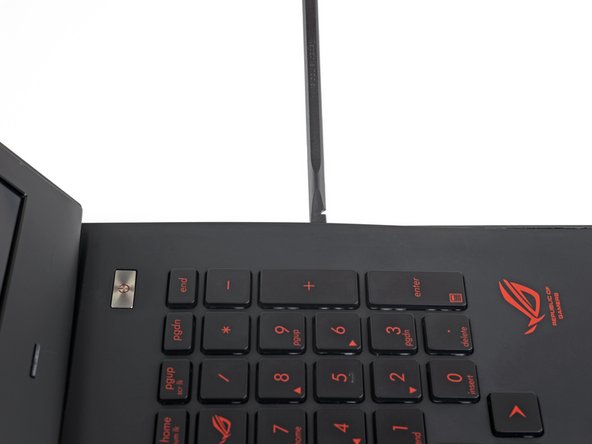
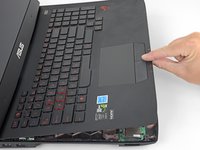
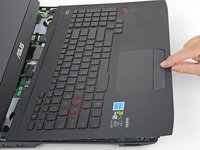
    6. Asus ROG G751JL-BB17T29 RAM Replacement, Remove the upper case assembly: crwdns2935265:013crwdnd2935265:01crwdnd2935265:03crwdne2935265:0 Asus ROG G751JL-BB17T29 RAM Replacement, Remove the upper case assembly: crwdns2935265:013crwdnd2935265:02crwdnd2935265:03crwdne2935265:0 Asus ROG G751JL-BB17T29 RAM Replacement, Remove the upper case assembly: crwdns2935265:013crwdnd2935265:03crwdnd2935265:03crwdne2935265:0
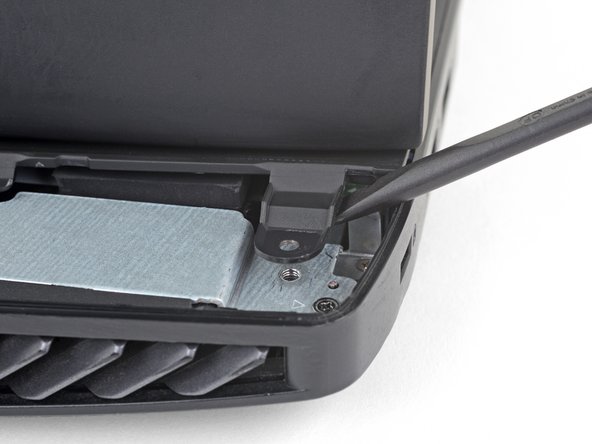
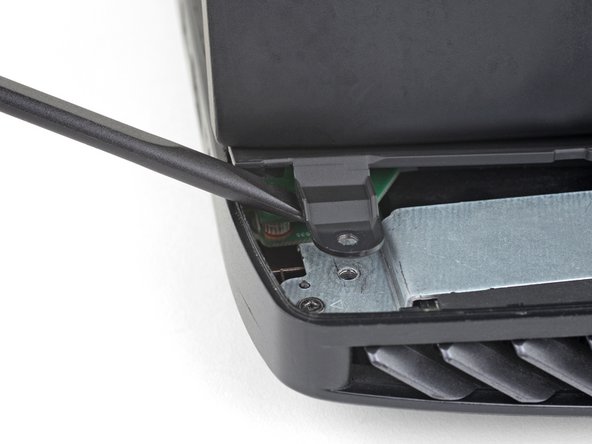
      • Open the laptop's display to a 90° angle.

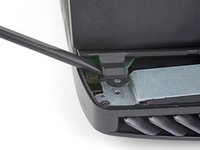
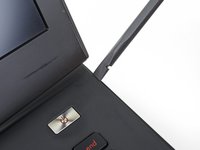
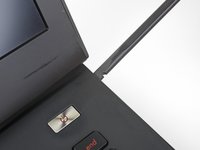
      • Use a spudger to pry against one of the screw tabs on the back of the upper case assembly.

      • Make sure to pry as close as possible to the base of the tab to avoid damaging the tab.

      • Repeat this procedure with the other tab.

      • The upper case assembly is held in place by small clips around its edges. In this step, pry each tab up until you feel the nearest clips release.

      crwdns2952109:0crwdne2952109:0

      crwdns2917038:0crwdne2917038:0

    7. Asus ROG G751JL-BB17T29 RAM Replacement: crwdns2935265:014crwdnd2935265:01crwdnd2935265:02crwdne2935265:0 Asus ROG G751JL-BB17T29 RAM Replacement: crwdns2935265:014crwdnd2935265:02crwdnd2935265:02crwdne2935265:0
      • Insert the flat end of a spudger in the gap between the laptop and the upper case assembly, near the display.

      • If there's not a big enough gap, repeat the previous step until you have space to insert the spudger.

      crwdns2952109:0crwdne2952109:0

      crwdns2917038:0crwdne2917038:0

    8. Asus ROG G751JL-BB17T29 RAM Replacement: crwdns2935265:015crwdnd2935265:01crwdnd2935265:03crwdne2935265:0 Asus ROG G751JL-BB17T29 RAM Replacement: crwdns2935265:015crwdnd2935265:02crwdnd2935265:03crwdne2935265:0 Asus ROG G751JL-BB17T29 RAM Replacement: crwdns2935265:015crwdnd2935265:03crwdnd2935265:03crwdne2935265:0
      • Slide the spudger along each edge of the upper case assembly, prying and releasing clips as you go.

      crwdns2952109:0crwdne2952109:0

      crwdns2917038:0crwdne2917038:0

    9. Asus ROG G751JL-BB17T29 RAM Replacement: crwdns2935265:016crwdnd2935265:01crwdnd2935265:03crwdne2935265:0 Asus ROG G751JL-BB17T29 RAM Replacement: crwdns2935265:016crwdnd2935265:02crwdnd2935265:03crwdne2935265:0 Asus ROG G751JL-BB17T29 RAM Replacement: crwdns2935265:016crwdnd2935265:03crwdnd2935265:03crwdne2935265:0
      • When all the clips securing the upper case assembly have been released, lift the assembly slightly and slide it down, away from the display, about an inch.

      • Do not attempt to remove the assembly yet. It is still attached to the laptop by four cables.

      crwdns2952109:0crwdne2952109:0

      crwdns2917038:0crwdne2917038:0

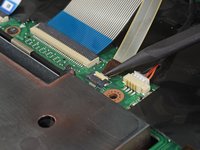
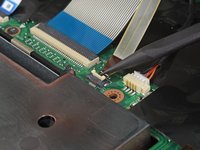
    10. Asus ROG G751JL-BB17T29 RAM Replacement: crwdns2935265:017crwdnd2935265:01crwdnd2935265:03crwdne2935265:0 Asus ROG G751JL-BB17T29 RAM Replacement: crwdns2935265:017crwdnd2935265:02crwdnd2935265:03crwdne2935265:0 Asus ROG G751JL-BB17T29 RAM Replacement: crwdns2935265:017crwdnd2935265:03crwdnd2935265:03crwdne2935265:0
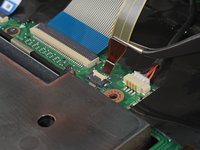
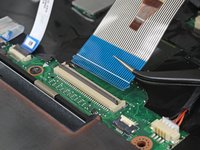
      • Use the tip of a spudger to flip up the small locking flap of the keyboard backlight cable ZIF connector.

      • Be sure to pry up on the hinged flap, not the connector socket.

      • Gently pull the cable out of its socket.

      crwdns2952109:0crwdne2952109:0

      crwdns2917038:0crwdne2917038:0

    11. Asus ROG G751JL-BB17T29 RAM Replacement: crwdns2935265:018crwdnd2935265:01crwdnd2935265:03crwdne2935265:0 Asus ROG G751JL-BB17T29 RAM Replacement: crwdns2935265:018crwdnd2935265:02crwdnd2935265:03crwdne2935265:0 Asus ROG G751JL-BB17T29 RAM Replacement: crwdns2935265:018crwdnd2935265:03crwdnd2935265:03crwdne2935265:0
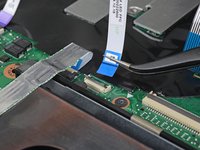
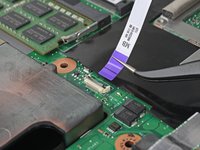
      • Repeat the previous step for the keyboard, trackpad buttons, and trackpad cables held in place by ZIF connectors.

      crwdns2952109:0crwdne2952109:0

      crwdns2917038:0crwdne2917038:0

    12. Asus ROG G751JL-BB17T29 RAM Replacement: crwdns2935265:019crwdnd2935265:01crwdnd2935265:01crwdne2935265:0
      • Remove the upper case assembly.

      crwdns2952109:0crwdne2952109:0

      crwdns2917038:0crwdne2917038:0

    1. Asus ROG G751JL-BB17T29 RAM Replacement, Disconnect the battery: crwdns2935265:020crwdnd2935265:01crwdnd2935265:02crwdne2935265:0 Asus ROG G751JL-BB17T29 RAM Replacement, Disconnect the battery: crwdns2935265:020crwdnd2935265:02crwdnd2935265:02crwdne2935265:0
      • Pull the battery cable away from the connector in the same direction as the individual wires are running to disconnect the battery.

      • Pull evenly on the full width of the cable so that no individual wires are overly strained.

      crwdns2952109:0crwdne2952109:0

      crwdns2917038:0crwdne2917038:0

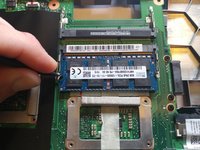
    1. Asus ROG G751JL-BB17T29 RAM Replacement, RAM: crwdns2935265:021crwdnd2935265:01crwdnd2935265:02crwdne2935265:0 Asus ROG G751JL-BB17T29 RAM Replacement, RAM: crwdns2935265:021crwdnd2935265:02crwdnd2935265:02crwdne2935265:0
      • Pull tabs on the left and right side of the RAM stick outward to release RAM.

      crwdns2952109:0crwdne2952109:0

      crwdns2917038:0crwdne2917038:0

crwdns2915888:0crwdne2915888:0

To reassemble your device, follow the above steps in reverse order.

Take your e-waste to an R2 or e-Stewards certified recycler.

Repair didn’t go as planned? Check out our Answers community for troubleshooting help.

crwdns2935221:0crwdne2935221:0

crwdns2935227:0crwdne2935227:0

Kristofer Cesaroni

crwdns2935283:010/06/16crwdne2935283:0

986 crwdns2915208:0crwdne2915208:0

crwdns2935297:08crwdne2935297:0

crwdns2935287:0crwdne2935287:0

USF Tampa, Team 2-1, Sullivan Fall 2016 crwdns2935289:0USF Tampa, Team 2-1, Sullivan Fall 2016crwdne2935289:0

USFT-SULLIVAN-F16S2G1

crwdns2931471:04crwdne2931471:0

crwdns2935297:0132crwdne2935297:0

crwdns2947412:00crwdne2947412:0

crwdns2917038:0crwdne2917038:0

crwdns2936625:0crwdne2936625:0:

crwdns2936751:024crwdne2936751:0 0

crwdns2936753:07crwdne2936753:0 3

crwdns2936753:030crwdne2936753:0 38

crwdns2942667:0crwdne2942667:0 2,500