crwdns2915892:0crwdne2915892:0
This guide will take you through the steps needed to replace the battery in your Asus Q325U.
crwdns2942213:0crwdne2942213:0
-
-
Remove the ten 5mm screws using a T5 Torx screwdriver.
-
-
-
Lift the back panel upward using the suction tool.
-
-
-
-
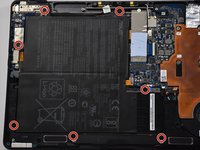
Remove the seven 5mm screws around the battery using a Phillips #00 screwdriver.
-
-
-
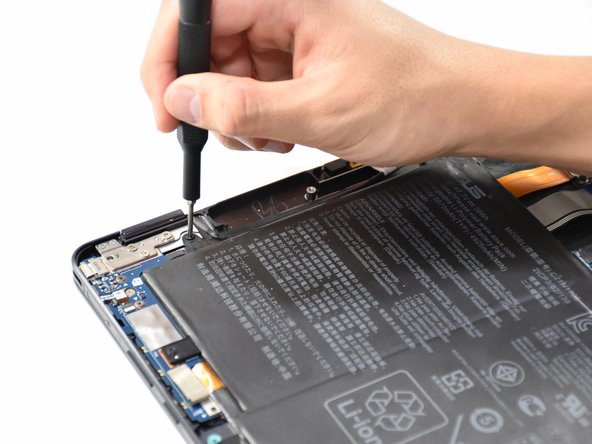
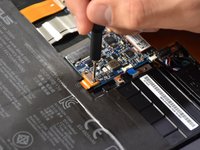
Using a Phillips #000 screwdriver, remove the two 3mm screws on top of the orange battery connector.
In my case, there were no screws, but two posts to be placed in corresponding slots in the replacement battery. So no need for the Philips #000.
-
-
-
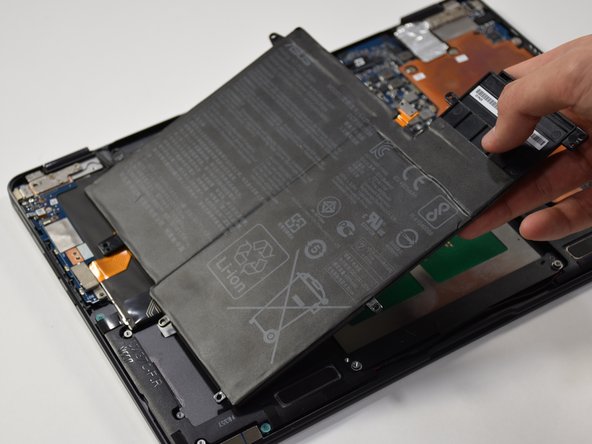
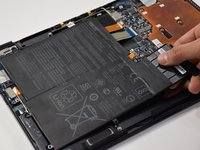
Lift the battery out from the laptop.
This was great! Thanks for publishing. One thing. The battery connection was not held by two 000 screws. The plastic connector simply clicked in place, so I carefully lifted it with a tool
-


To reassemble your device, follow these instructions in reverse order.
To reassemble your device, follow these instructions in reverse order.
crwdns2935221:0crwdne2935221:0
crwdns2935229:04crwdne2935229:0
crwdns2915084:0crwdne2915084:0

Cal Poly, Team S19-G1, White Winter 2019 crwdns2935289:0Cal Poly, Team S19-G1, White Winter 2019crwdne2935289:0
CPSU-WHITE-W19S19G1
crwdns2931471:03crwdne2931471:0
crwdns2935297:06crwdne2935297:0
crwdns2947412:07crwdne2947412:0
Hello,
Can you point me to a place to purchase a replacement battery? Thanks,
Dan Goldman, daniel.goldman@physics.gatech.edu
Would recommend the screw size be ad to the guide please.
Like Dan, I need to get a replacement battery. Any idea where it can be purchased (safely)?
Thanks :D
not able to get beyond step 4. Any ideas how to open the small screws. I tried PH#000, and many others, but no luck
the battery shown here is not the same for the Q325U, different battery connectors.
Has anyone found an answer to the replacement battery questions? I.E. where to get a reliable, proper battery?
jacreightoniii@gmail.com A direct email would be great!!
Two types of batteries for the Q325U with different power connectors:
C21N1624
C21N1706 (shown in this guide)