crwdns2933423:0crwdne2933423:0
Arturia Microbrute Opening Procedure

Arturia Microbrute Opening Procedure

Tobias Isakeit

crwdns2944109:0crwdnd2944109:0Tobias Isakeitcrwdnd2944109:0crwdnd2944109:0crwdnd2944109:0crwdne2944109:0

crwdns2944111:0Maw 26, 2024crwdne2944111:0

20 - 35 crwdns2931279:0crwdne2931279:0
crwdns2937801:0crwdne2937801:0

crwdns2915892:0crwdne2915892:0

crwdns2942287:0crwdne2942287:0

This guide shows you how to open up the Arturia Microbrute and remove the bottom plate including the keyboard.

crwdns2942213:0crwdne2942213:0

crwdns2943215:0crwdne2943215:0

  • Phillips #0 Screwdriver
    Phillips #0 Screwdriver
  • Spudger
    Spudger

crwdns2944105:0crwdne2944105:0

  1. Arturia Microbrute Opening Procedure, Arturia Microbrute Opening Procedure: crwdns2935265:01crwdnd2935265:01crwdnd2935265:02crwdne2935265:0 Arturia Microbrute Opening Procedure, Arturia Microbrute Opening Procedure: crwdns2935265:01crwdnd2935265:02crwdnd2935265:02crwdne2935265:0
    • Switch off the Microbrute and make sure to disconnect any cables.

    • Don’t forget the mini patch bay on the top right.

  2. Arturia Microbrute Opening Procedure: crwdns2935265:02crwdnd2935265:01crwdnd2935265:01crwdne2935265:0
    • Flip the Microbrute over and put it on a soft surface to not damage the knobs and faders.

    • Use a screwdriver to remove the twelve Philips screws on the bottom plate.

  3. Arturia Microbrute Opening Procedure: crwdns2935265:03crwdnd2935265:01crwdnd2935265:03crwdne2935265:0 Arturia Microbrute Opening Procedure: crwdns2935265:03crwdnd2935265:02crwdnd2935265:03crwdne2935265:0 Arturia Microbrute Opening Procedure: crwdns2935265:03crwdnd2935265:03crwdnd2935265:03crwdne2935265:0
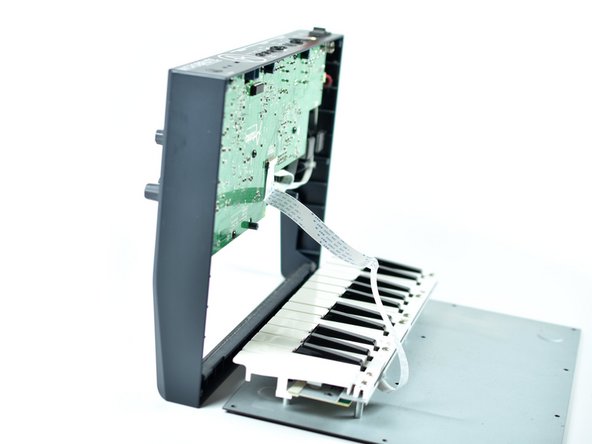
    • Put the Microbrute on its front edge and carefully tilt open the bottom plate including the keyboard.

    • Be aware of the ribbon cable connecting the keyboard to the PCB.

    • The cable should give you enough slack to put the top section over the keyboard section for better handling.

  4. Arturia Microbrute Opening Procedure: crwdns2935265:04crwdnd2935265:01crwdnd2935265:01crwdne2935265:0
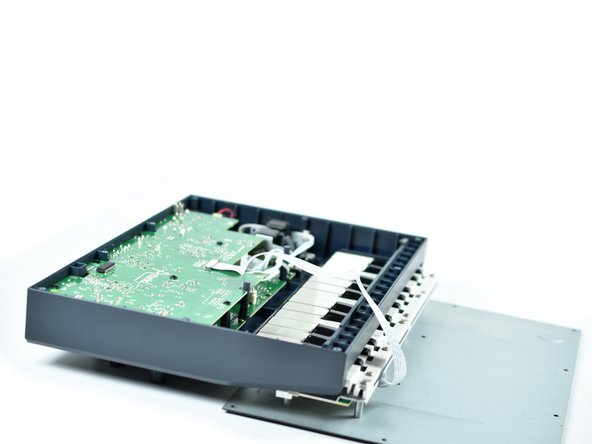
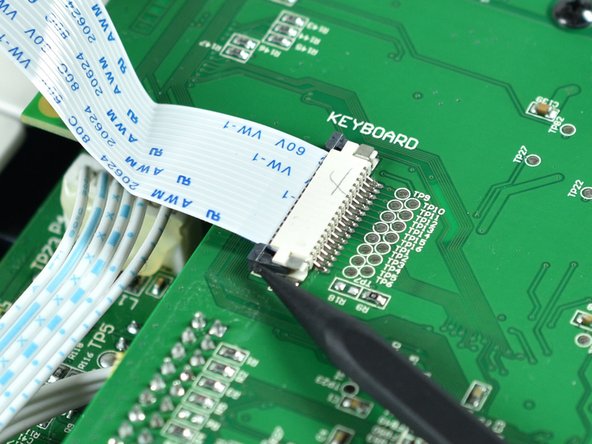
    • Next, focus on the connector of the keyboard.

  5. Arturia Microbrute Opening Procedure: crwdns2935265:05crwdnd2935265:01crwdnd2935265:03crwdne2935265:0 Arturia Microbrute Opening Procedure: crwdns2935265:05crwdnd2935265:02crwdnd2935265:03crwdne2935265:0 Arturia Microbrute Opening Procedure: crwdns2935265:05crwdnd2935265:03crwdnd2935265:03crwdne2935265:0
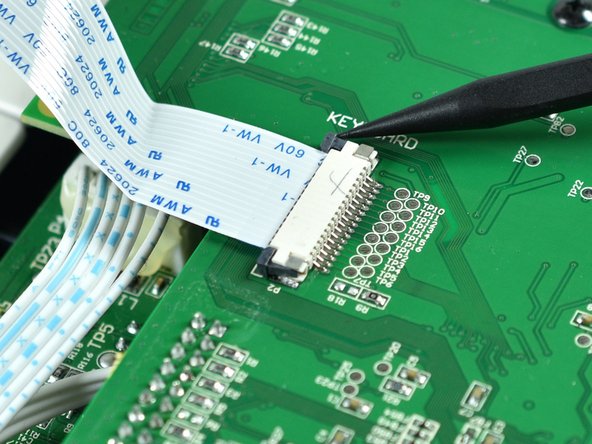
    • Use a spudger to unlock the connector by pushing both left and right locking tabs tabs towards the cable.

  6. Arturia Microbrute Opening Procedure: crwdns2935265:06crwdnd2935265:01crwdnd2935265:02crwdne2935265:0 Arturia Microbrute Opening Procedure: crwdns2935265:06crwdnd2935265:02crwdnd2935265:02crwdne2935265:0
    • Grab the ribbon cable with your fingers and pull it out of the connector.

  7. Arturia Microbrute Opening Procedure: crwdns2935265:07crwdnd2935265:01crwdnd2935265:01crwdne2935265:0
    • Now the Microbrute is open and the bottom plate with the keyboard is separated from the rest of the device.

crwdns2915888:0crwdne2915888:0

To reassemble your device, follow these instructions in reverse order.

Tobias Isakeit

crwdns2935283:003/31/14crwdne2935283:0

125,276 crwdns2915208:0crwdne2915208:0

crwdns2935297:0189crwdne2935297:0

crwdns2915084:0crwdne2915084:0

Tobias Isakeit - Repairability Engineer crwdns2935289:0Tobias Isakeit - Repairability Engineercrwdne2935289:0

Business

crwdns2934841:01crwdne2934841:0

crwdns2935297:01,132crwdne2935297:0

crwdns2947412:00crwdne2947412:0

crwdns2917038:0crwdne2917038:0

crwdns2936625:0crwdne2936625:0:

crwdns2936751:024crwdne2936751:0 0

crwdns2936753:07crwdne2936753:0 3

crwdns2936753:030crwdne2936753:0 9

crwdns2942667:0crwdne2942667:0 172