crwdns2915892:0crwdne2915892:0
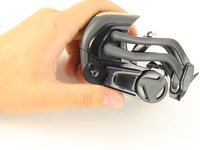
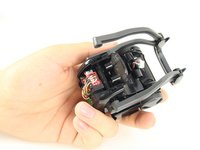
This guide details how to fully remove the battery of the Anki Vector. Due to its location, this procedure requires many steps accessing the battery.
Remember to only embark on this guide if you have followed the Anki Troubleshooting Page and the device is still broken.
You should be using this guide if vector fails to charge, power on, or has an extremely short battery life.
While disassembling Vector, make sure to look out for disconnected cables and other broken parts, as often times these can be fixed without entirely replacing the battery.
crwdns2942213:0crwdne2942213:0
-
-
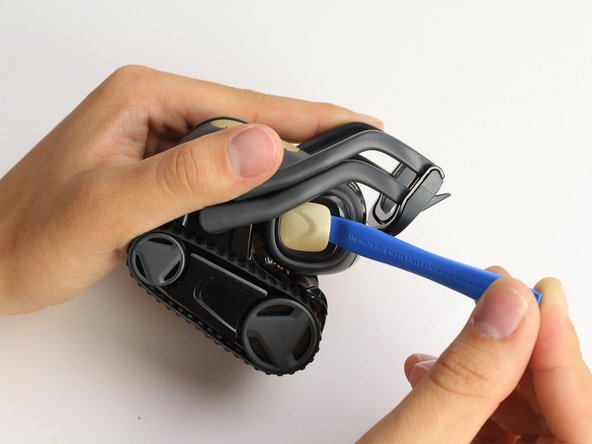
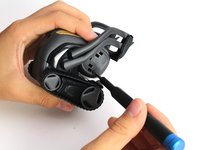
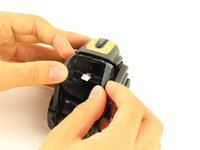
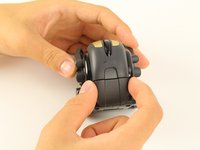
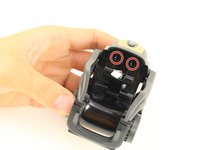
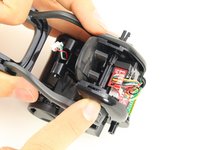
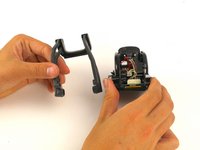
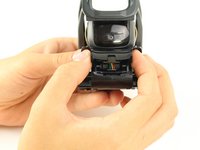
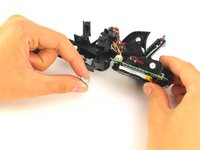
Using the iFixit opening tool, insert the corner under Vector's golden side panel and lightly twist.
-
Repeat this step on the other side.
-
-
-
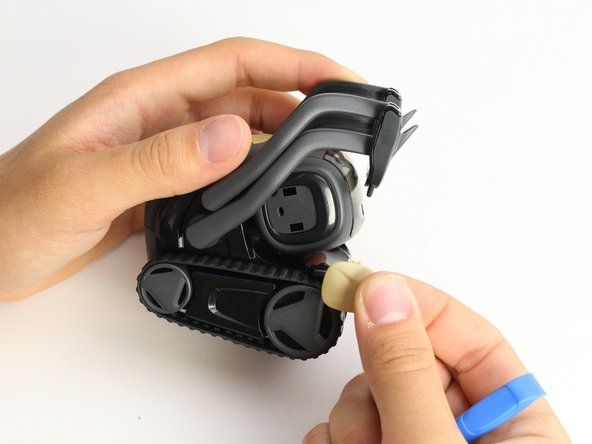
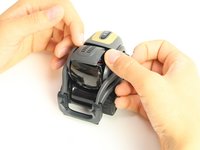
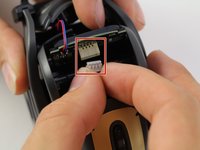
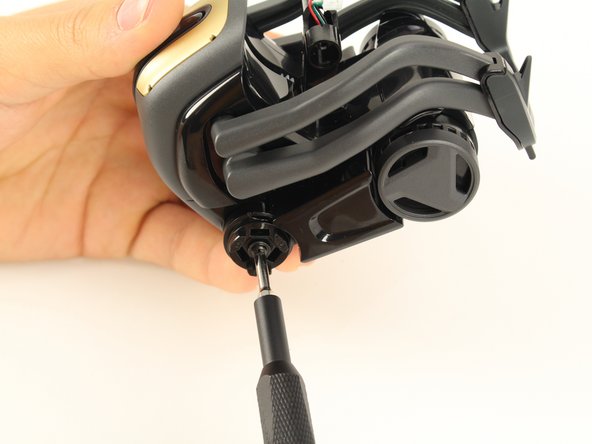
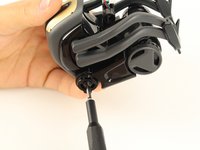
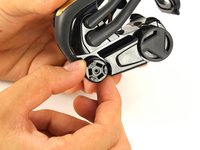
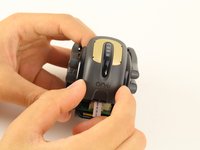
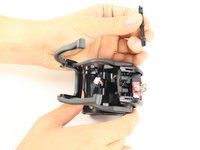
Insert the corner of the square end of the spudger under the side plate above the partially visible screw.
-
Lightly turn the spudger to separate the plate from Vector's head.
-
Work the spudger around the plate until it comes off.
-
Repeat this step on the the other side.
This is easiest to do by starting near the top screw hole.
-
-
-
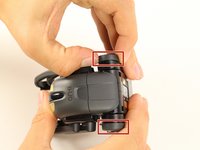
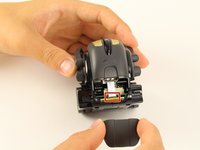
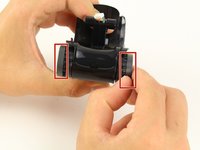
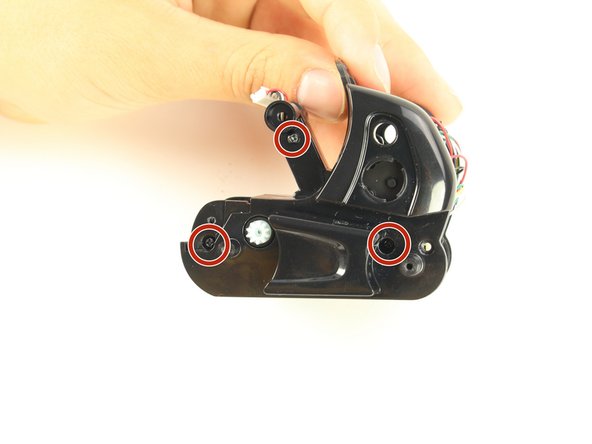
Using a Phillips #0 screwdriver, unscrew the two 2 mm screws on the side of Vector's head.
-
Repeat this step on the opposite side.
-
-
-
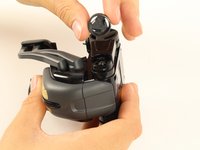
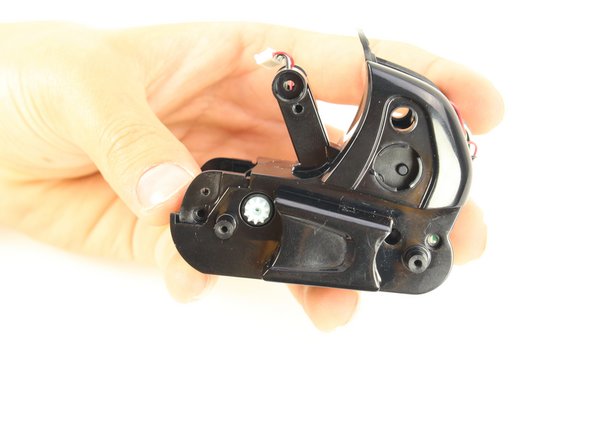
Pull apart Vector's head. It should separate down the middle.
-
Remove the screen protector by gently pulling it free from the two face halves.
-
-
-
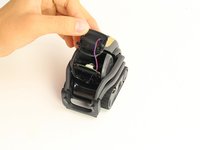
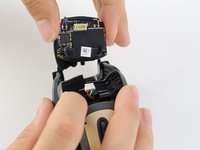
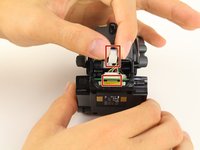
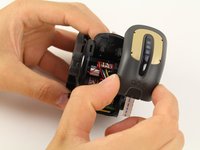
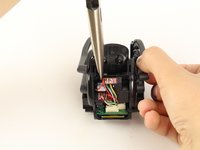
Using your thumb and index finger, unplug the display from the plug in Vector's neck.
-
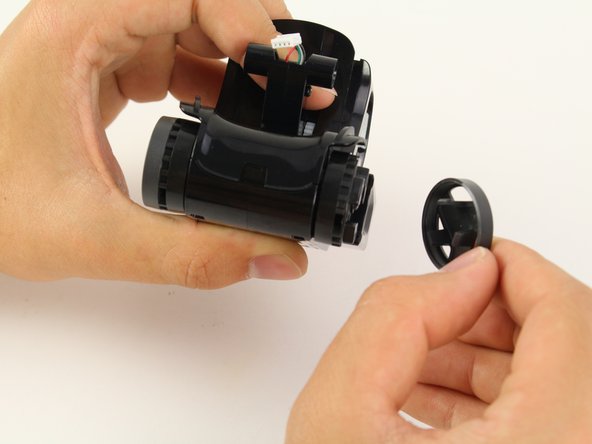
Pull the LCD and speaker assembly from Vector's head.
This board contains a lot of his tech. CPU, GPU, Wi-Fi, Bluetooth, camera, screen, storage, etc. Replacing this will replace his personality, and may mess up his sensor calibration.
-
-
-
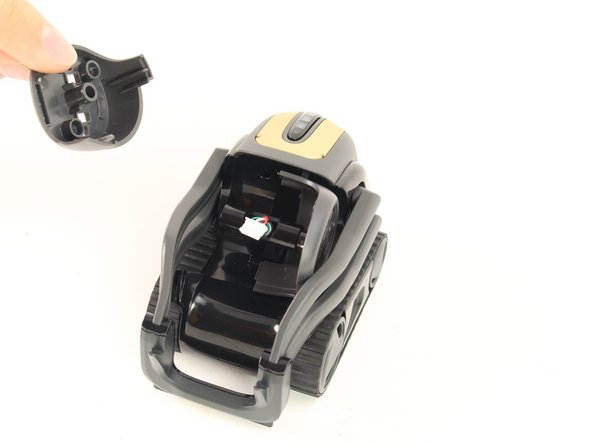
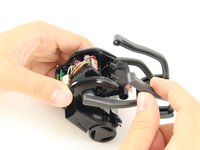
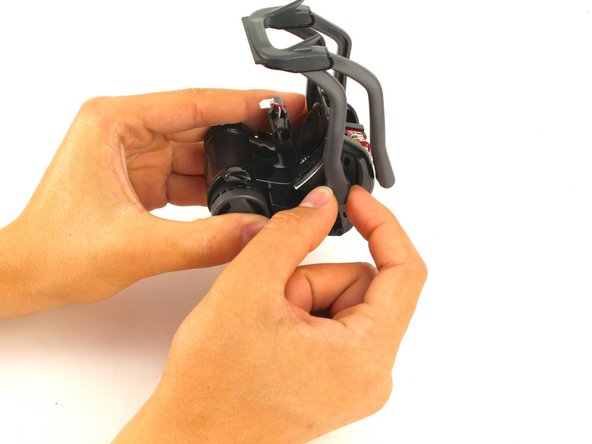
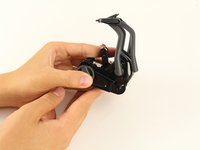
Gently pull out the two halves of Vector's head from between his arms.
Pull his forklift up while doing this
When putting him back, don't assemble these two parts at this point: do the one with the gear teeth only.
Then, go back up the steps to attach the LCD and speaker assembly, and then come back and do the other side of this along with the screen protector.
In this case, it helps to lower the arms and rotate the head up.
-
-
-
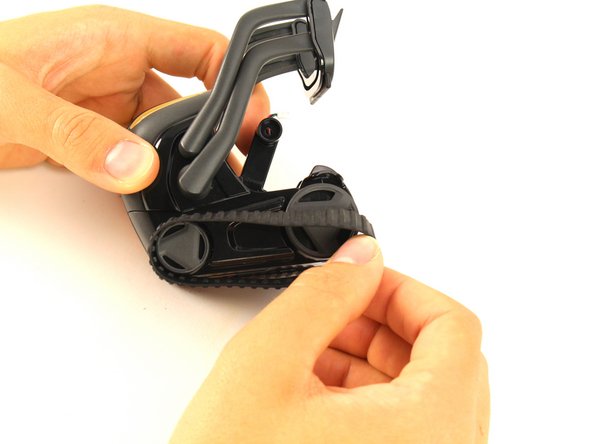
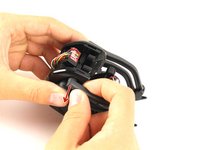
Remove the Anki Vector's belts on both sides of its body by gently sliding them off.
-
-
-
Pull off the covers attached to Vector's rear wheels.
-
-
-
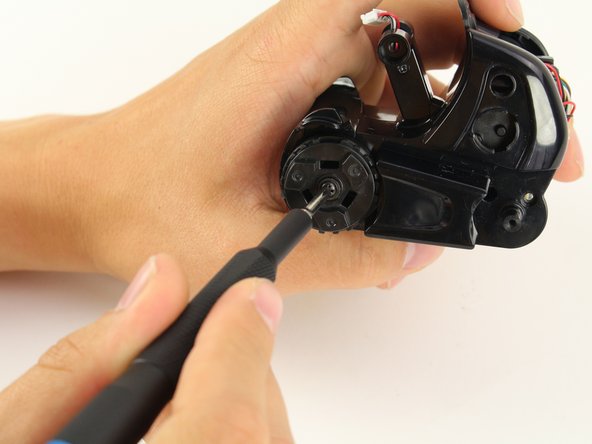
Unscrew the 2 mm screws located under the wheel covers using a Phillips #0 screwdriver.
-
Remove the rear wheel.
-
-
-
-
Unscrew the two 2 mm body screws using a Phillips #0 screwdriver.
-
-
-
Using two fingers gently pull off the lower rear panel.
-
Using your fingers, unplug the ribbon connector.
-
-
-
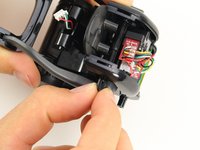
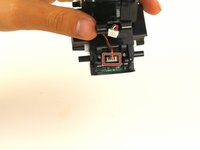
Unscrew the two screws behind vector's neck.
-
Remove the capacitive touch assembly.
-
-
-
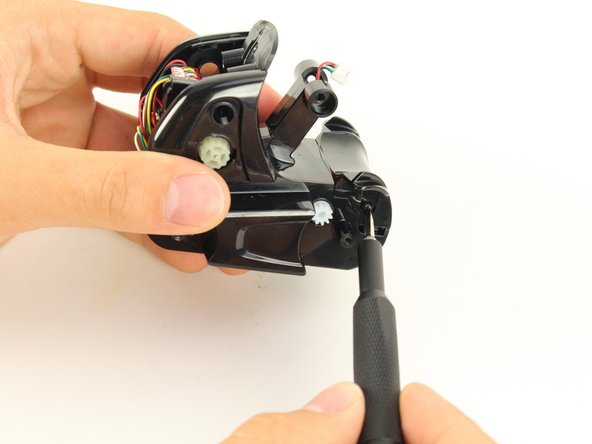
With a moderate amount of force pull one of vector's top arms away from his body until it disconnects from the shaft.
To help remove the risk of breaking an arm, remove the surround of the forklift U (it's clipped on lightly), then remove the screws (4) holding his arms on at the lower end - this reduces the risk of breaking his arms as you remove them.
-
-
-
Gripping the shaft with needle nosed pliers, pull the opposite top arm off the main shaft.
-
-
-
Pinch one end of the arm shaft and push it into the body.
-
Grab the other end and pull the shaft out of the body.
I very much recommend doing this at the beginning. It makes the rest of the repair a lot easier. You can pry it off at one side then push in at the bottom of the other side with a screwdriver or other pointy object if it doesn’t snap away from the shaft.
-
-
-
Raise vectors arms all the way up and gently pull each arm out of its socket.
-
-
-
Pull the wheel covers off of Vectors forward wheels.
-
-
-
Using the same Phillips #0 screwdriver, unscrew the 2 mm screw under the wheel cover.
-
Gently pull the wheel off.
-
-
-
Unscrew the two body screws located behind the front wheels.
-
Gently pull the cover from Vector's body
-
-
-
Gently unplug and remove the infrared sensor.
-
-
-
Insert your Phillips #0 bit into a 4 mm nut driver and insert both into your bit driver.
-
Unscrew the three body screws.
-
-
-
Gradually increasing applied force, pull the body apart.
On reassembly, be certain not to pinch the head wire harness. Also MAKE SURE YOU REMEMBERED TO INSTALL THE WEIGHT.
-
-
-
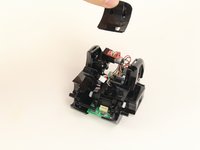
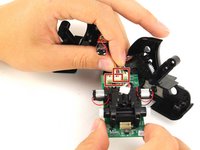
Remove the shoulder panel.
-
Remove the weight.
-
-
-
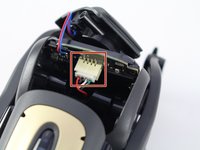
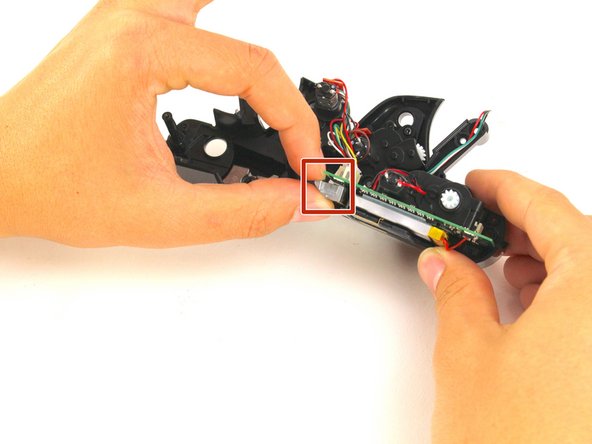
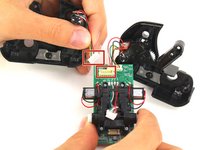
Unplug the two motor connectors from the motherboard.
-
-
-
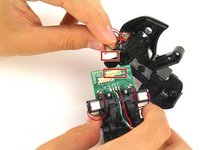
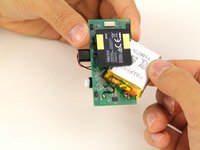
Wriggle the battery free from the motherboard.
-
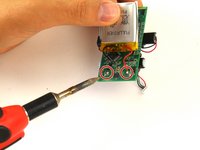
Using a soldering iron, desolder the connections from the battery to the motherboard.
What are the dimensions of the battery?
can you do this without a soldering iron?
Fml what is this
hi..can i replace it with 850 m.amperes?
When soldering the battery, don’t get too happy with the solder. You only have 1mm height for your solder joints to clear the metal weight on reassembly.
-


To reassemble your device, follow these instructions in reverse order.
To reassemble your device, follow these instructions in reverse order.
crwdns2935221:0crwdne2935221:0
crwdns2935229:042crwdne2935229:0
crwdns2915084:0crwdne2915084:0

Cal Poly, Team S2-G6, Maness Spring 2019 crwdns2935289:0Cal Poly, Team S2-G6, Maness Spring 2019crwdne2935289:0
CPSU-MANESS-S19S2G6
crwdns2931471:04crwdne2931471:0
crwdns2935297:010crwdne2935297:0
crwdns2947412:024crwdne2947412:0
Ok nice step by step guide but what are the specs for the battery as they’re not visable in any of the pictures…
Part Number: Li-Ion Poly 500mAh #1578B
3.7V 500mAh
Brian -
Who manages to do all of this in 7 minutes ? Apparently it is a 3.7V battery, question is what is the max size that fits ? 3.5 x 2.5 x 0.4 cm is reported to fit, 4x3x0.5 might as well.
Any idea where to get one ?
Who manages to do all of this is 7 minutes?
me
I used this battery which was a little too long EEMB 3.7V 820mAh 653042 Lipo Battery Rechargeable Lithium Polymer ion Battery PCS with JST Connector UN38.3 Certified the width was fine but the length was a bit long - I had to bend the connector end a bit to make it fit.
Hi there, slightly off topic here but I have no idea where else to look, but if anyone can help that would be brilliant! I have a Vector and my dopey rabbits have eaten through the charger/ Vectors home. I am hoping to find one to replace and was hoping if anyone on here could help me out?
Hi, I dont know if you have managed to get a charger base yet, but given the date of the post this is likely you have. However, I managed to get my hands on threes unopened, genuine chargers. I am based in the UK, but of you havnt found one, I am happy to ship to you.
Marc
After I got one apart that wouldn’t power on,I found corrosion and liquid damage.
can this be done without a soldering iron? i already took it apart to realize that i would be unable to fully complete the process :(
what battery to use
Nice guide. Does ifixit sell parts for Vector?
Thanks
Can I transfer the memory over to a new unit? Is that a specific board that can be removed and transplanted?
What type of battery do I need to replace vectors old battery
I used a 503040 (5mm 30x40) battery and thanks to those very good instructions I managed it to replace it. One addition I have… use soldering flux to easier get the cables off and on again. As this was my biggest problem… I had to increase temperature to the maximum my soldering station was able and soldering flux, then I managed it.
Take note, if you have Vector 1.0 (by Anki), the battery is 320mAh, 503236 and I got a LP503040 3.7V 550mAh and works perfectly, works with bigger ones too, but at first, after I dissasembled him, I tought it won’t work… but works like a charm.
I tought the original battery is 600mAh, but that’s for Vector 2.0 (by DigitalDreamLabs)… and I found the closest one to be the 550mAh one. I’m glad I didn’t bought the 320mAh one, since now, the battery life is way better on my old guy, Vector 1.0! :D
Thanks for the tutorial! I tought it would be very hard, but took me like 40~ minutes (I didn’t want to rush).
Awesome instructions. My 9 y/o son and I did this in probably 20 minutes. Thanks. Thumbs way up!!!!!
My Vector fell into a bucket of water (don't ask). These instructions were perfect for disassembling to the point where I feel assured that he's dry. Now, to reverse the process...
can i ask what happened
I swear by 100% isopropyl alcohol for wet tech. Keep it away from LCD displays as it doesnt agree with the back lighting plastic layers - but it displaces water under components nicely and evaporates quickly..... Get well soon lil Vector
operation was success, thank you, its alive....
Excellent step through. Thanks for this! new battery installed and no "spare screws" left.
Realistically, took us an hour and forty-five. But it was a good weekend. https://youtu.be/JkRvGSU5CTI?si=qCDvbkrE...
i did this and now have 898 error ive tried various long and short button presses on and off the charger, and battery drain i cant get him into recovery or to boot up normally, any ideas please
Where can i buy a display for vector?
Can you help me?
carlosanjo - crwdns2934203:0crwdne2934203:0
See the comments below
Russell English -