crwdns2915892:0crwdne2915892:0
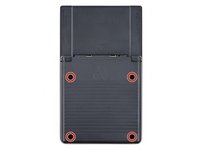
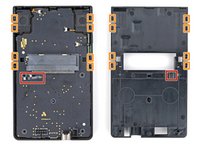
Use this guide to replace the button board in your Analogue pocket.
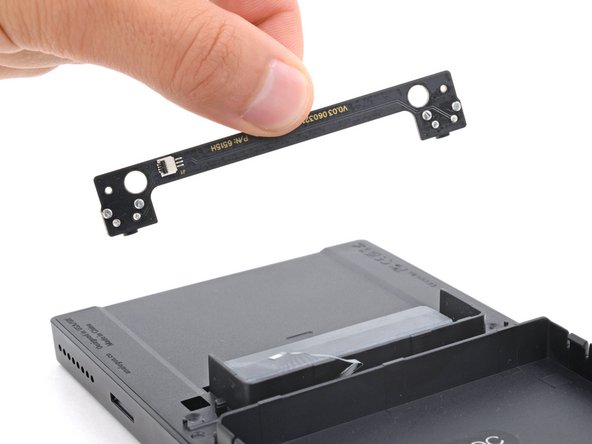
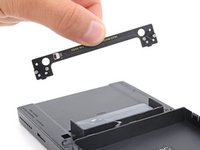
This board has the buttons for your bumpers. You might need to replace it if your bumpers aren't working, are inconsistent, or aren't clicking.
Note: Removing the battery from its recess isn't a required step, but it makes accessing the board and its cable easier.
crwdns2942213:0crwdne2942213:0
-
-
Unplug all cables and fully power off your device.
-
Working on your device requires laying it screen-side down. To prevent damage, lay it on a soft surface such as a towel.
-
-
-
Use a T6 Torx screwdriver to remove the four 13.4 mm‑long screws securing the battery shell.
-
-
-
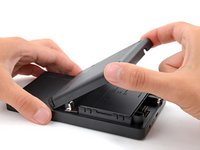
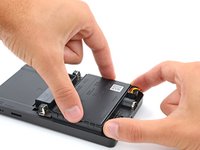
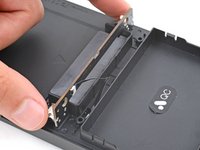
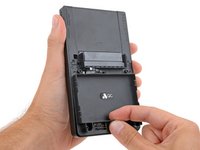
Lift the bottom edge of the battery shell to unhook its tabs.
-
Remove the battery shell.
-
-
crwdns2935267:0crwdne2935267:0Tweezers$4.99
-
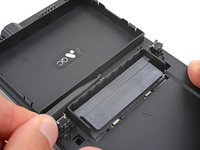
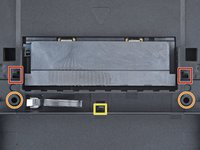
Use blunt nose tweezers to pull the battery connector out of its socket on the bottom right corner of your device.
-
-
-
-
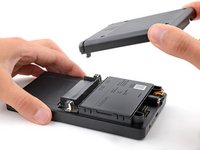
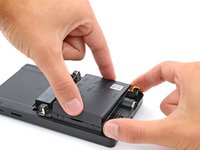
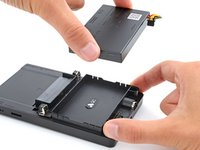
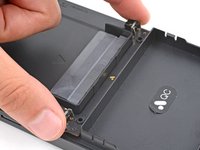
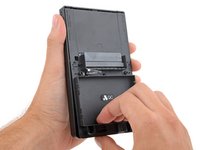
Lift one of the battery's short edges until the clips release.
-
Remove the battery.
-
-
-
Use the point of a spudger to push the clip out and release the board.
-
-
-
Swing the bottom edge of the button board up and over the cartridge reader.
-
Set the board on top of the cartridge reader so the cable's connector is facing the bottom of the device.
-
Put the top edges of the board under their tabs on the rear shell.
-
Lay the board onto the rear shell so the alignment posts go into their circular cutouts on the board.
-
Press the board down until the plastic clip engages.
-
-
-
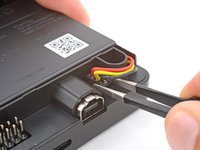
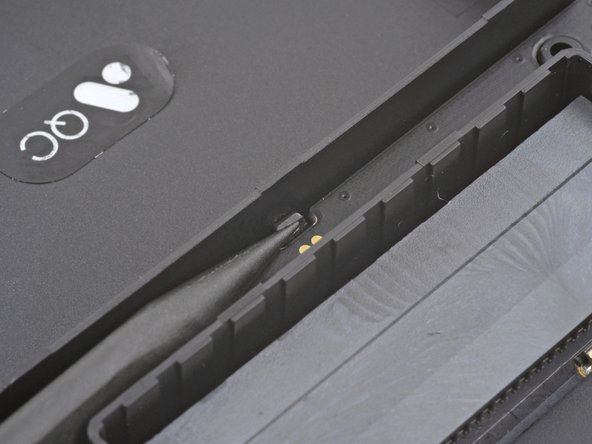
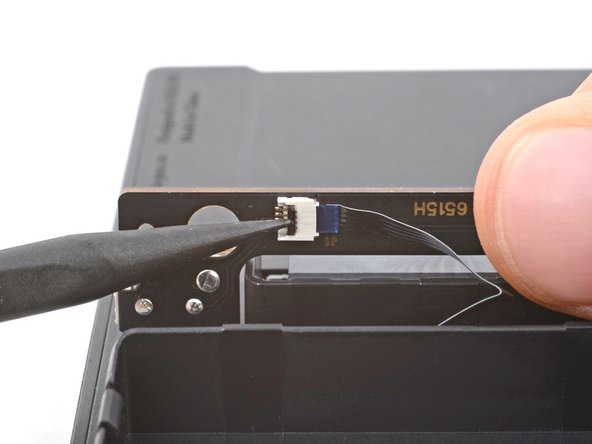
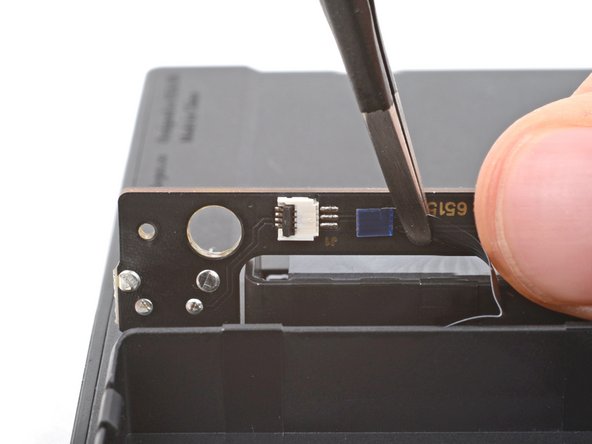
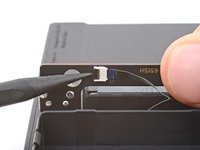
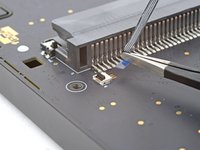
Use the tip of a spudger or a clean fingernail to flip up the hinged locking flap on the board cable ZIF connector located on the board itself.
-
Use blunt nose tweezers to pull the cable straight out of its socket.
-
-
-
Firmly grip your device with one hand.
-
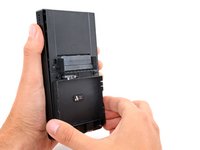
With your free hand, lift the bottom edge of the rear shell until it clears the front shell.
-
Pull the rear shell down until the sliding tabs disengage.
-
-
-
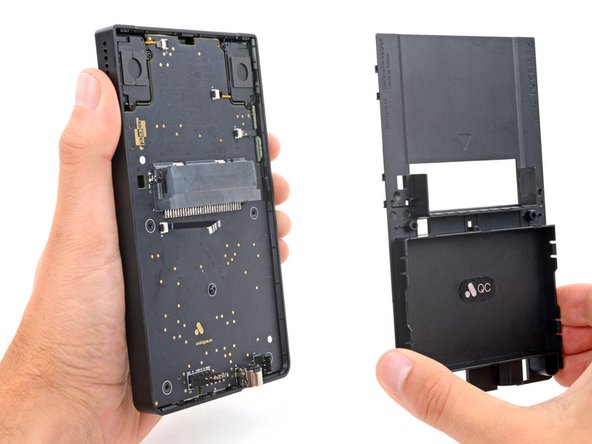
Remove the rear shell.
-
Thread the button board cable through its slot in the rear shell.
-
Lay the rear shell on the front shell so its bottom edge overhangs slightly.
-
Push the rear shell in and slide it up to engage the sliding tabs.
-
-
crwdns2935267:0crwdne2935267:0Tweezers$4.99
-
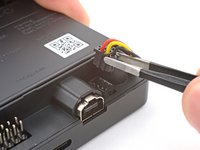
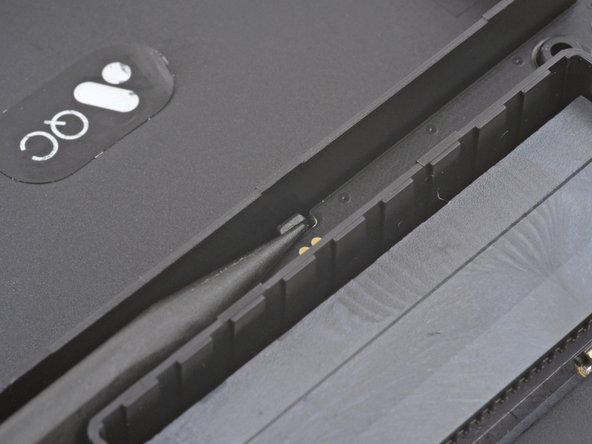
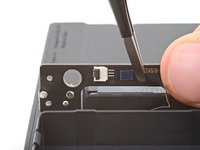
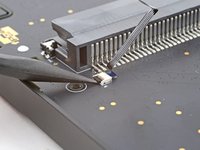
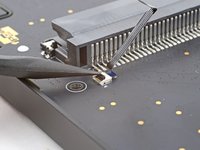
Use the tip of a spudger or a clean fingernail to flip up the hinged locking flap on the board cable ZIF connector to the bottom left of the cartridge reader.
-
Use blunt nose tweezers to pull the cable straight out of its socket.
-


To reassemble your device, follow these instructions in reverse order.
Take your e-waste to an R2 or e-Stewards certified recycler.
Repair didn’t go as planned? Try some basic troubleshooting, or ask our Answers community for help.
To reassemble your device, follow these instructions in reverse order.
Take your e-waste to an R2 or e-Stewards certified recycler.
Repair didn’t go as planned? Try some basic troubleshooting, or ask our Answers community for help.

