crwdns2933423:0crwdne2933423:0

Acer Swift X N20C12 Motherboard Replacement

crwdns2942213:0crwdne2942213:0

  1. Acer Swift X N20C12 Motherboard Replacement, Lower Case: crwdns2935265:01crwdnd2935265:01crwdnd2935265:01crwdne2935265:0
    • Use a T5 Torx screwdriver to remove the eleven screws that secure the lower case.

  2. Acer Swift X N20C12 Motherboard Replacement: crwdns2935265:02crwdnd2935265:01crwdnd2935265:01crwdne2935265:0
    • Insert an opening pick in the seam between the lower case and chassis.

    • Slide the pick around the perimeter while prying until the lower case releases.

    • Remove the lower case.

  3. Acer Swift X N20C12 Motherboard Replacement, SSD: crwdns2935265:03crwdnd2935265:01crwdnd2935265:01crwdne2935265:0
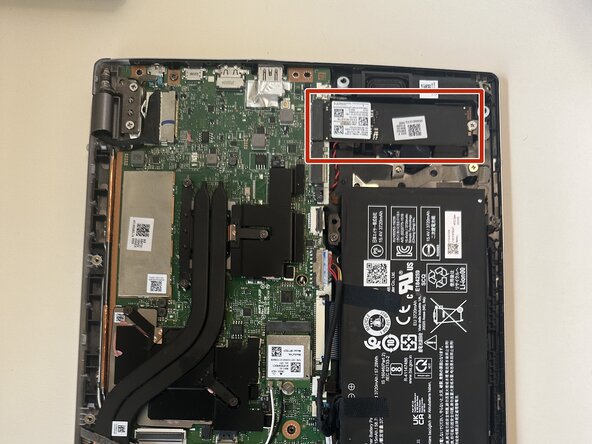
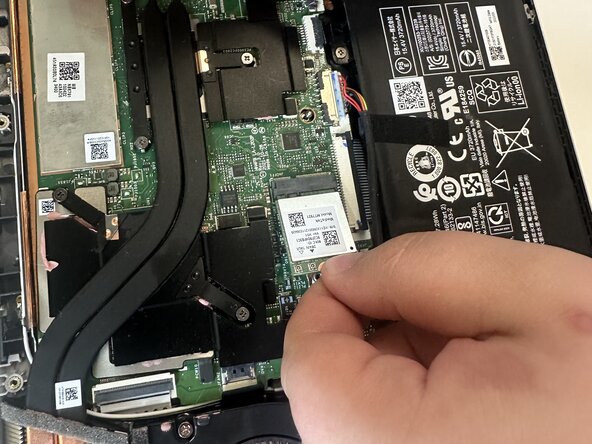
    • The SSD is located to the right of the battery.

  4. Acer Swift X N20C12 Motherboard Replacement: crwdns2935265:04crwdnd2935265:01crwdnd2935265:01crwdne2935265:0
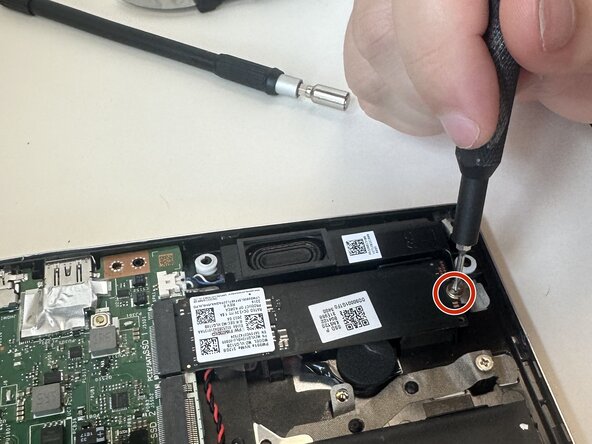
    • Use a Phillips screwdriver end to remove the 5 mm screw that secures the SSD.

  5. Acer Swift X N20C12 Motherboard Replacement: crwdns2935265:05crwdnd2935265:01crwdnd2935265:01crwdne2935265:0
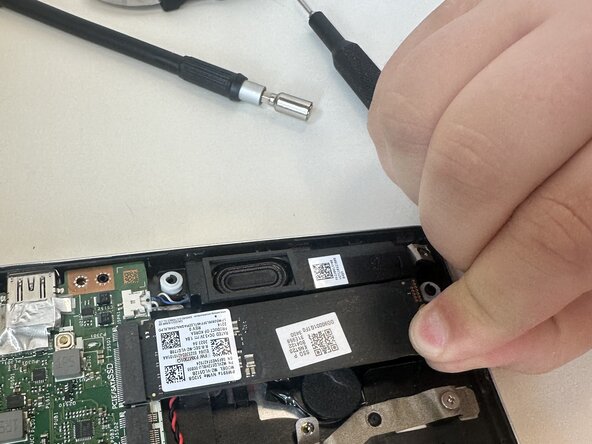
    • Gently remove the SSD from the computer by pulling it straight out of its motherboard socket.

  6. Acer Swift X N20C12 Motherboard Replacement, Wi-Fi Card: crwdns2935265:06crwdnd2935265:01crwdnd2935265:01crwdne2935265:0
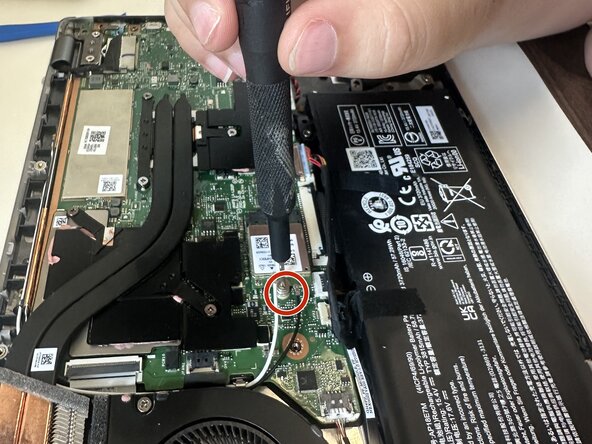
    • Use a Phillips screwdriver to remove the 5 mm screw that secures the Wi-Fi card.

  7. Acer Swift X N20C12 Motherboard Replacement: crwdns2935265:07crwdnd2935265:01crwdnd2935265:01crwdne2935265:0
    • Use the pointed end of a spudger to lift and disconnect the two Wi-Fi card antenna cables.

    • When reconnecting the black and white wires, notice the markings that indicate which color wire goes where.

    • Take the Wi-Fi card out by gently pulling it away from the motherboard connector.

  8. Acer Swift X N20C12 Motherboard Replacement, Heatsink: crwdns2935265:08crwdnd2935265:01crwdnd2935265:02crwdne2935265:0 Acer Swift X N20C12 Motherboard Replacement, Heatsink: crwdns2935265:08crwdnd2935265:02crwdnd2935265:02crwdne2935265:0
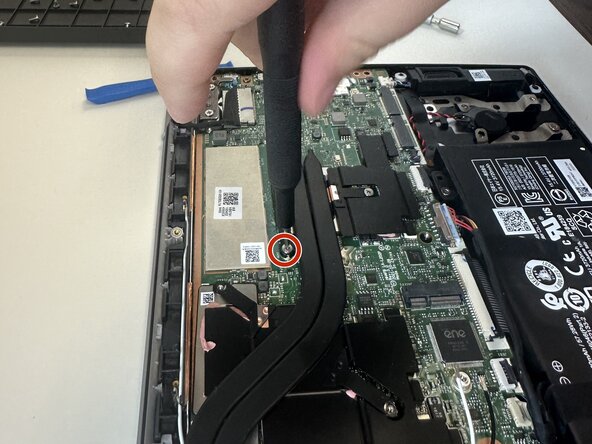
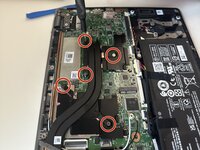
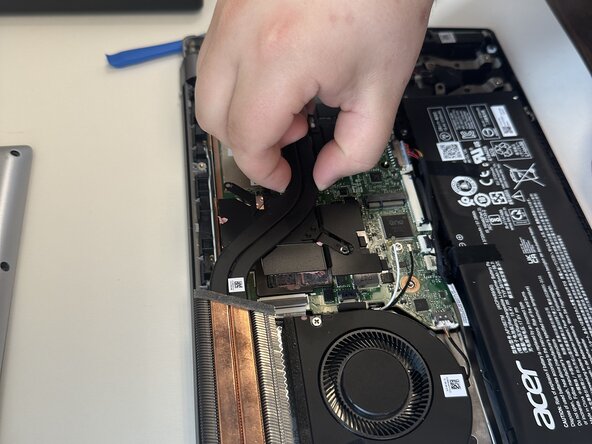
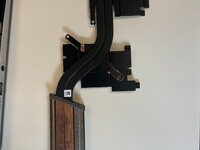
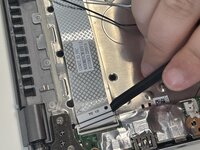
    • Use a Phillips #00 screwdriver to remove the five 5 mm screws that secure the heatsink.

    • When reinstalling the heatsink, replace the screws in the numbered order as indicated on the heatsink.

  9. Acer Swift X N20C12 Motherboard Replacement: crwdns2935265:09crwdnd2935265:01crwdnd2935265:01crwdne2935265:0
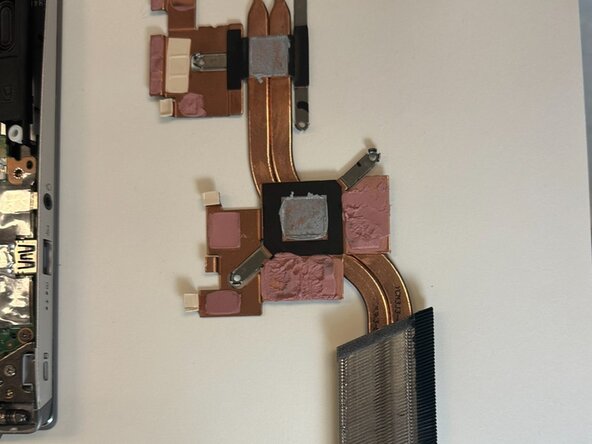
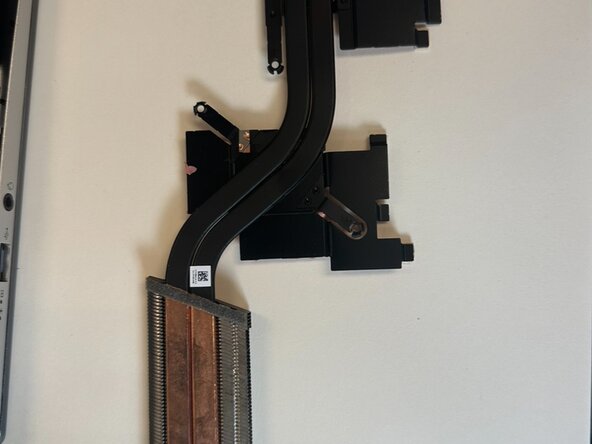
    • Hold the heatsink firmly with your fingers and lift it straight up to remove it from the laptop.

  10. Acer Swift X N20C12 Motherboard Replacement: crwdns2935265:010crwdnd2935265:01crwdnd2935265:02crwdne2935265:0 Acer Swift X N20C12 Motherboard Replacement: crwdns2935265:010crwdnd2935265:02crwdnd2935265:02crwdne2935265:0
    • Lay the heatsink with the thermal paste up so you don't stain your surface.

    • Instead of replacing, if you want to repaste the laptop, clean the thermal paste and pads off of the heatsink and motherboard components with isopropyl alcohol. Follow this guide for more information.

    • When applying the thermal paste/pads on the motherboard components, making sure not to apply too much or little. Do NOT apply the thermal paste/pads on the heatsink.

  11. Acer Swift X N20C12 Motherboard Replacement, I/O Board: crwdns2935265:011crwdnd2935265:01crwdnd2935265:01crwdne2935265:0
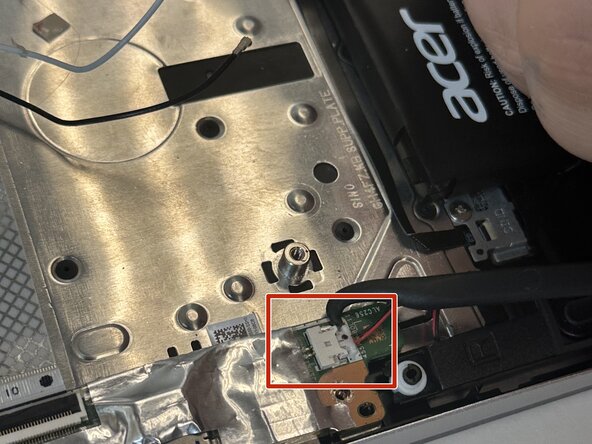
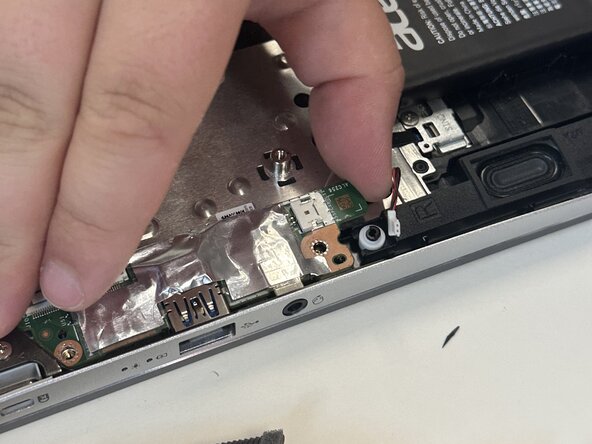
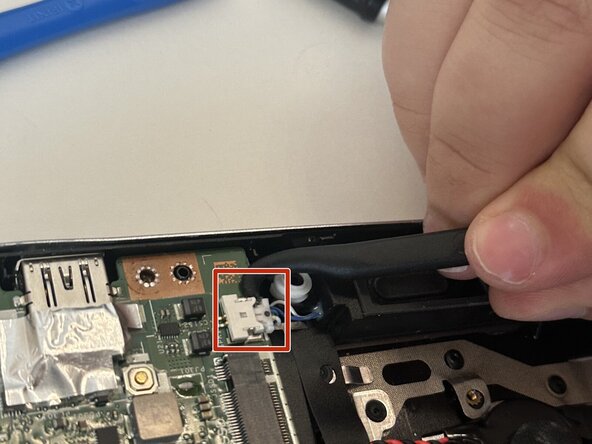
    • Gently disconnect the white I/O board connector by pulling it directly out of its socket.

    • With this type of connector, "walk" the cable out of its socket with the spudger.

  12. Acer Swift X N20C12 Motherboard Replacement: crwdns2935265:012crwdnd2935265:01crwdnd2935265:02crwdne2935265:0 Acer Swift X N20C12 Motherboard Replacement: crwdns2935265:012crwdnd2935265:02crwdnd2935265:02crwdne2935265:0
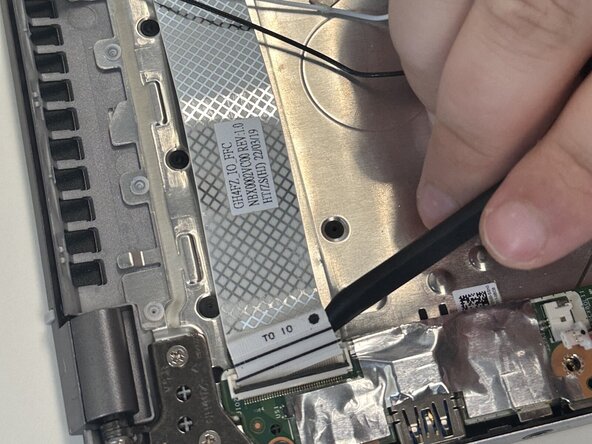
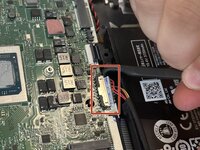
    • Use a spudger to flip up the black ZIF locking flap.

    • Disconnect the ribbon cable.

  13. Acer Swift X N20C12 Motherboard Replacement: crwdns2935265:013crwdnd2935265:01crwdnd2935265:01crwdne2935265:0
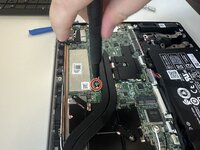
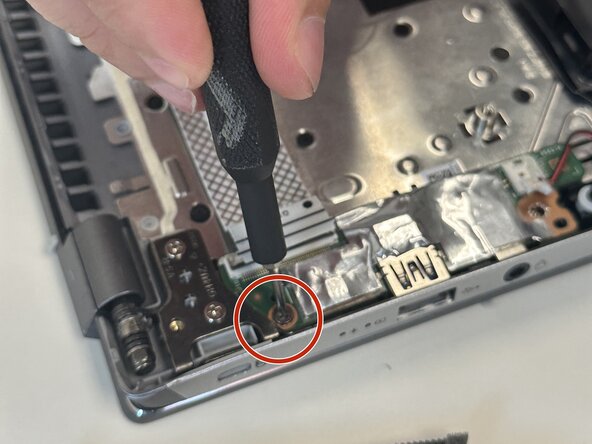
    • Remove the single 5 mm screw on the I/O board with a Phillips screwdriver.

  14. Acer Swift X N20C12 Motherboard Replacement: crwdns2935265:014crwdnd2935265:01crwdnd2935265:01crwdne2935265:0
    • Gently remove the I/O board from the laptop.

  15. Acer Swift X N20C12 Motherboard Replacement, Motherboard: crwdns2935265:015crwdnd2935265:01crwdnd2935265:01crwdne2935265:0
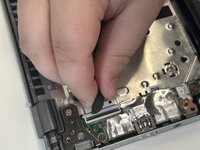
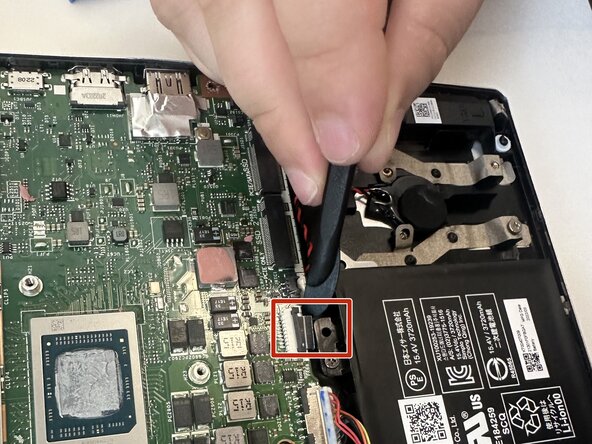
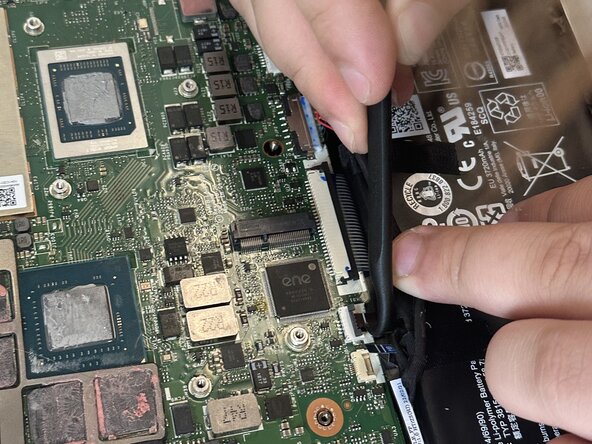
    • Use a spudger to release the black ZIF connector above the battery.

    • Disconnect the ribbon cable.

  16. Acer Swift X N20C12 Motherboard Replacement: crwdns2935265:016crwdnd2935265:01crwdnd2935265:03crwdne2935265:0 Acer Swift X N20C12 Motherboard Replacement: crwdns2935265:016crwdnd2935265:02crwdnd2935265:03crwdne2935265:0 Acer Swift X N20C12 Motherboard Replacement: crwdns2935265:016crwdnd2935265:03crwdnd2935265:03crwdne2935265:0
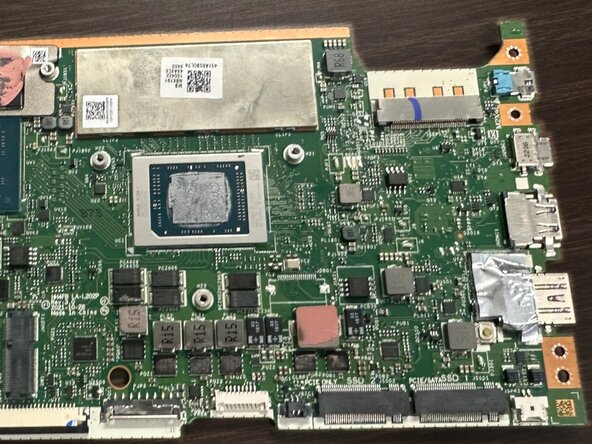
    • Disconnect the remaining cables from their motherboard sockets.

  17. Acer Swift X N20C12 Motherboard Replacement: crwdns2935265:017crwdnd2935265:01crwdnd2935265:02crwdne2935265:0 Acer Swift X N20C12 Motherboard Replacement: crwdns2935265:017crwdnd2935265:02crwdnd2935265:02crwdne2935265:0
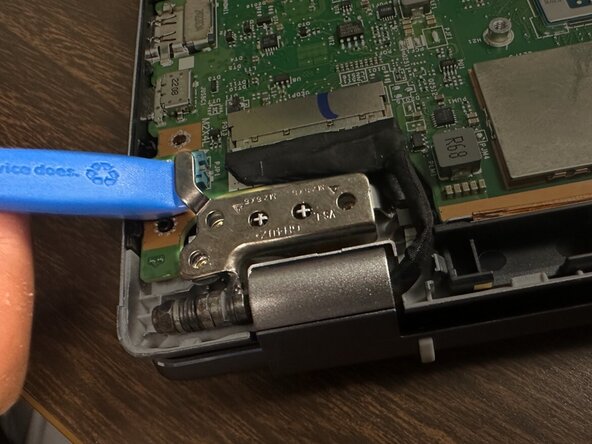
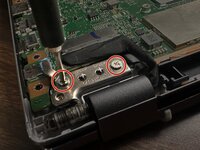
    • Remove the 5 mm screws on the two hinges with a Phillips screwdriver.

    • Lift the hinges perpendicular to the motherboard.

  18. Acer Swift X N20C12 Motherboard Replacement: crwdns2935265:018crwdnd2935265:01crwdnd2935265:01crwdne2935265:0
    • Gently lift the motherboard out.

    • You may have to wiggle it slightly since it is enclosed in a tight space.

crwdns2915888:0crwdne2915888:0

To reassemble your device, follow the above steps in reverse order.
Take your e-waste to an R2 or e-Stewards certified recycler.
Repair didn’t go as planned? Try some basic troubleshooting or ask our Answers community for help.

crwdns2935227:0crwdne2935227:0

Hector

crwdns2935283:006/17/25crwdne2935283:0

427 crwdns2915208:0crwdne2915208:0

crwdns2935297:04crwdne2935297:0

crwdns2915084:0crwdne2915084:0

Austin Community College, Team 22-3, Watkins Summer 2025 crwdns2935289:0Austin Community College, Team 22-3, Watkins Summer 2025crwdne2935289:0

AUSTINCC-WATKINS-SU25S22G3

crwdns2931471:04crwdne2931471:0

crwdns2935297:05crwdne2935297:0

crwdns2947412:00crwdne2947412:0

crwdns2917038:0crwdne2917038:0

crwdns2936625:0crwdne2936625:0:

crwdns2936751:024crwdne2936751:0 3

crwdns2936753:07crwdne2936753:0 11

crwdns2936753:030crwdne2936753:0 61

crwdns2942667:0crwdne2942667:0 100