crwdns2915892:0crwdne2915892:0
Do not proceed with this guide unless you are prepared to clean and re-apply thermal compound. For more information, please refer to the How to Clean and Apply Thermal Compound guide.
crwdns2942213:0crwdne2942213:0
-
-
Close down the display and flip the device upside down.
-
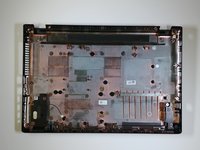
Use a Phillips #1 screwdriver to remove 18 black 10mm Phillips Head screws in order to loosen up the protective bottom casing.
-
-
-
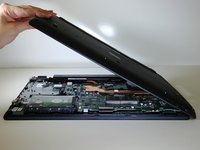
With the screws removed, flip the device right-side up and open up the display.
-
Run a plastic spudger tool along the seam of the face-plate in order to loosen up the protective bottom casing.
-
-
-
Close the display down once more, and flip the laptop upside down, with the hinge facing away from you.
-
Taking note of the small speaker wire, gently lift only the left side of the bottom casing.
-
-
crwdns2935267:0crwdne2935267:0Tweezers$4.99
-
Using a pair of blunt tweezers, push on the tabs of the small white connector to separate it from the motherboard.
-
-
-
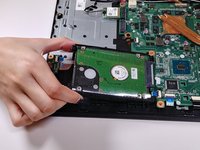
Using the plastic tabs, lift the hard drive slightly and pull to the left.
-
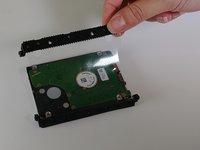
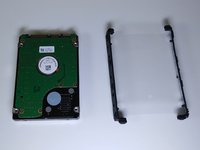
Remove the rubber mounting brackets from the hard drive.
Thank you for the post. This is exactly what I needed. My laptop however doesn't have the plastic mounting bracket. And I can't find the part number or the equivalent part. Anything I find belongs to other Acer models and seem to be a diff size. Would you be kind enough to mention the part number , or a link to it online , or at the dimension of the bracket
-
-
-
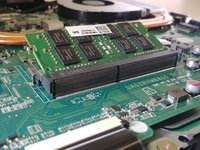
Locate the memory modules at the bottom right quadrant of the motherboard. The two memory modules are slightly stacked on top of each other.
-
Using both hands, pull the clasps away simultaneously in order to release the memory modules.
-
-
-
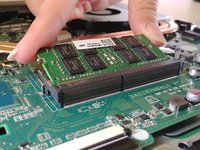
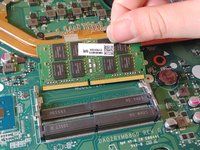
To remove the top memory module, lift the module slightly up and pull away.
-
Repeat the previous step to remove the bottom memory module.
-
-
-
-
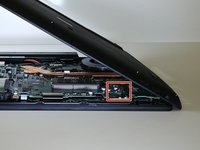
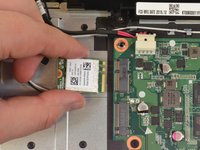
Locate the wireless card on the top left quadrant. It should have two antenna cables connected to it, one white and one black.
-
-
crwdns2935267:0crwdne2935267:0Tweezers$4.99
-
With a pair of blunt tweezers, firmly grasp each antenna head and detach it by lifting straight up.
-
-
-
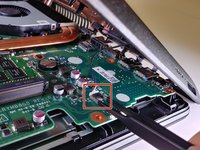
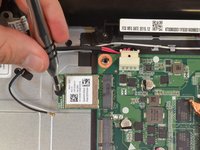
Using a Phillip Head size 1 screwdriver, remove the screw attaching the wireless card to the laptop frame.
-
To detach the wireless card, lift up slightly and pull away.
-
-
-
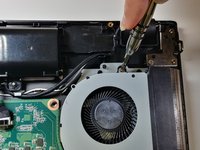
Use a Phillips Head size #1 screwdriver to remove the two silver-colored 10mm Phillips Head screws securing the fan to the motherboard.
-
-
crwdns2935267:0crwdne2935267:0Tweezers$4.99
-
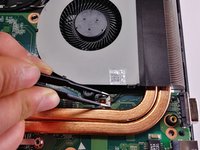
Use a pair of blunt tweezers to gently push on the 3-pin connector. This disconnects the fan from the motherboard.
-
-
-
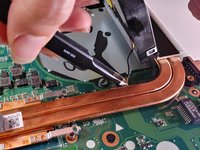
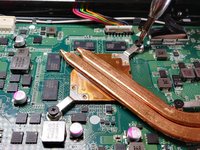
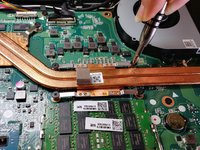
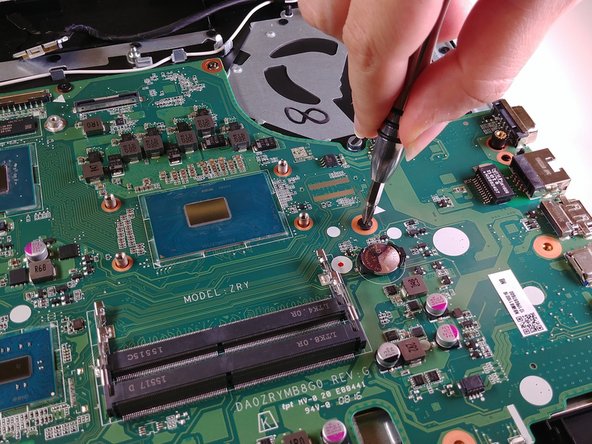
Use a Phillips #1 screwdriver to remove 6 black 10mm Phillips Head screws that connect the copper heat-sink to the motherboard.
-
-
-
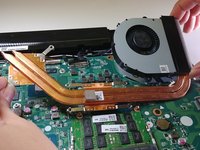
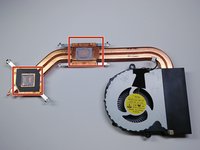
Using both hands, gently lift the heat-sink and fan components from the motherboard.
-
-
-
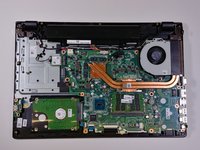
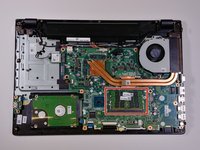
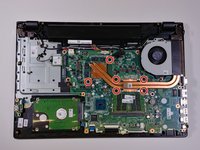
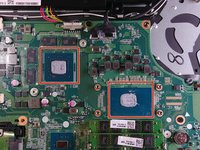
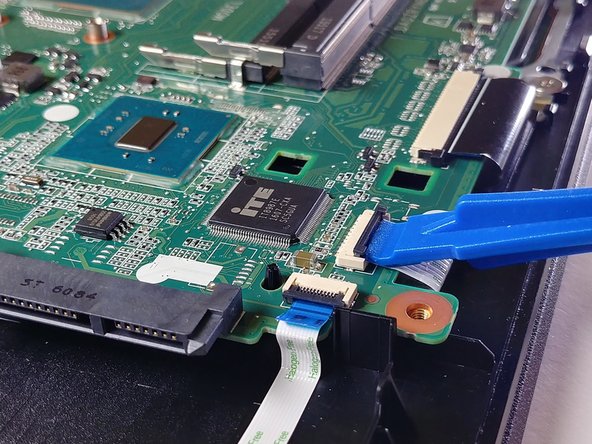
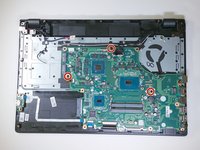
With all major components removed, proceed to locate the connectors marked on the photograph:
-
Power jack harness connector.
-
Ribbon cables.
-
Display cable connector.
-
Keyboard connector.
-
-
crwdns2935267:0crwdne2935267:0Tweezers$4.99
-
Disconnect the power jack harness from the motherboard by pushing on the tabs with a pair of blunt tweezers.
-
Use a plastic opening tool to pry open the locks, then pull the ribbon cables out.
-
-
-
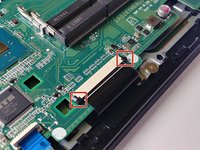
The ribbon cables have small locks securing them in place.
-
Use a plastic opening tool to pry the locks up. Once unlocked, simply pull the cables out.
-
-
-
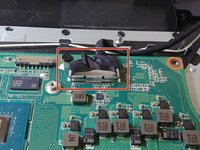
The display cable connects the motherboard to your laptop's monitor. It has a small tab lock on it.
-
Use a plastic opening tool to pry the tab lock up.
-
Use the plastic ears on top of the cable to head to disconnect the display cable from the motherboard.
-
-
-
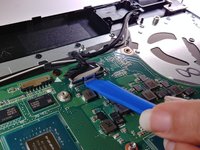
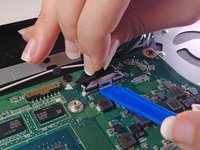
To disconnect the wide ribbon cable, use your fingers to pull back the black tab until it is loose.
-
Slide out the black plastic tab from beneath the ribbon cable.
-
Once the plastic tab is out, simply pull out the wide ribbon cable.
-
-
-
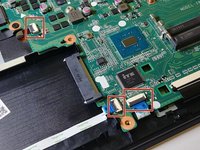
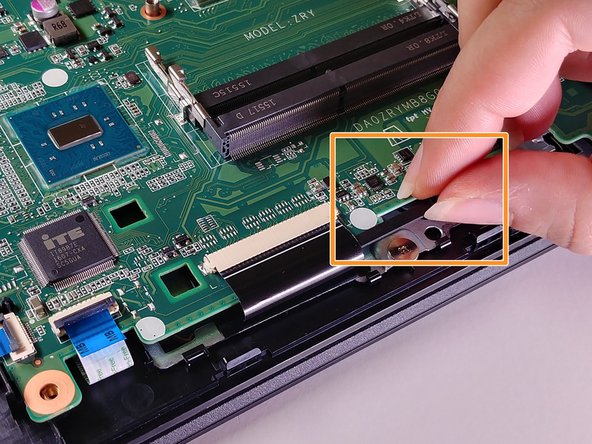
Use a Phillips #1 screwdriver to remove the 3 black 10mm Phillips Head screws securing the motherboard to the face-plate of the device.
-
-
-
Lift the motherboard gently to completely remove this component from the device.
-


You can follow the steps in reverse to reassemble your device, but you should not re-seat the heat sink and fan without cleaning and re-applying the thermal compound.
You can follow the steps in reverse to reassemble your device, but you should not re-seat the heat sink and fan without cleaning and re-applying the thermal compound.
crwdns2935221:0crwdne2935221:0
crwdns2935229:02crwdne2935229:0

crwdns2915084:0crwdne2915084:0

UW Tacoma, Team S3-G5, Liner Fall 2017 crwdns2935289:0UW Tacoma, Team S3-G5, Liner Fall 2017crwdne2935289:0
UWT-LINER-F17S3G5
crwdns2931471:04crwdne2931471:0
crwdns2935297:018crwdne2935297:0
crwdns2947412:02crwdne2947412:0
Is it necessary to remove everything especially heat sink if I want to replace only keyboard?
Where do you purchase the motherboard?