crwdns2915892:0crwdne2915892:0
The screen is half of the computer, allowing you to see anything that is accessed and making the laptop usable. If you see improper colors or if it is completely black when turned on, then it could need a screen replacement. Although a relatively easy fix, the replacement is a little involved. Before opening up the laptop, ensure that it is powered off for at least 30 seconds and unplugged from anything else.
crwdns2942213:0crwdne2942213:0
-
-
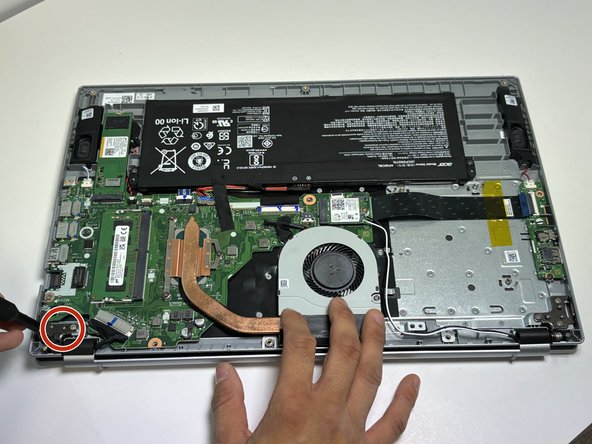
Remove the eleven 7 mm Phillips screws that secure the lower case.
-
-
-
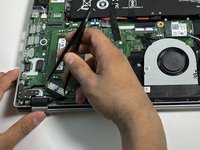
Insert an opening tool into the seam between the lower case and chassis.
-
Pry along the perimeter until the lower case releases.
-
Lift off the lower case.
-
-
-
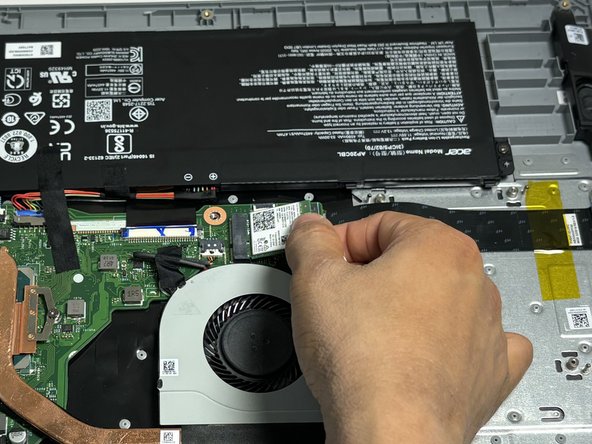
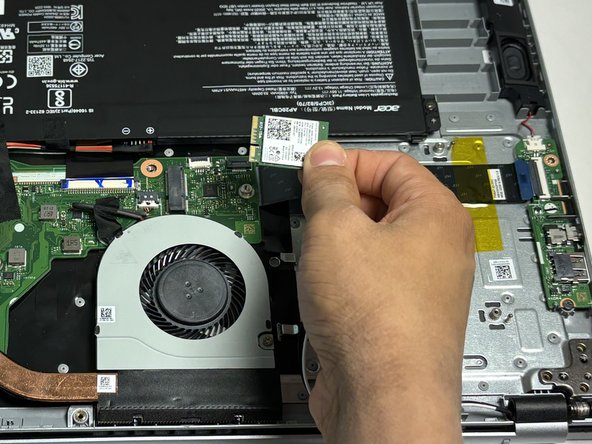
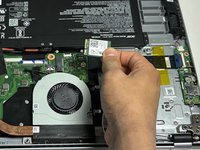
Use an opening tool to lift and disconnect the Wi-Fi card antenna cables.
-
Remove the single 2 mm Phillips screw that secures the Wi-Fi card.
-
Pull the Wi-Fi card directly out of its socket.
-
-
-
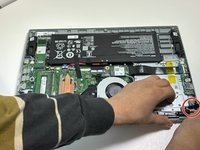
Remove the six 4 mm Phillips screws that secure the hinges.
-
-
-
-
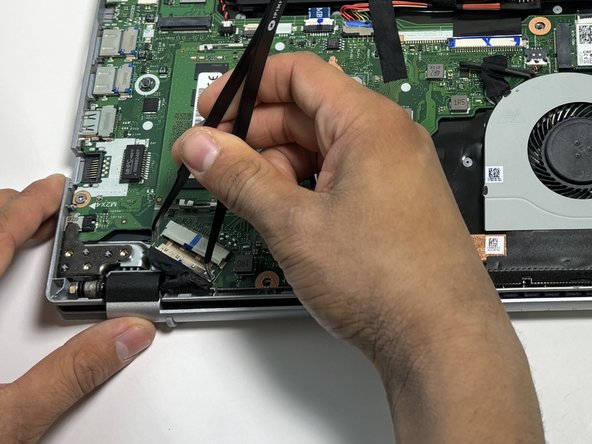
Use tweezers to grab both ends of the display connector.
-
Pull the connector directly out of its socket.
-
-
-
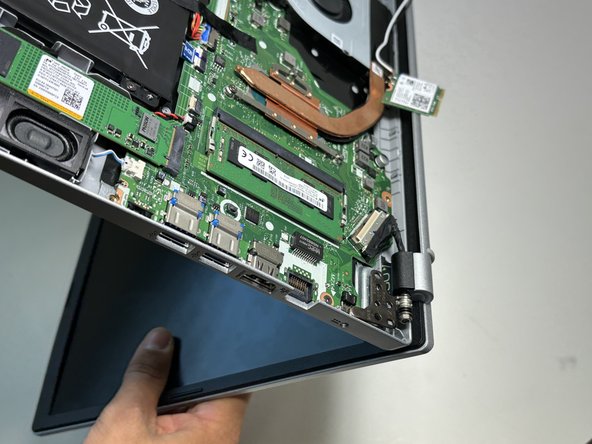
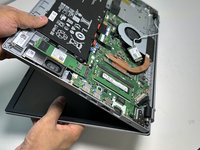
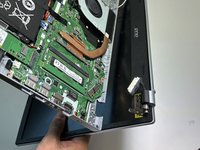
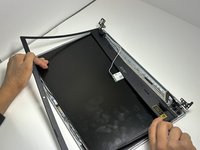
Lift the laptop and gently separate the display assembly from the lower chassis.
-
-
-
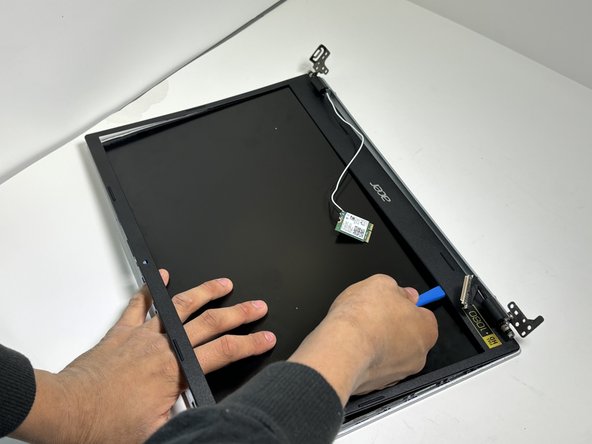
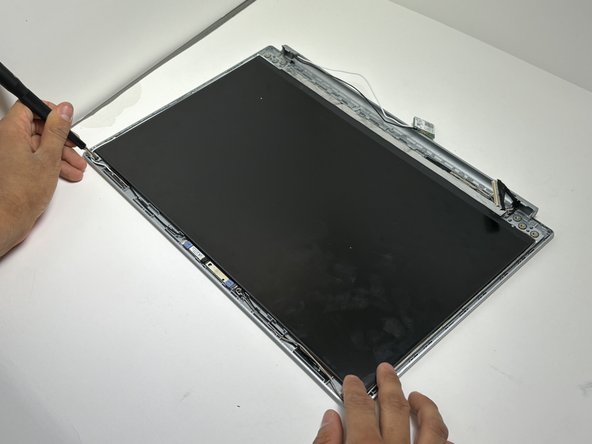
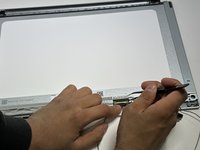
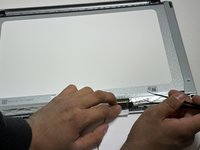
Insert an opening tool between the bezel and display
-
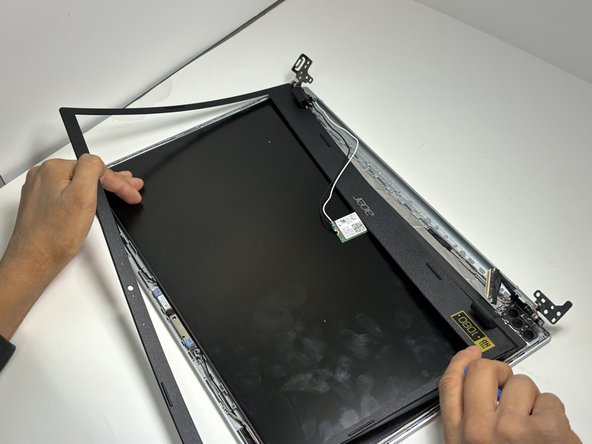
Pry around the entire perimeter of the screen until the bezel releases.
-
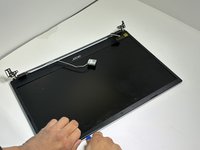
Pull the bezel away from the hinges to remove it.
-
-
-
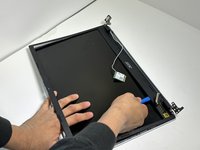
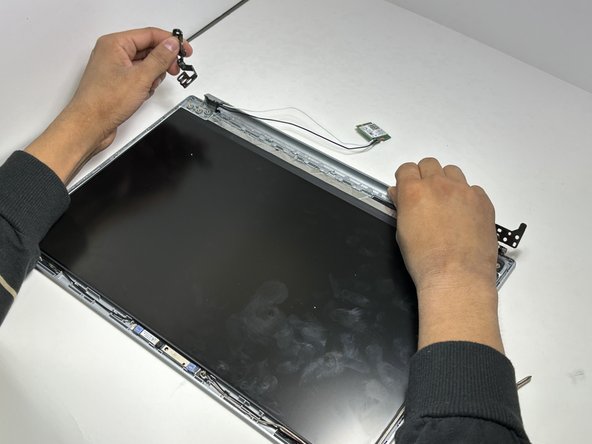
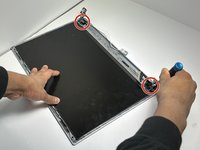
Remove the six 3 mm Phillips screws that secure the two hinges.
-
-
-
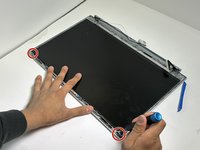
Remove the two 3 mm Phillips screws on the bottom left and right corner of the screen.
-
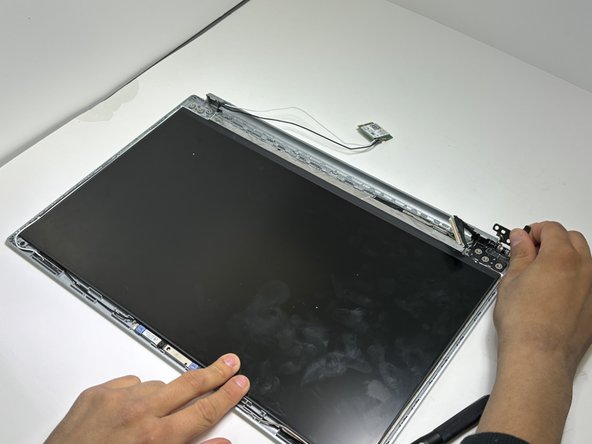
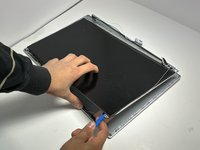
Use an opening tool to separate the display from the display assembly.
-
-
-
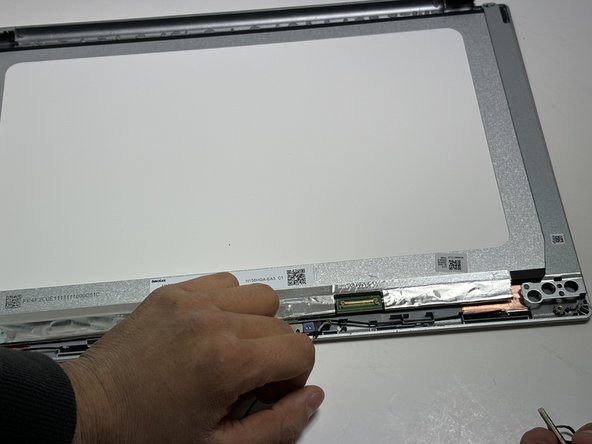
Use the tweezers to lift brass display connector hinge.
-
Pull the display connector directly out of its socket.
-
Remove the display.
-


To reassemble your device, follow these instructions in reverse order.
To reassemble your device, follow these instructions in reverse order.
crwdns2935221:0crwdne2935221:0
crwdns2935229:02crwdne2935229:0

crwdns2915084:0crwdne2915084:0

Austin Community College, Team 9-1, Watkins Spring 2024 crwdns2935289:0Austin Community College, Team 9-1, Watkins Spring 2024crwdne2935289:0
AUSTINCC-WATKINS-S24S9G1
crwdns2931471:04crwdne2931471:0
crwdns2935297:012crwdne2935297:0
crwdns2947410:01crwdne2947410:0
Hi Evan,
Thanks for the walkthrough, I was able to get the screen replaced. I did want to call out Step 4 as a tripping point for me. Since you disassembled or....shopped the image (for ease of display I'm sure) the mainboard monitor hinge screws in the image show all three screws in place with the case removed.
The screw holes with the large X in your images are actually two of the exterior case screws. so showing them in place without the case on made me search for two missing screws for about an hour. Not complaining but I wanted to help anyone else who might get caught on that part.