crwdns2915892:0crwdne2915892:0
If your Acer Aspire 3 A315-24PT-R288 Screen is black or cracked or otherwise broken this guide is for you. In this guide we will go over the 7 steps to take off the screen on the Acer Aspire 3 A315-24PT-R288 to replace it.
crwdns2942213:0crwdne2942213:0
-
-
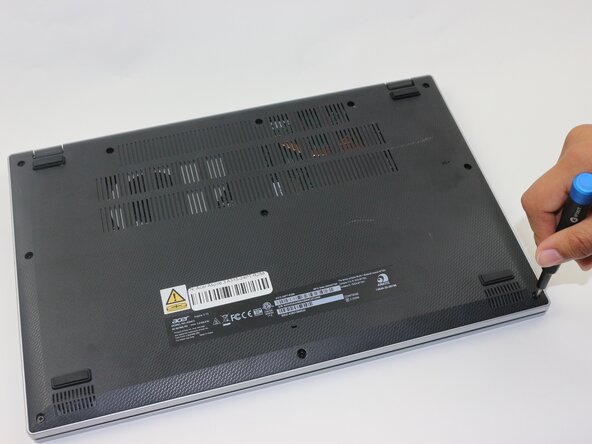
Use a Phillips screwdriver to remove the eleven 2 mm screws that secure the lower case.
-
-
-
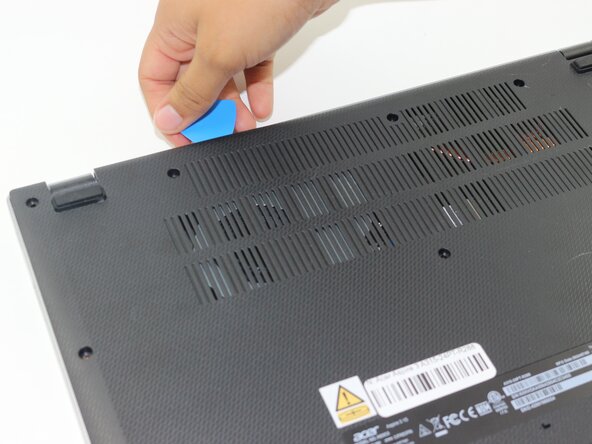
Insert an opening pick in the seam between the chassis and the lower case.
-
Slide the opening pick around the entire perimeter, prying every couple of centimeters, to release all of the retaining clips that secure the lower case.
-
Remove the lower case.
-
-
-
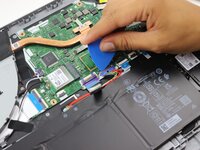
Remove the tape on the battery connector using tweezers or your fingers.
-
-
-
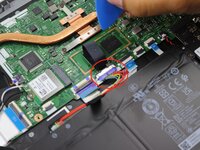
Use an opening pick or the flat end of a spudger to gently push the battery connector out of its motherboard socket.
-
-
-
-
Flip the laptop over and open the lid.
-
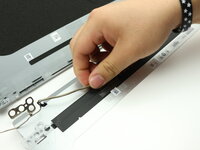
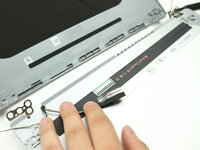
Insert an opening pick in the seam between the bezel and screen.
-
Pry around the entire perimeter of the bezel to release the clips.
-
Remove the bezel.
-
-
-
Remove both of the 2 mm screws at the top-left and top-right corners of the screen.
-
-
-
Remove the eight 3 mm screws that secure the hinge to the display assembly.
-
-
-
Disconnect the small press connector on the top-left side of the screen.
-
-
-
Dislodge the cords from their retaining hooks.
-
-
-
Gently lift the screen away from the display assembly, with care not to strain the connected cables.
-
-
-
Lay down the screen flat with the back facing you.
-
Flip up the display connector locking bar.
-
Pull the display connector directly out of its socket.
-
Remove the screen.
-


To reassemble your device, follow the above steps in reverse order.
Take your e-waste to an R2 or e-Stewards certified recycler.
Repair didn’t go as planned? Try some basic troubleshooting or ask our Answers community for help.
To reassemble your device, follow the above steps in reverse order.
Take your e-waste to an R2 or e-Stewards certified recycler.
Repair didn’t go as planned? Try some basic troubleshooting or ask our Answers community for help.
crwdns2935221:0crwdne2935221:0
crwdns2935227:0crwdne2935227:0
crwdns2915084:0crwdne2915084:0

Sam Houston State, Team 17-5, Thornton Spring 2025 crwdns2935289:0Sam Houston State, Team 17-5, Thornton Spring 2025crwdne2935289:0
SHSU-THORNTON-S25S17G5
crwdns2931471:03crwdne2931471:0
crwdns2935297:05crwdne2935297:0