crwdns2915892:0crwdne2915892:0
The motherboard of a ASUS Transformer Book Flip TP500LA allows all of the components of a computer, such as memory, storage, and the central processing unit (CPU) to communicate with each other. If your ASUS Transformer Book Flip TP500LA does not boot up, frequently freezes, randomly shuts down, or has a blue screen with text saying “critical error,” the motherboard might be faulty and in need of replacement.
Before replacing the motherboard, rule out other possible causes of these problems. This process requires opening up the device, so be cautious about any parts because some components are sensitive to accidental damage. Also, be cautious of encountering a swollen battery (which could be an alternative cause of the issues), because removal can be dangerous.
Before beginning this guide, power off the device and unplug any external cables.
crwdns2942213:0crwdne2942213:0
-
-
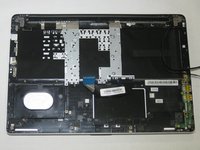
Remove the ten 10 mm Phillips #0 screws found on the computer's back case.
-
-
crwdns2935267:0crwdne2935267:0Heavy-Duty Spudger$4.99
-
Slide a heavy-duty spudger between the back case and the computer.
-
Slowly work around the edges to undo the clips to fully separate the back case from the computer.
-
Gently lift off the back case.
-
-
crwdns2935267:0crwdne2935267:0Heavy-Duty Spudger$4.99
-
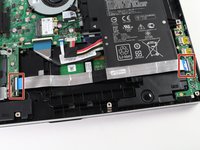
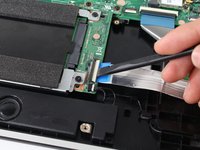
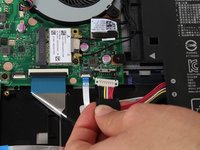
Slide a heavy-duty spudger into the ZIF connector and gently flip up the retaining flap to open the connector.
-
Pull the blue tab to remove the ribbon.
-
-
-
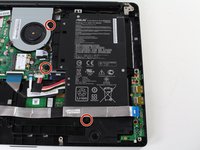
Remove the three 5 mm Phillips #0 screws.
-
Remove the single 6 mm Phillips #0 screw.
-
-
-
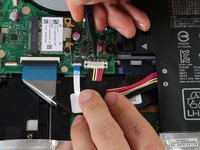
Use the heavy-duty spudger to pry the white 8-pin connector away from the motherboard.
-
Gently pull the connector away from the motherboard.
-
-
-
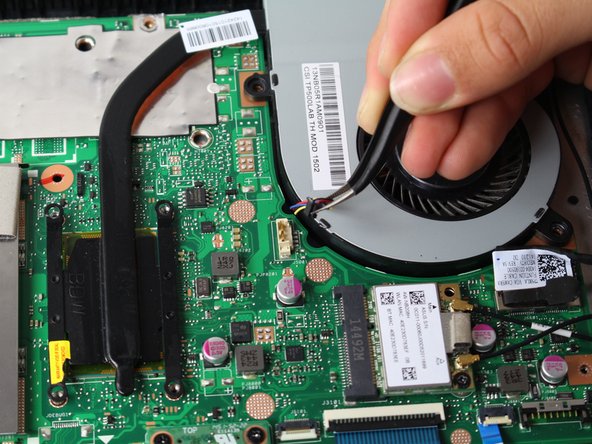
Use the blue plastic opening tool to loosen and remove the three black wires from the battery.
-
Slide the battery out from the computer to remove.
-
-
-
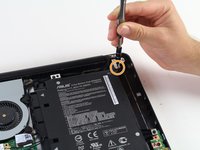
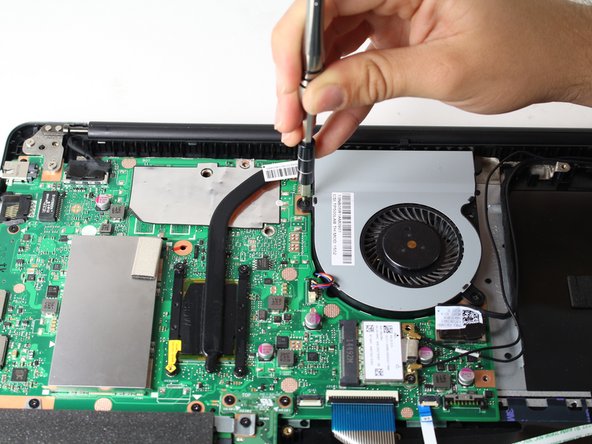
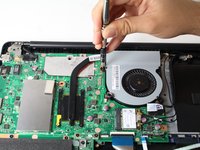
Unscrew the six 5 mm Phillips #0 screws.
-
-
crwdns2935267:0crwdne2935267:0Tweezers$4.99
-
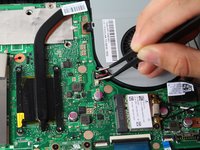
Grasp the top of the 3-pin connector with tweezers.
-
Wiggle the connector until it loosens itself from the motherboard.
-
Gently lift the connector from the motherboard attachment.
-
-
-
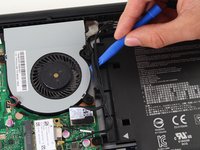
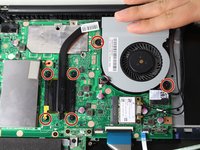
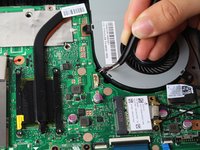
Carefully lift the fan off the motherboard.
-
-
-
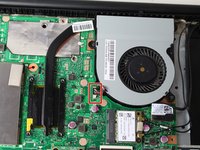
Disconnect the two display cables from the motherboard.
-
-
-
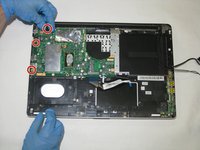
Using the Phillips #0 screwdriver, remove the three screws holding the motherboard to the rest of the device.
-
-
-
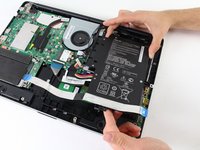
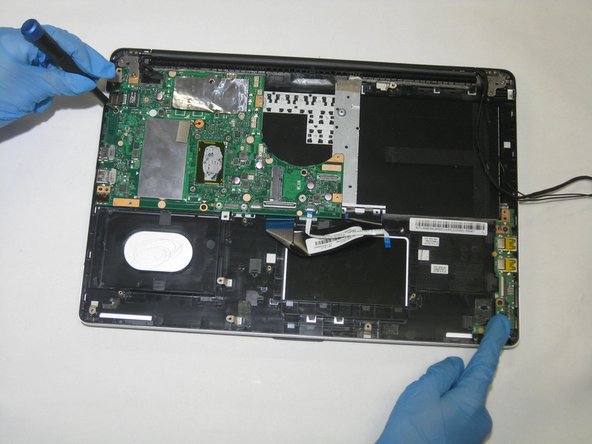
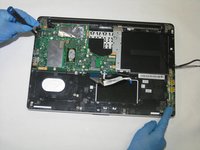
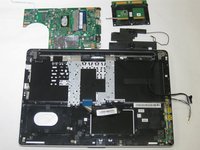
Remove the motherboard from the device.
-


To reassemble your device, follow these instructions in reverse order. Take your e-waste to an R2 or e-Stewards certified recycler.
crwdns2935287:0crwdne2935287:0

The Citadel Military College of South Carolina, Team S3-G3, Eggleston Spring 2021 crwdns2935289:0The Citadel Military College of South Carolina, Team S3-G3, Eggleston Spring 2021crwdne2935289:0
CMCSC-EGGLESTON-S21S3G3
crwdns2931471:03crwdne2931471:0
crwdns2935297:03crwdne2935297:0