crwdns2915892:0crwdne2915892:0
This is the ASUS Chromebook (Model C424MA-DH48F), here we will be guiding you though replacing the touch pad, also known as the mouse pad, for the ASUS Chromebook.
You will need to remove the battery first to access the connectors and screws for the touchpad.
Reasons to replace the touch pad include:
- Physical damage
- Erratic behavior
- Water damage
crwdns2942213:0crwdne2942213:0
-
-
Use a Phillips #0 screwdriver to remove the eleven 6.9 mm screws that secure the lower case.
-
Insert an opening pick into the gap between the lower case and chassis.
-
Slide the pick around the entire perimeter of the laptop until the lower case fully releases.
-
Remove the lower case.
-
-
-
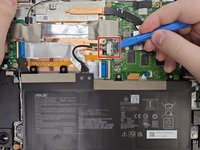
Use an opening tool to pop up the silver locking bar securing the battery connector.
-
Push the battery connector directly out of its motherboard port.
-
-
-
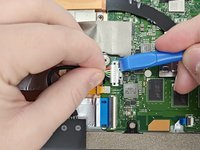
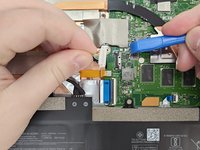
Carefully use the plastic prying tool and pop up the locking bar and lift the connector off with your hand.
-
-
-
-
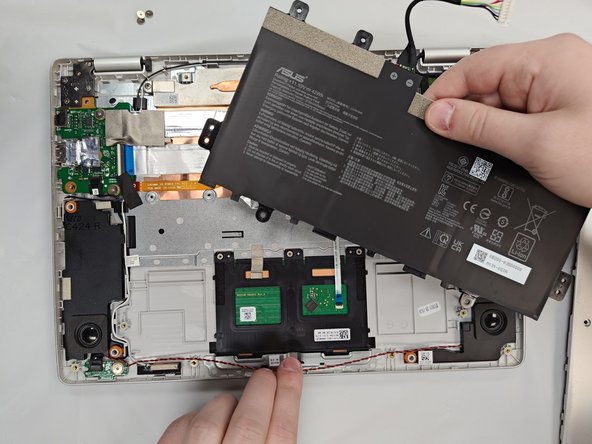
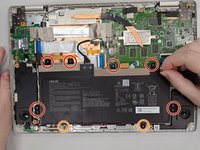
Use a Phillips #0 screwdriver to remove the six 4.1 mm screws that secure the battery.
-
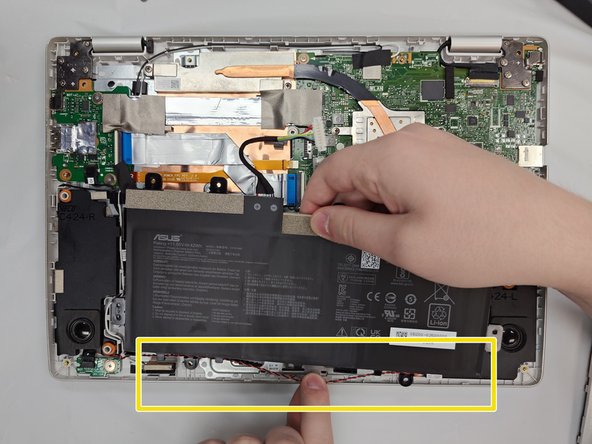
Unseat the speaker cable from the black plastic hooks on the lower side of the battery.
-
Lift the battery up and out of the chassis.
-
-
-
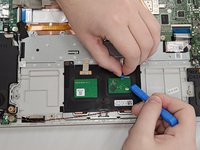
Use a Phillips #000 screwdriver to remove the three 1.9 mm screws that secure the touchpad.
-
-
-
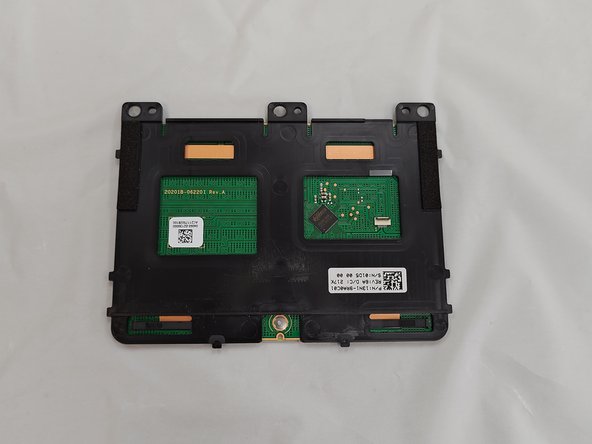
Carefully peel off the gray tape on the touchpad.
-
-
-
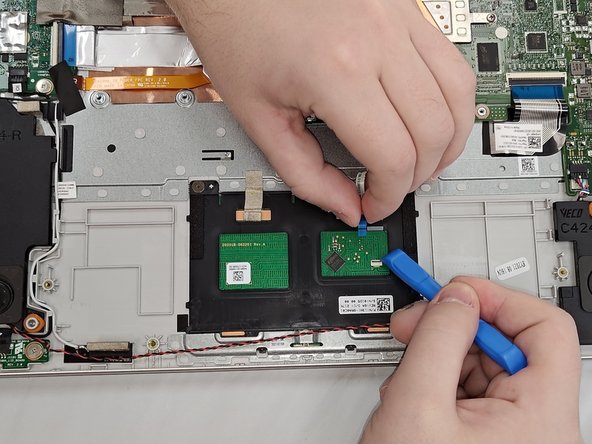
Use an opening tool to flip up the black ZIF locking flap that secures the ribbon cable connector to the touchpad.
-
Pinch both sides of the ribbon cable connector and gently pull straight back to disconnect the touchpad.
-
-
-
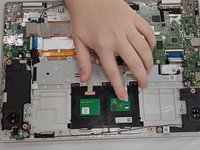
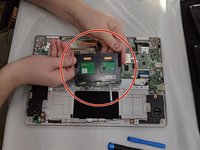
Lift the touchpad up and out of the chassis.
-


To reassemble your device, follow the above steps in reverse order.
Take your e-waste to an R2 or e-Stewards certified recycler.
Repair didn’t go as planned? Try some basic troubleshooting, or ask our Steam Deck answers community for help.

crwdns2935287:0crwdne2935287:0

University of North Texas, Team 1-6, Kilpatrick Fall 2024 crwdns2935289:0University of North Texas, Team 1-6, Kilpatrick Fall 2024crwdne2935289:0
UNT-KILPATRICK-F24S1G6
crwdns2931471:04crwdne2931471:0
crwdns2935297:05crwdne2935297:0