crwdns2915892:0crwdne2915892:0
If your 2002-2006 CR-V's fans are no longer blowing air when your air conditioning or heater is engaged then your vehicle may be suffering from a dead/faulty blower motor. This part tends to go bad with time and as these vehicles are getting to be at least 20 years old, this is becoming an increasingly common problem. This guide will focus on providing easy-to-follow instructions on how to replace your vehicle's blower motor.
The blower motor is responsible for blowing air out of the vents when using the vehicle's air conditioning or heater. It is important to make sure you have a functioning blower motor especially if you live in very cold or very hot climates. An addiotional function of the blower motor is blow air across the front windshield and is how the defroster/defogger on this vehilce functions. Without a functional blower motor driving not only becomes uncomfortable, but dangerous as well as you may have limited visability.
In step 8 of this guide you will have to disconnect the wiring harness from the blower motor. To ensure safety, please turn your vehicle off before starting with this guide.
crwdns2942213:0crwdne2942213:0
-
-
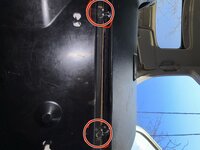
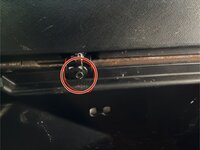
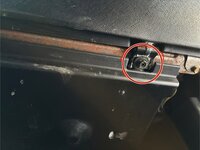
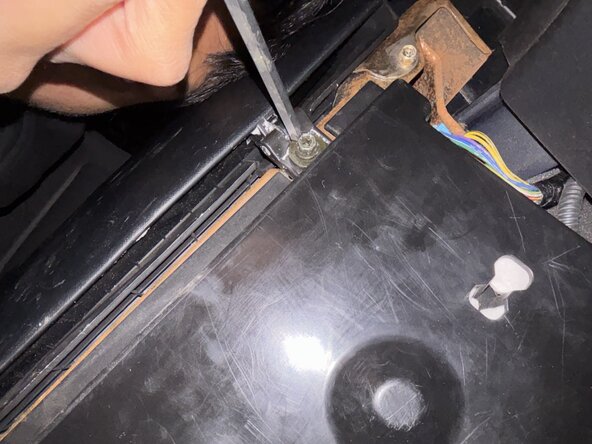
Remove the two 20 mm Phillips #3 screws under the glove box on the passenger side of the vehicle.
-
-
-
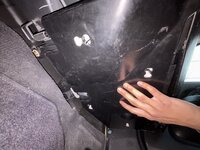
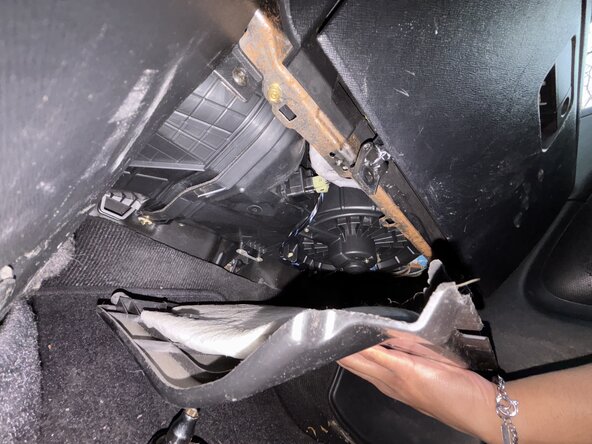
Push the panel up and back to remove it.
-
The panel will fall out, revealing the blower motor underneath.
-
-
-
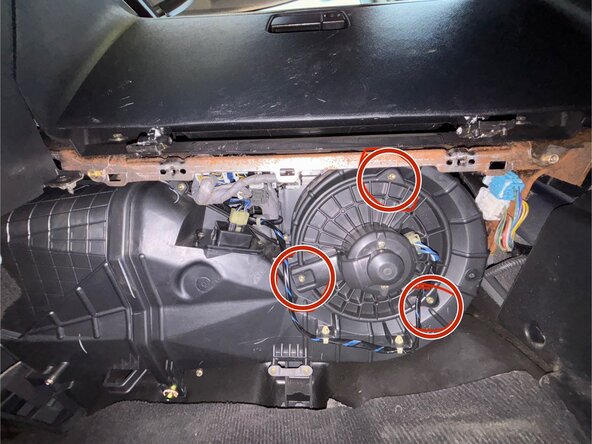
Locate the three 20 mm T20 Torx screws found on the blower motor.
-
-
-
Use a T20 Torx screwdriver to remove the three 20 mm screws securing the blower motor.
-
-
-
-
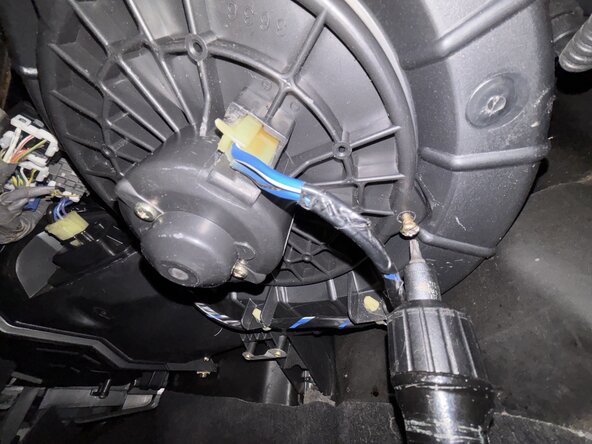
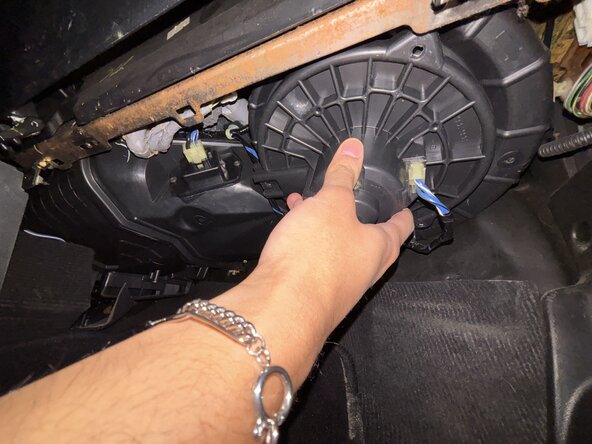
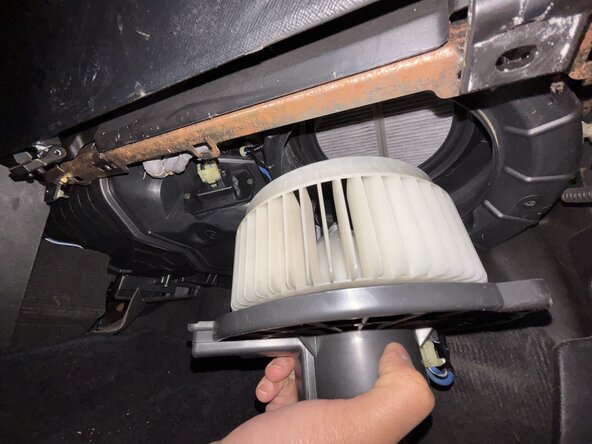
Pull the blower motor out of its housing, with care not to strain the connected wire bundle.
-
-
-
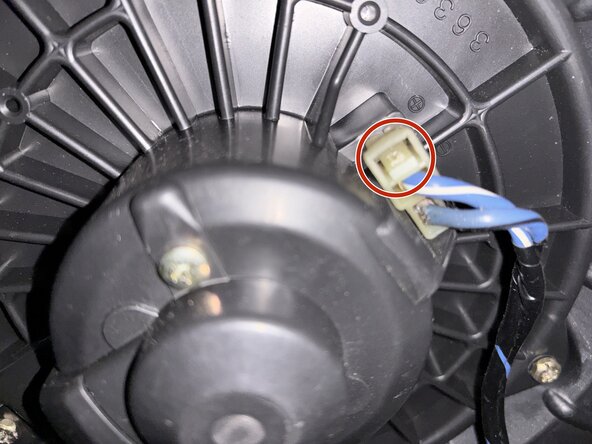
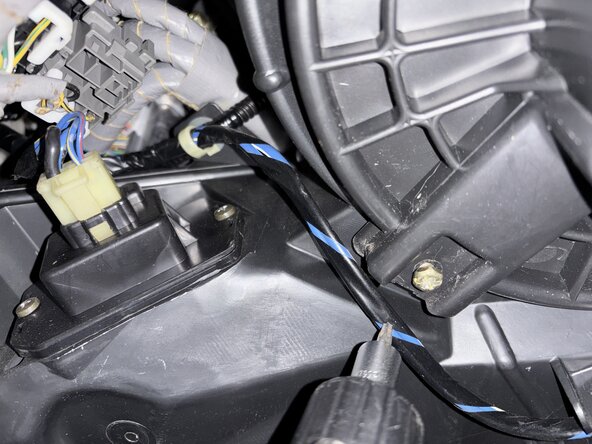
Push on the tab to release the wire harness connector.
-
Disconnect the wire harness connector.
-
-
-
Set the new blower motor back into its housing.
-
-
-
Fasten the three 20 mm T20 Torx screws back into the blower motor to resecure it.
-
-
-
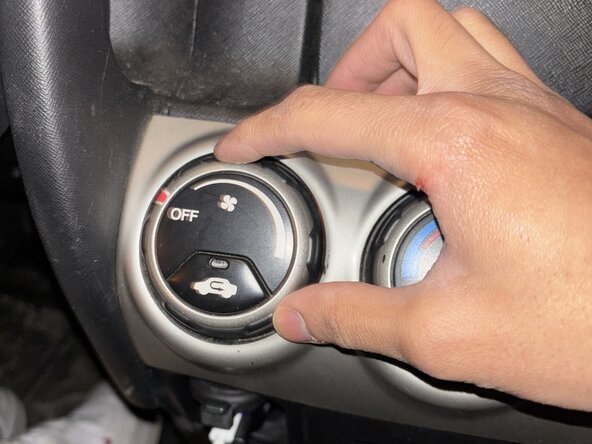
Run the fans in the car to test to see if the blower motor is functional.
-
-
-
Push the panel back up into place, making sure it holds itself up.
-
-
-
Use an 8 mm wrench or a Phillips screwdriver to replace the two 20 mm screws that secure the panel.
-


crwdns2915084:0crwdne2915084:0

York University, Team 5-4, Woodhouse Winter 2025 crwdns2935289:0York University, Team 5-4, Woodhouse Winter 2025crwdne2935289:0
YORK-WOODHOUSE-W25S5G4
crwdns2931471:02crwdne2931471:0
crwdns2935303:01crwdne2935303:0