crwdns2933423:0crwdne2933423:0

PS4 Controller model CUH-ZCT1. Released in November 2013 by Sony Computer Entertainment, this six-axis, 3.7 V lithium ion battery controller is uncomplicated to repair. (NOTE: Teardown guide is NOT for this model)

PS4 still has stick drift after joystick module replacement

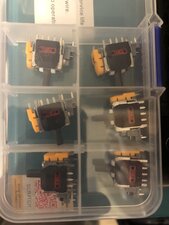
Help! I have changed both the joystick modules on my ps4 controller, I got the modules from eBay. It all works but it appears that the drift is still there which is completely bizarre.

I did find a calibration tool online that I thought had worked but when you unplug and plug the controller back in and check gamepad tester the drift is still there, I’m not certain the drift is exactly the same as it was before with the old joysticks but I’ve got my suspicions that it is.

Help please, it took me ages to change these modules and I just want it to be fixed so I can fix up some more 😀

Thanks!!!

Block Image
Block Image
Block Image
Block Image
Block Image
Block Image
Block Image
crwdns2934089:0crwdne2934089:0 crwdns2934093:0crwdne2934093:0

crwdns2934109:0crwdne2934109:0

crwdns2889612:0crwdne2889612:0 0
crwdns2934285:0crwdne2934285:0

crwdns2933313:01crwdne2933313:0

Hi Luke!

It's more likely that the new joysticks are broken too. But, it's also possible that a trace on the motherboard is damaged and causing this.

First, please inspect the motherboard to check if all the traces are OK (especially the traces near the joysticks, where you have soldered/desoldered).

If those are all OK (when in doubt, please share some pictures with us). Then buy some new Joysticks, and when you are there, why not buy the Hall Effect joysticks?? Those are great and take care for good with the drift (drift is no longer possible with the hall effect ones).

You can buy them here: https://www.aliexpress.us/item/325680714...

Please let us know how it goes!

crwdns2934105:0crwdne2934105:0

crwdns2889612:0crwdne2889612:0 0

crwdns2944067:019crwdne2944067:0:

Thanks for the quick response! I will send you some pictures later on, I should have done that initially!

Luke

crwdns2934271:0crwdnd2934271:0crwdne2934271:0

No problem at all! We will take a look once they are there :)! Thanks!

crwdns2934271:0crwdnd2934271:0crwdne2934271:0

How do I add photos?

crwdns2934271:0crwdnd2934271:0crwdne2934271:0

Okay I’ve added photos to the original post. Feel free to criticise my soldering, this was my first attempt, I think the one on the left was my first and the right my second 😀 thanks

crwdns2934271:0crwdnd2934271:0crwdne2934271:0

Thanks! The left one (when the motherboard is facing is towards you) look like it's having small trace damages (back side). Is the left one having drift?? Please remove the left joystick and clean it with isopropyl alcohol. Then make again a picture of it (sorry). Can you share that one as well with us? Removing them both is fine as well, so we can check the other one too. After checking this, I can tell if the traces need to be fixed. Thanks again!

crwdns2934271:0crwdnd2934271:0crwdne2934271:0

crwdns2934275:014crwdne2934275:0

crwdns2934285:0crwdne2934285:0

crwdns2934229:0crwdne2934229:0

LukeResells crwdns2934231:0crwdne2934231:0
crwdns2936625:0crwdne2936625:0:

crwdns2936751:024crwdne2936751:0 1

crwdns2936753:07crwdne2936753:0 8

crwdns2936753:030crwdne2936753:0 60

crwdns2942667:0crwdne2942667:0 360