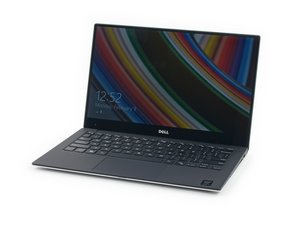
Dell XPS non-bootable after SupportAssist, glance over my proposed fix
Summarized: SSD issues, not booting due to missing EFI, primary volume recognized as RAW. The concern: losing data. I believe I'm comfortable with rewriting the EFI with bootable image, but will relabeling the RAW volume to NTFS where my primary data storage is have a chance of losing data? My understanding is the command will re-label the volume without formatting.
Details:
Dell XPS 13 9343, Win10 x64, Lite-On L8T128L9G-11 (128GB)
Daily driver with usage within 24 hours previous, boot up to error "No bootable image" - have seen this issue with this very Dell XPS (and many other reports online) prior due to updates and usage a toggle of the UEFI to legacy boot or verifying secure boot is disabled fixed it.
This case is different, UEFI shows two partitions with neither bootable. When manually attempting to set path for \EFI\Boot\bootx64.efi is nowhere to be found under file system 0 or 1. I only see a BOOTSECT.BAK file and IndexerVolumeGuid under system volume information.
So it seems to me my EFI volume needs to be rewritten which I can follow along from this guide:
Desired outcome: Get bootable again, no loss of data.
++http://woshub.com/how-to-repair-uefi-boo...
Planned solution: Rewrite MBR and rebuild Boot Configuration File as advised above to get bootable. Targeting Volume 1 labeled ESP.
Then set the primary storage volume back to NTFS using command "format fs=ntfs label=volume label quick"
My questions: Am I misunderstanding/missing anything here or have you some additional guidance? Further, is the above command necessary and will it risk losing my data, does it actually format the partition? Or are we simply telling the filesystem to be NTFS and that's all?
Why do I show 3 more additional RAW filesystems and should I change them to NTFS also?
I don't understand why I show so many volumes (5) and partitions (7) on this disk - 3 recovery partitions, one of which nears 7GB, but I am not able to use that as a bootable image to get to command prompt like I am the bootable USB...
Volume 0 RAW PARTITION 110GB
Volume 1 - ESP FAT32 PARTITION 500MB
Volume 2 RAW PARTITION 750MB
Volume 3 RAW PARTITION 511MB
Volume 4 RAW PARTITION 7110MB
Previously attempted solutions:
Changing UEFI/Legacy Ensuring Secure Boot is disabled Adding boot delay Attempting to manually navigate to bootx64 Startup repair via Win10 bootable image Updating BIOS to latest
During this process, before trying the BIOS update solution, I noticed it said I was on A03, I know I did a BIOS update last year, the newest BIOS is A20 - how in the world did that happen?
Additional details:
I noticed some battery abnormalities, I went to run a diagnostic (forgetting there was onboard diagnostic) and via the Dell website SupportAssist was installed. Apparently there's some security vulnerabilities with this and it was just after the install and diagnostic ran that my machine became non-bootable. Diagnostics showed me what I already knew that battery is in fair health. Ran a thorough diagnostic on SSD via onboard and it passed.
Thank you for your time


crwdns2934109:0crwdne2934109:0


 2
2 
 13
13  66
66
crwdns2944067:08crwdne2944067:0
BEFORE doing ANYTHING clone the drive or bootup with USB flash drive and copy important files to another drive.
crwdns2934271:0crwdnd2934271:0 mike crwdne2934271:0
Thanks Mike, but how can I do that? The filesystem is unreadable
crwdns2934271:0crwdnd2934271:0 IT FixUp crwdne2934271:0
@IT FixUp
You said the drive passed the Dell diagnostics test didn't you? The cloning software would be on the bootable USB flash drive and cloned onto or files copied over to another drive. I'll come back later. Key to troubleshooting is to keep things simple. The initial problem is OFTEN very slight and simple. W10 booting often gets "screwed up".
crwdns2934271:0crwdnd2934271:0 mike crwdne2934271:0
Correct, it passed thorough diagnostic check.
Which avenue would you recommend for most likely to recover data?
A) using bootable Win10 USB, rewrite EFI, then perform chkdsk to repair remaining RAW partitions
B) using USB enclosure for SSD mount to another machine and use a program like TestDisk (or other you may recommend you've had success with) to repair and recover?
C) other
Test Disk - CGSecurity
Thanks in advance
crwdns2934271:0crwdnd2934271:0 IT FixUp crwdne2934271:0
I'd suggest before trying to repair anything you connect the drive to another machine (through a SATA/USB adapter, or however you can) and run I've had success with EaseUS Data Recovery. That should be able to find lost partitions and lost files within them. Depending how much datsa you've got you may be able to recover it all with the free trial. Then re-setp your SSD as new, reinstall Windows and copy your data back.
crwdns2934271:0crwdnd2934271:0 Philip Le Riche crwdne2934271:0
crwdns2934275:03crwdne2934275:0