I have a Turtle Beach Recon x50, and some of the instructions above were contradictory, misleading or vague, leading to me having to redo soldering, which wasn't fun, and is why I'm posting for clarity.
Disclaimer: Don't burn yourself!
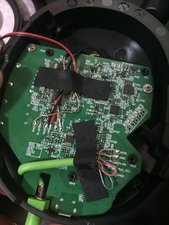
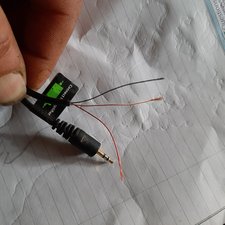
I cut an existing 3.5mm jack from another headset. Just had to connect wires this way.
Preparation:
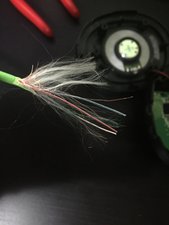
Step 1: Burn the enamel so you expose about 1cm of copper. Sanding the tips can help but it's delicate.
Step 2: Carefully separate the white fluff, and then cut or burn it off.
Step 3:
Tin the wires. (It's 1000 times easier to solder if you already have some solder adhered to the wire. Use flux to make the solder flow/wick better onto the wire. )
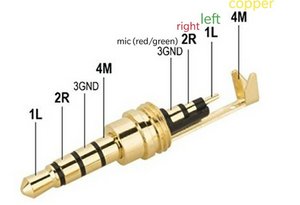
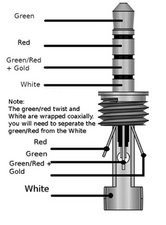
Wire Pinout:
Green Wire: Left channel (Tip)
Red Wire: Right channel (2nd ring)
Red/green twisted pair: Both tied together to GROUND (3rd ring)
White wire: mic channel (4th ring)
Tested and it works.
Hope this helps!
crwdns2934105:0crwdne2934105:0
crwdns2934113:0crwdne2934113:0
crwdns2915270:0crwdne2915270:0
crwdns2889612:0crwdne2889612:0
1


crwdns2944067:03crwdne2944067:0
The copper or gold is usually the ground
crwdns2934271:0crwdnd2934271:0 The-Revenant3421 - crwdne2934271:0
I have blue red and copper colour thin wires and a thick black.
crwdns2934271:0crwdnd2934271:0 Rob Shaw crwdne2934271:0
I can ad that this is the same setup for the Turtle Beach Recon 200 Gen 2. There is no other guide or otherwise that I could find that mentions the color coding of The wires in the Recon 200 Gen 2.
crwdns2934271:0crwdnd2934271:0 Frank Smith crwdne2934271:0