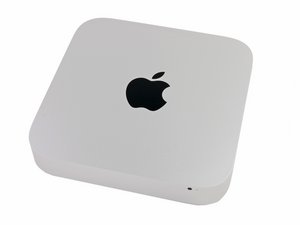
So you can still make it work. Having the vacant bay be the one closer to the access panel actually makes it easier to install a second drive, as you don't end up having to remove the hard drive chassis to install the grommets, as they're already installed and hold what is now the original drive. I removed it anyway, because I wanted to install two new SSD drives, but now if you're just adding one drive, you don't have to. I think you could probably squeeze in a new drive without even removing the power or logic boards.
There are two 6.6 mm T8 screws connected to the antenna (in step 8)- when you try to remove them at first, you can't, because they used to connect to the hard drive that is no longer there. When you remove the antenna, you find Apple has loc-tited two little hex nuts on instead, but these are easily removable. You'll actually end up using these for their original intention (to secure the new drive).
The first thing to deal with is the kit ribbon cable, as you have to get it to connect to the left port now, not the right. It took me a couple tries to get it right- you have to kind of fold it over on itself in a Z near the HD end, and sort of reverse the folds near the logic board end. You can't be too precious about it- they're made to bend.
So you kind of eyeball it, stick it on the HD, and slide the HD in. I used a spacer that came with my hard drive to help support the space between the two drives, although it was more for peace of mind. After that you just put the antenna back in, and you'll see that the two 6.6mm T8 holes will line up with your hard drive perfectly (although the newly installed ribbon cable almost blocks one of them- you can make them both work). I just installed both screws and called it a day. I was using really light SSD drives, so I felt okay only having one side truly supported.
However, it seems on the older design, the original drive had two little bumper screws or something that slotted in to two little circles in the plastic IR/power LED piece (the seemingly unremovable part from the inside of the face of the chassis). With the supplied hardware, there's no real way to re-create this as the standoff screws they supply are too long. Like I said, I felt fine just using the antenna screws.
Basically, all you would need for a "kit" now would be a newly bent cable, and two little bumpers to secure the far side of the new drive. You'd only need the U-shaped logic board tool if you were messing with the original drive. $50 is now seeming pretty steep for what you actually need, although the toolkit they include is pretty awesome.
I powered it up with some trepidation, but everything works fine.
crwdns2934105:0crwdne2934105:0
crwdns2934113:0crwdne2934113:0
crwdns2915270:0crwdne2915270:0
crwdns2889612:0crwdne2889612:0
1

 1
1 
 16
16  32
32