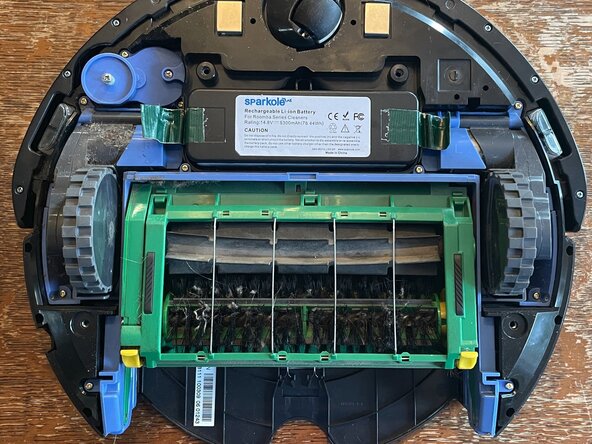
crwdns2915892:0crwdne2915892:0
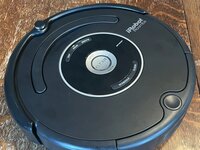
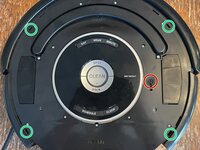
The Roomba 581 was introduced in 2010, and still does what you'd want of a robot vacuum cleaner. Arguably, better than some of today's robot vacuums, because there's no internet connection and it's easily repairable. Honestly, there isn't a plastic rivet in sight.
Some notes for this Roomba:
- While it's easy to get at the modular motors and brushes, taking a part the chassis is a bit trickier.
- It's always advisable to prevent cross threading by turning the screw to the left before screwing it in, as you can get it to click into the threads. However, if it's because of the thread size or the plastics, you don't always feel it click into place with this Roomba.
- If the screw takes a lot of force to screw in, try a couple of times to feel/hear the click before full sending it into the plastic.
- I'm not someone who knows screws. I'm using what I have. My bits are either labeled with a +x.x or Jx. They are definitely Philips screws because the inside is round instead of a right angle, I just don't know what kind of Philips since my bits aren't labeled in a way I recognize (the usual PHxxx).
- Some of these screws go straight into plastic. Remember that repeatedly inserting and removing screws can wear the threads out.
crwdns2942213:0crwdne2942213:0
crwdns2931587:0crwdne2931587:0
-
-
For the beginning of this guide, it's going to follow the existing steps in the manual. I'd also recommend looking at page 15 of the PDF (28 in the manual) for the exploded view to get a better idea of how the Roomba comes apart.
-
Some screws won't have a type listed and instead will have an asterisk (*). I don't have any bits labeled in the normal Philips way (PHxxx), instead with a + and a number. All of these screws can be used with a +2.5 bit, though I had to initially crack them loose with a J1 bit. Please use a proper Philips bit if you can.
-
-
-
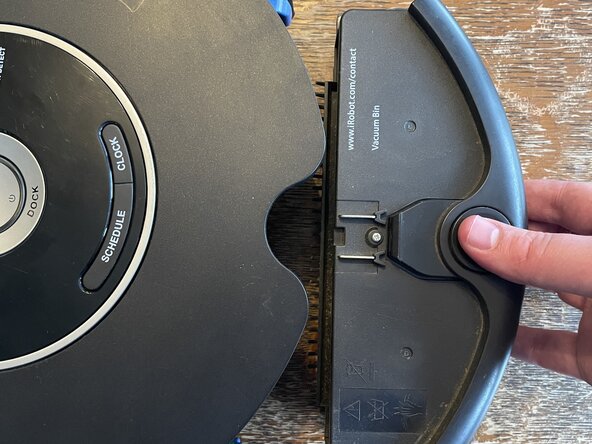
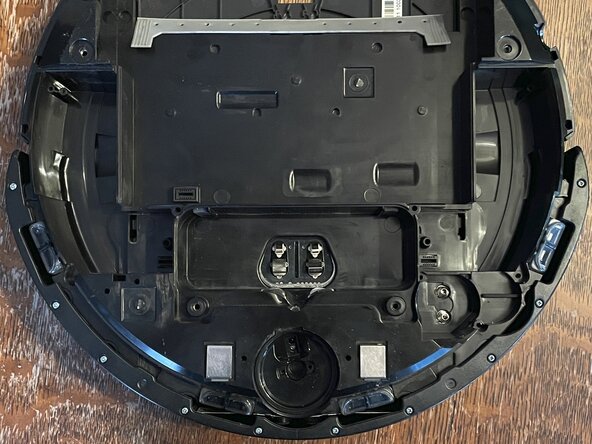
Lets start by taking the Roomba down to the chassis. We'll remove the bin module, side brush, and bottom cover.
-
All screws took the +3.5 bit.
-
These screws on the bottom over are captive, which means that they'll be stored in the cover unless you try to get them all the way out.
-
The side brush, on the other hand, has a screw that isn't captive and can get easily lost. Make sure to store it in a safe place. A good one is the screw it back into the peg that holds the brush.
-
-
-
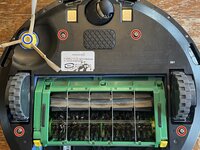
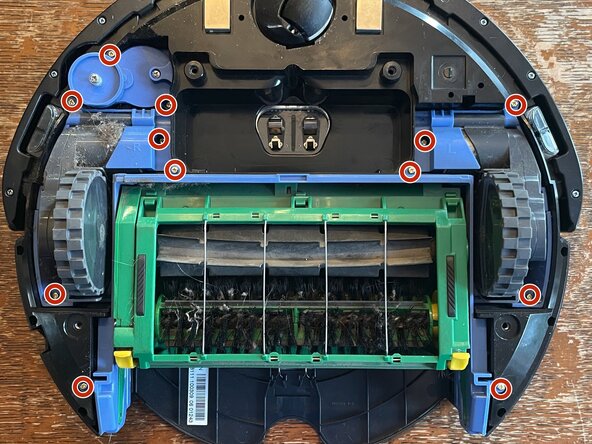
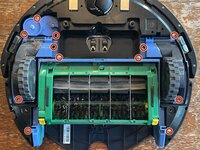
Now we'll take out the battery and the blue modules.
-
In order to remove the modules, we'll need to take out the 12 screws marked in red*. All of these are captive, so don't worry about losing them.
-
The rubber piece that's in front of the cleaning head module actually isn't riveted in place! You can pull that off for cleaning or replacing.
-
-
-
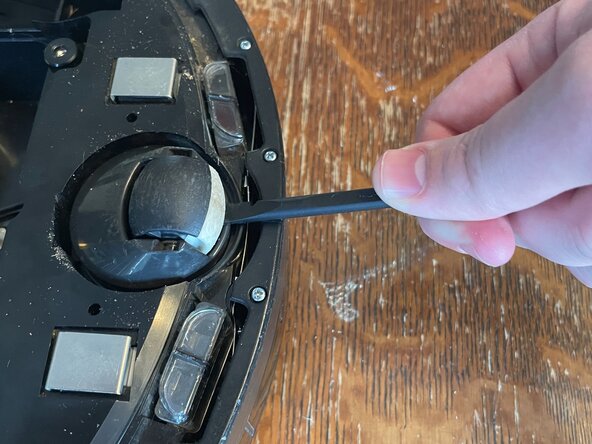
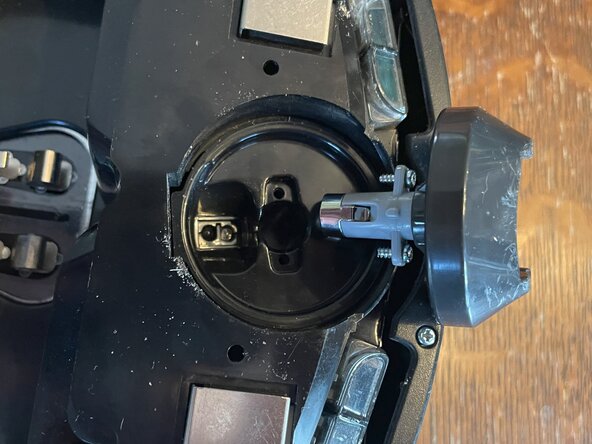
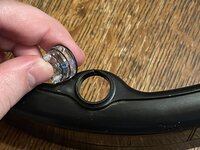
We're almost done with modules. Now we'll remove the front caster and it's housing. The wheel pops out with the help of a spudger.
-
The housing is held in with two screws*. And you guessed it, they're captive! I hope that other manufacturers follow iRobot's example for these screws.
-
Note that the housing is keyed back towards the (presumably) IR LEDs.
-
-
-
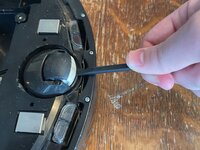
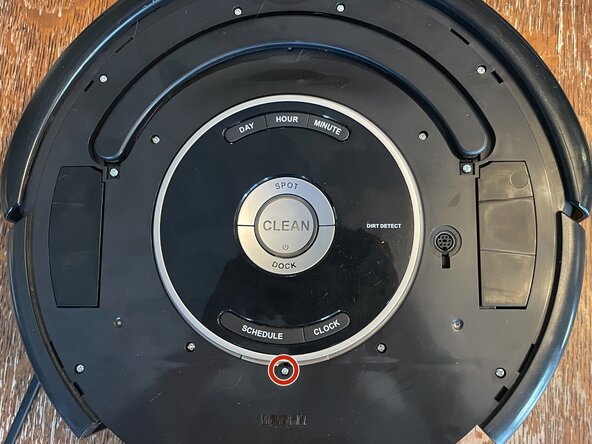
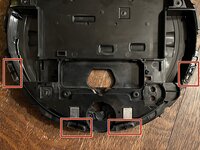
Now we're down to the last part meant to be user removable: the faceplate. I start where the manual says, where the bin pops out, but then I use a spudger to help coax the other clips out of their positions. I go under the faceplate, but it might be better to go around the faceplate popping them out.
-
The clip locations are marked in green
-
If the handle is giving you issues, tilt the faceplate towards the handle to get the lip stuck under there to pop out.
-
What's this port in the top? That is a DIN-8 port for adding modules onto your Roomba, or reprogramming it all together with the "Communication Cable for Create 2" that iRobot sells. No reverse engineering required! There are also PDFs of the pinout and serial settings if you want to go the DIY route.
-
-
-
This is where the manual stops and we now have a monolithic chassis. Not to fear, screws also hold the whole thing in place! Though, we did leave the land of captive screws, so now you must keep track of your screws.
-
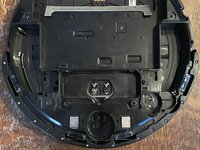
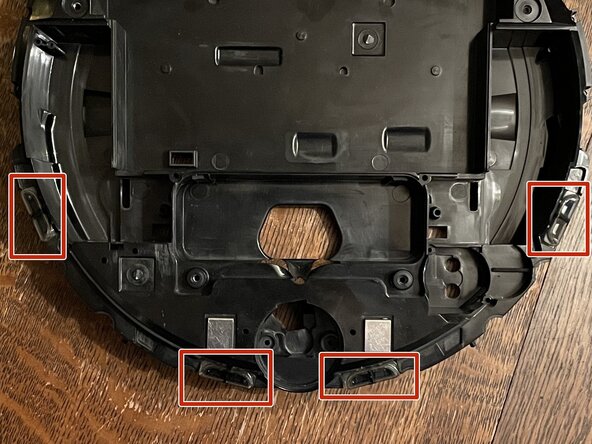
We'll be starting with the bumper and the plastic top of the chassis.
-
The plastic piece holding on the bumper has 10 screws*.
-
The top of the chassis has 12 +3.5 screws with one screw* marked in red.
-
-
-
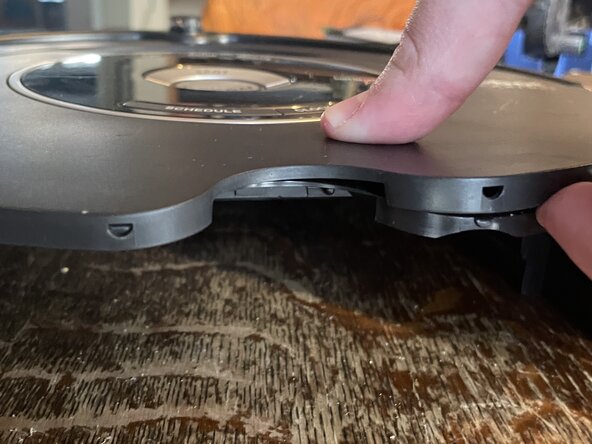
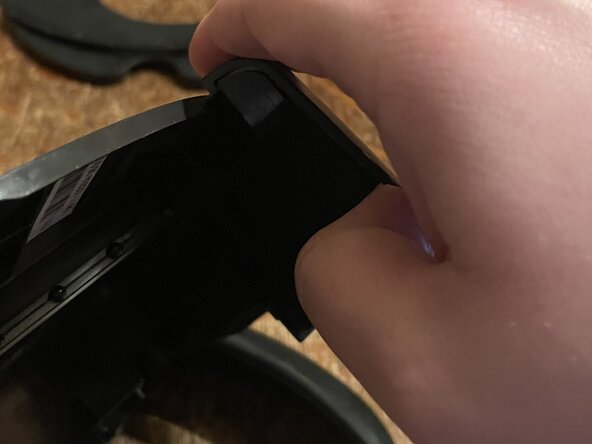
Now we'll get the top of the chassis off. The top goes down around the hole where the bin should be, and has some overhang towards the center. This is going to be tricky for me to show/explain since I only have two hands.
-
Pull out the overhang a bit with one of your thumbs and insert a spudger. With your other hand, you can push the top up by placing your thumb in the bin hole, and the rest of your fingers on the center button area on top. While putting upwards pressure on the top, move the spudger around.
-
If you placed the spudger well initially, it can just pop right up.
-
Repeat for the other side. Keep the pressure with one hand in the bin hole, and use your other hand to pull the overhangs away so it can pop off fully.
-
-
-
-
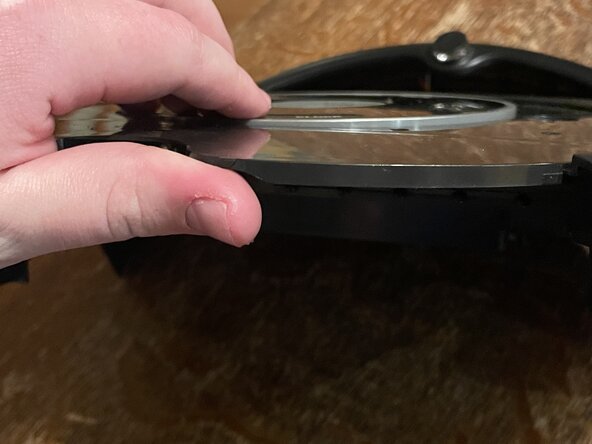
The handle is easily removable (once the top is off). Flip the top over and press down on the screw side of the hinge. To put is back in, lift up on the screw holes and slide it back into the top.
-
-
-
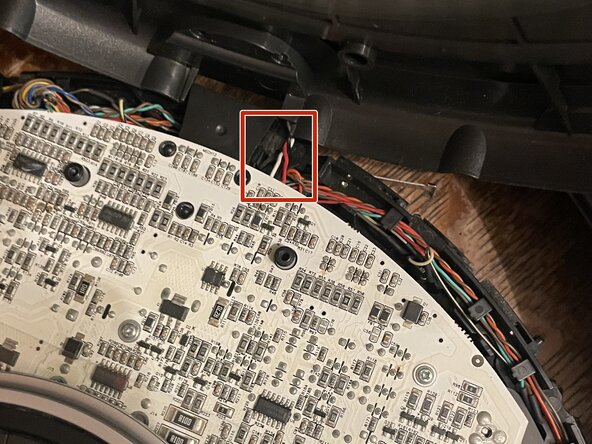
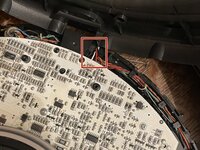
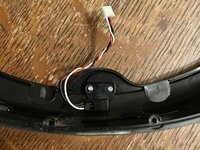
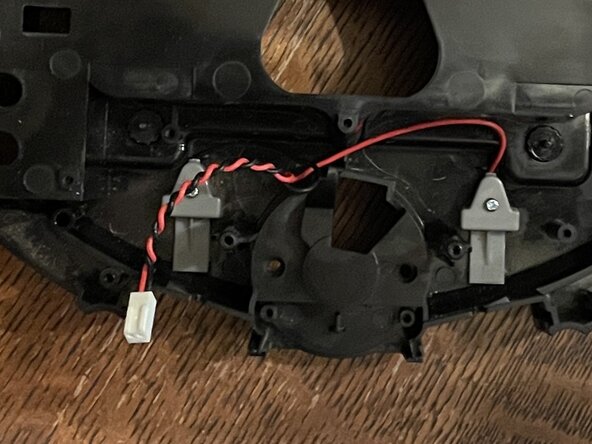
With the top propped up, find the three highlighted wires. These go from the IR bump to the main board, and luckily have a connector. Reach in there with your other hand and gently pull the wires to get the connector out.
-
-
-
Optional if you're just looking to clean your Roomba. I recommend getting the wires out of the top of the chassis now. It will help with reassembly of the IR bump and the Roomba itself. The IR bump is held in by two screws*.
-
The translucent top is keyed to the bumper.
-
-
-
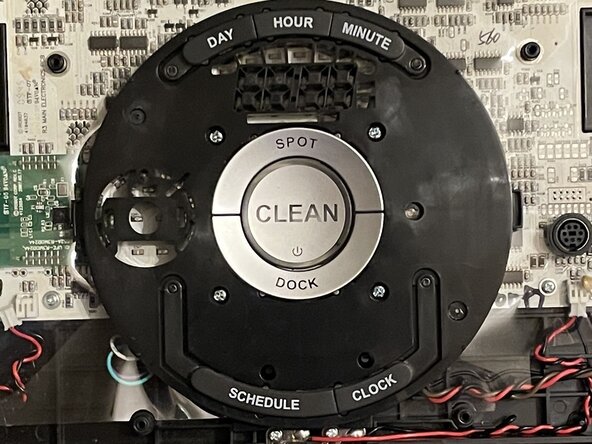
The center buttons have 5 layers. The silver ring that holds them on, the translucent top, a diffusion layer, and then the plastic with the buttons themselves.
-
Take out the four+3.5 screws in the buttons module. The plastic skirt around the buttons should come with it. Don't worry if it doesn't, it just means you have another thing to position when putting it back together.
-
-
-
There's four connectors along the bin side of the main board that need to be disconnected.
-
Speaker connector
-
Schedule and Clock button connector
-
DC barrel jack connector
-
Bin module connector
-
There's also handy gliphs molded into the plastic that show you roughly how the wires were routed
-
-
-
Optional pieces you can remove when you disconnect them from the main board.
-
The Schedule and Clock buttons have a screw* holding them down
-
The Bin module connectors both have screws* holding them down
-
The speaker is under the flap in the first photo. It's held in place by a screw*. The speaker has two notches that it slides into in the chassis, and the flap has an arch that sits on top of the speaker.
-
The DC barrel jack is held in place by one screw*. Like the speaker, there's a place for it to slide into the chassis.
-
-
-
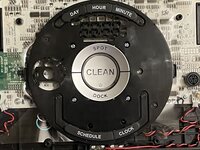
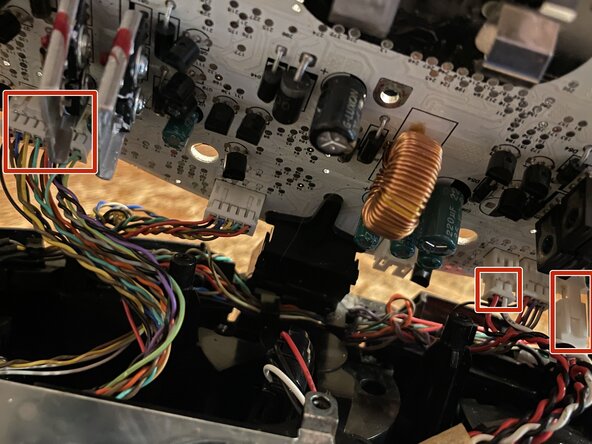
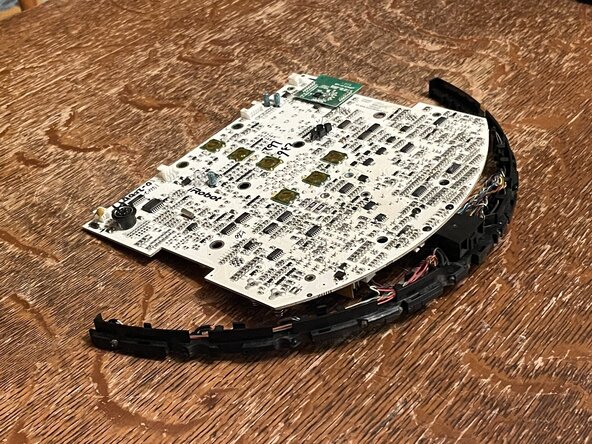
The main board has five screws* holding it in.
-
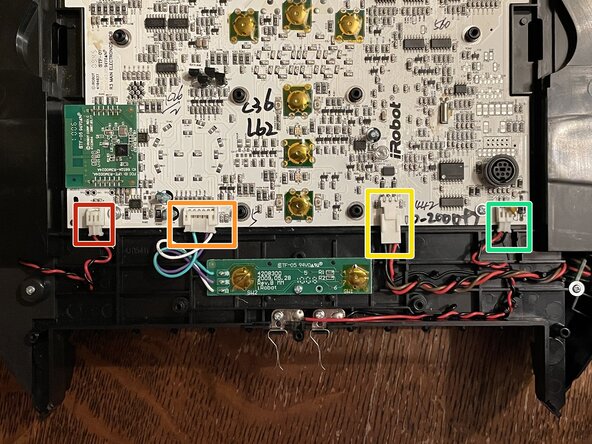
The three highlighted connectors need to be removed. I recommend taking off the power connector and data connector on the right first. Then you have more give to work with the data lines on the left.
-
The rest of the connectors go to an arch of IR LEDs that shine out the bumper. They can move around with the main board thankfully.
-
I won't be taking apart the IR arch in this. It seems to just be the LEDs, and looks like a pain to rewire. I'd touch it only if you know something on it is bad.
-
-
-
The two pin on the left goes to the charging pads on the bottom
-
The four pin handles the LEDs that watch the caster
-
The large data connector handles the LEDs watching the ground for the cliff detection, and the bump switches for when the bumper hits something.
-
-
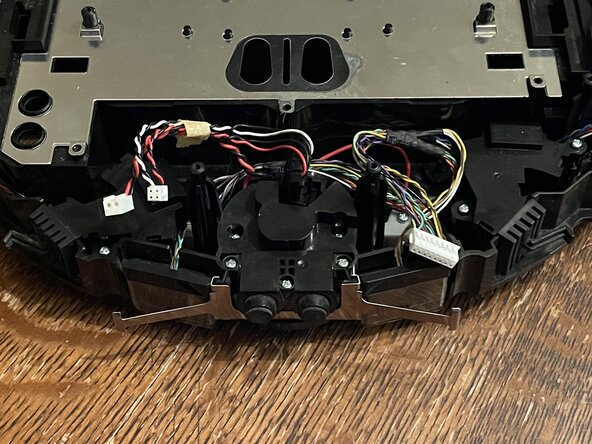
-
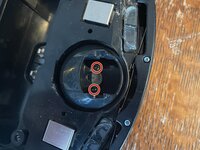
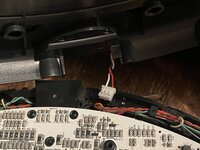
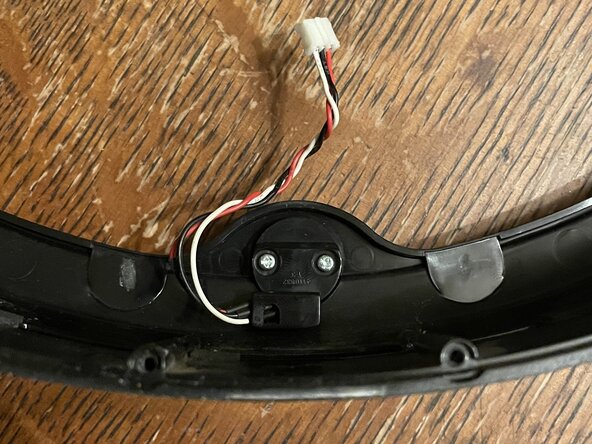
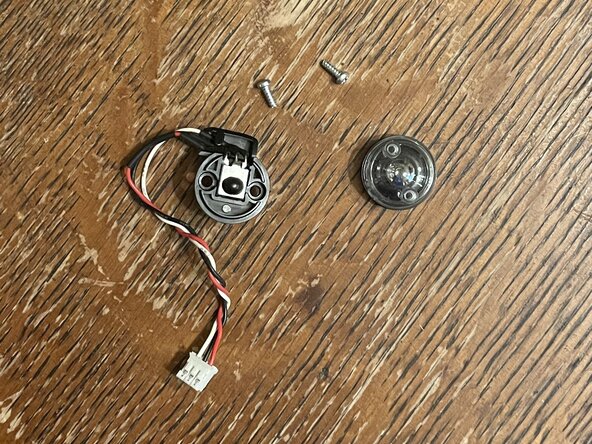
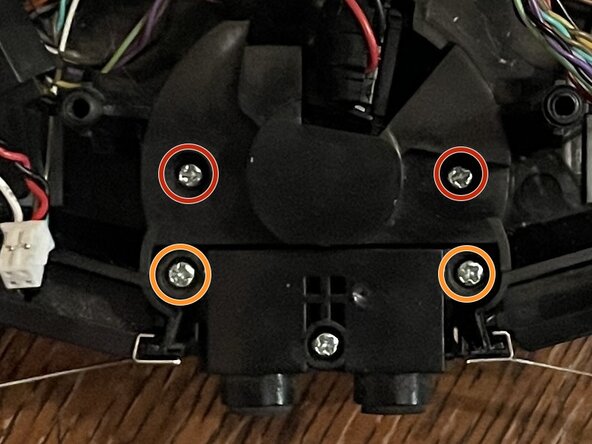
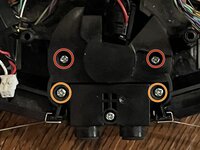
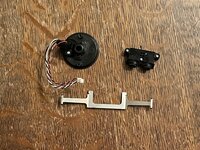
Lets start taking off the sensing bits that make this Roomba smart. Starting with the caster detection. It is held in by the two screws* on top and comes out the bottom.
-
There's a second piece of plastic holding in the LEDs. It's secured by a screw*
-
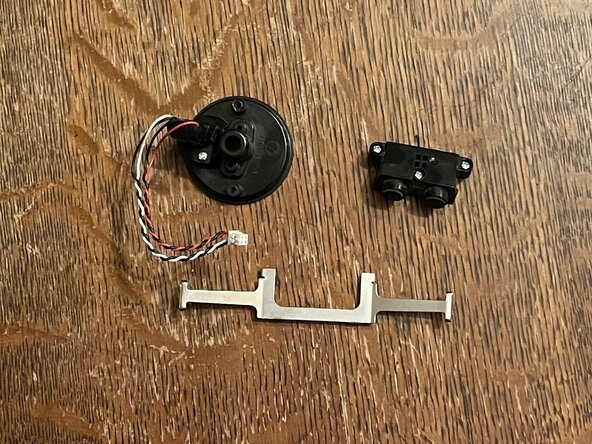
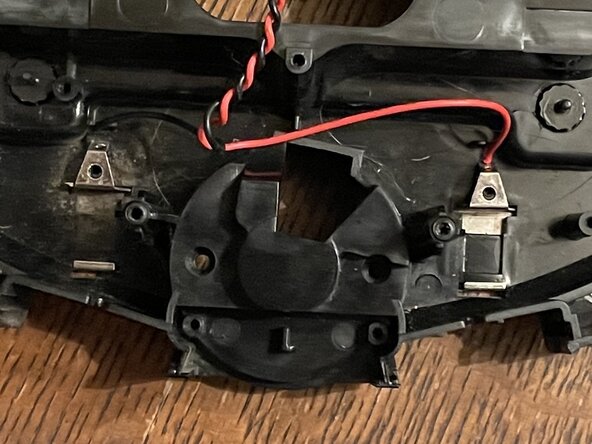
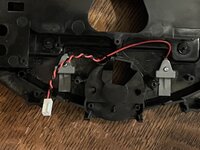
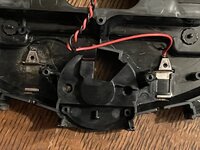
While we're here, we can remove the black plastic chunk in front of it (two screws*), and the metal leaf spring.
-
The black plastic chunk seems to be a two springs with different tensions for if the Roomba hits something really hard. It seems to held together with one screw*.
-
-
-
I wish these weren't clipped in place. Anyway, lets suffer with getting these freed from the chassis.
-
To start, remove the bump switches, since they are wired in with the cliff sensors. They both have two screws*.
-
Put the spudger in between the cliff sensor and the chassis, then push the bottom of the cliff sensor away from the chassis while pushing down. You should get the sensor to slide out of the chassis.
-
Apparently there's an issue with cliff sensors getting dust and stuff in the clear plastic. Here's an old solution that I came across if you need it. Wayback Machine archive
-
-
-
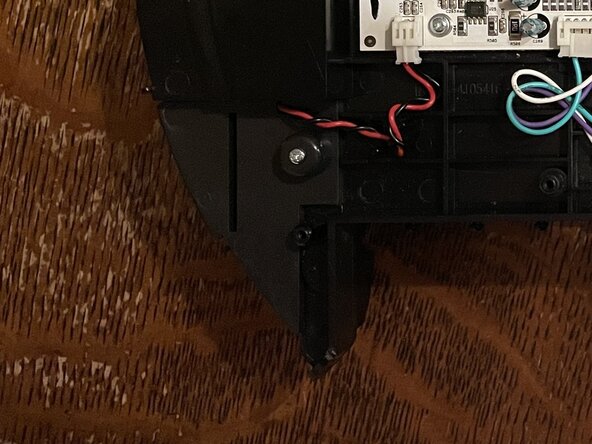
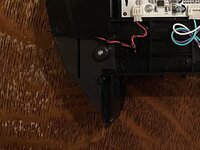
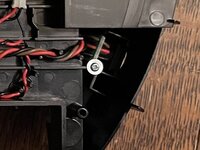
Finally the last piece. We don't need to take out everything before getting to the charging terminals, but we do need to take out the left switch to get to the ground. The plastic covers are both held in with a screw*.
-
Once the plastic covers come off, we'll need to unhook part of the terminals from the chassis. Push down so that the hook/tab thing is clear of the chassis. Angle then pull the terminals through the hole on the wire side.
-
-
-
And that's it! Now you should have a large pile of parts to put back together! Some notes for reassembly
-
The IR arch can be tricky. Try to insert it behind the cliff sensors and into the guides on the chassis at the same time.
-
If you didn't already, separate the top of the chassis from the bumper. It'll be easier to route the wires back into the top than trying to keep everything connected.
-