crwdns2915892:0crwdne2915892:0
My 1984 Suzuki FA50 was exhibiting some interesting problems. Although it ran fine a year ago, I could not get it running for the life of me. The problem was most likely a stuck throttle cable that I unstuck using some brute force. However, I figured it would also be nice to get my hands dirty and do an overhaul of the carburetor and engine. So here it is!
Note: The teardown was done backwards. I already disassembled the moped, and then took pictures reassembling it together. You may notice that some parts look new -- it's because they are.
Note #2: I figured it would be good to ring in the new year with a solid teardown, so I published it right on 12:00 AM PST, January 1, 2010 :)
crwdns2942213:0crwdne2942213:0
-
-
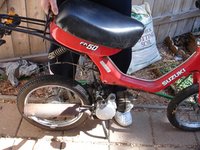
There's no rage against this machine.
-
Looks great, except it doesn't run.
-
Its 50 cc engine lets me go downhill at almost 28 MPH when it does run. Uphills, not so much. Depending on the hill (and my head start), I may or may not have to walk it up.
-
-
-
In retrospect I figured out i that I didn't need to remove the exhaust cover, but what the heck... When in Rome, right?
-
-
-
Took off the air intake box.
-
That's contractor-grade 3M packing tape holding the airbox together. Only the best for my moped.
Oh mine probably don't run cuz of that I don't have the airbox
-
-
-
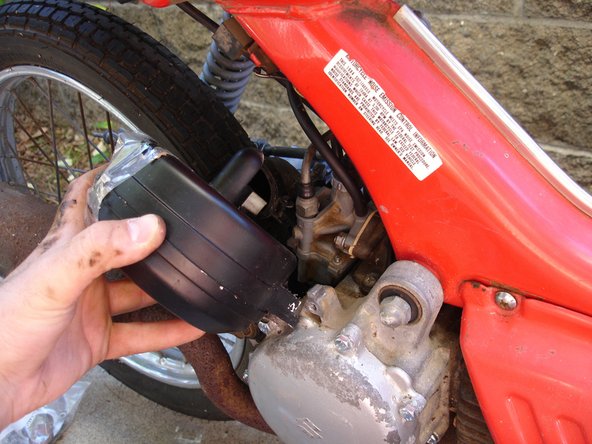
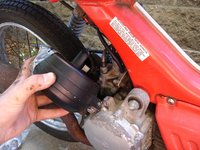
I went to the other side of the bike and removed the carb/oil pump protective cover.
Aaaand I don't have that cover either
Nor do I. Do you have any idea where I could get the Carb cover?
-
-
-
The foot rest came off next, in order to gain access to the engine and spark plug.
-
-
-
While down there, I unplugged the spark plug cover.
-
-
-
I then proceeded to access the wiring underneath the gas tank.
-
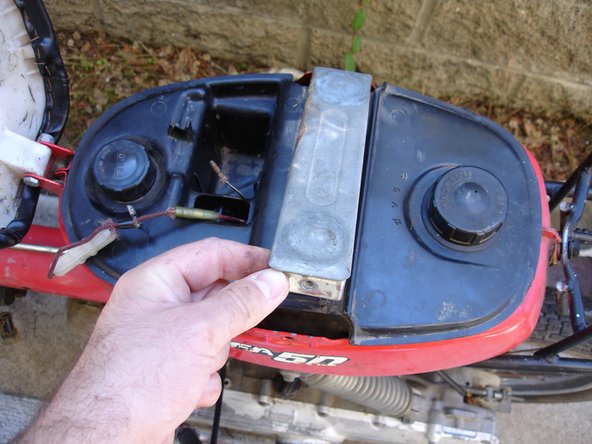
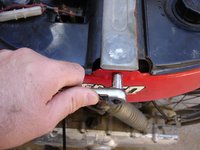
First I removed the protective brace on top of the oil/gas tanks using a 10 mm socket wrench.
-
-
-
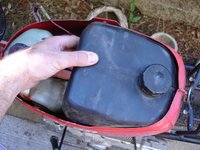
I had to take off both oil and gas caps in order to remove the plastic protective cover.
-
-
-
-
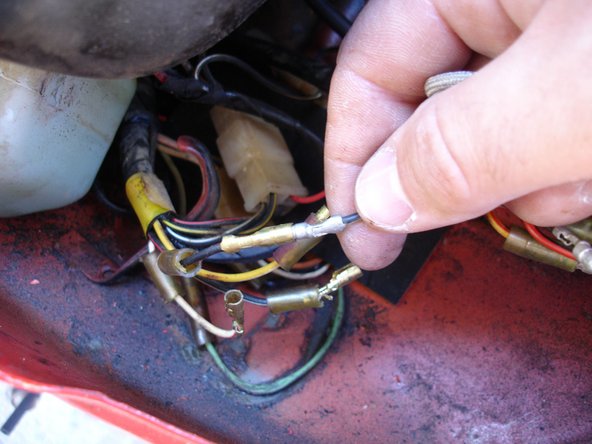
I set aside the fuel tank and bam! -- the wires were ready to be disconnected.
-
The wires must have been minding their own business since '84... Separating them was quite a challenge. Thankfully they had those round connectors on them, so I didn't have to solder or crimp anything when reassembling the moped.
-
-
-
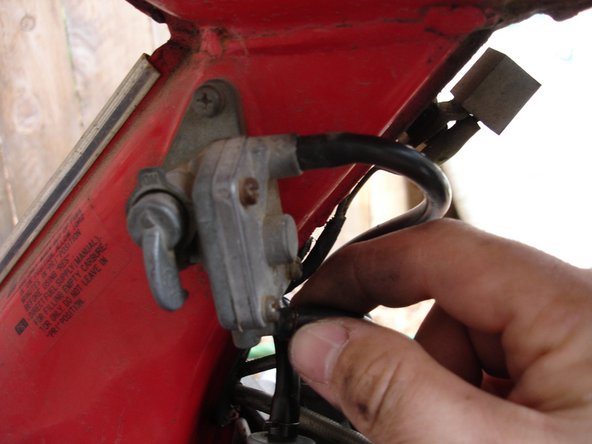
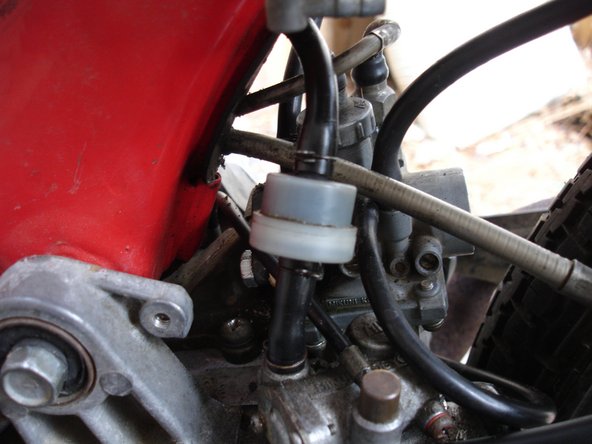
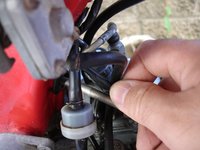
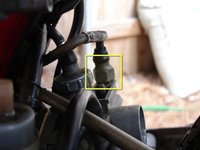
I then unplugged the emergency fuel valve .
-
-
-
I paused for a minute to enjoy a cold cup of Diet Coke, and to drain all the 2-cycle oil...
-
I got the Goliath "freezer" mug in Six Flags Magic Mountain about 6-7 years ago. Best investment I ever made, aside from marrying the wife. It's the gift that keeps on giving!
-
Ikea bowls come in quite handy. Turns out there was enough 2-cycle oil to fill the entire bowl to the brim!
I want that mug, I had one but it died and I can't seem to find them.
Hey Rob,
I may have found a replacement for your lost Goliath mug. I was at Bed Bath & Beyond the other day, and I found this jewel: large frosty mug
Hope that helps!
crwdns2936937:0Rob adamscrwdne2936937:0
I want that mug, I had one but it died and I can't seem to find them.
I wish you the best of luck in finding one. When I bought it a long long time ago, at a Magic Mountain far far away, I never knew it was going to become a collector's item...
How/where exactly are you draining the oil from? I just disconnected the emergency fuel valve, and then the next step shows you drinking a root beer?? I don't think I've missed a step as I have been following your instructions. Any help appreciated.
nevermind, got it
-
-
-
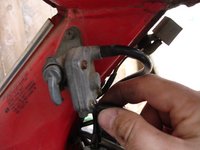
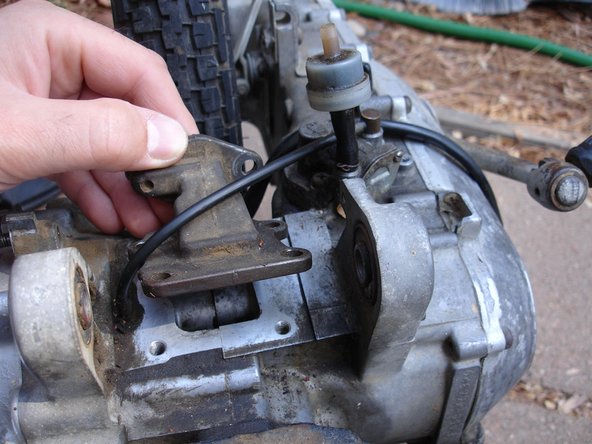
I had a difficult time figuring out what I was doing in these pictures. According to the manual, I was removing the oil pump cover and oil hose.
-
-
-
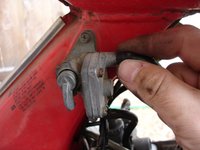
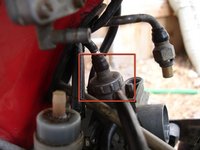
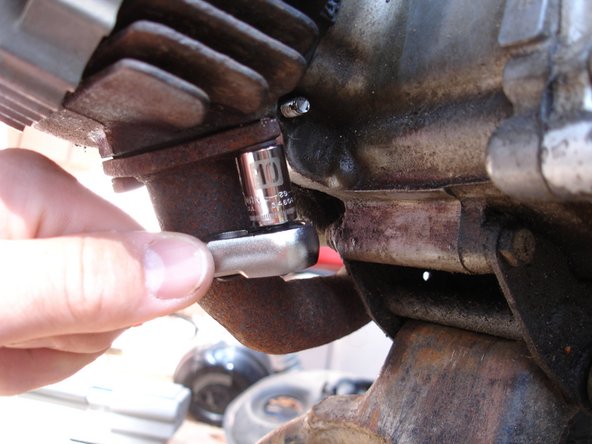
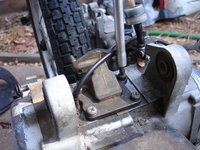
Unscrewing the smaller valve, which I believe to be the carburetor choke cable.
-
My culprit resides beneath the carburetor top cover. Even though I reassembled the moped, I'll have to investigate the throttle cable going into the carburetor.
-
-
-
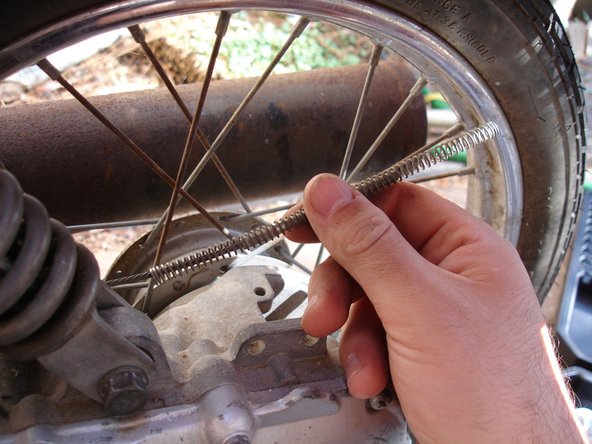
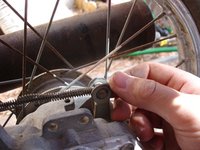
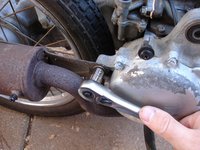
Rear brake gets disconnected next. The cable needs to be free since the brake lever will come off with the rest of the frame.
-
-
-
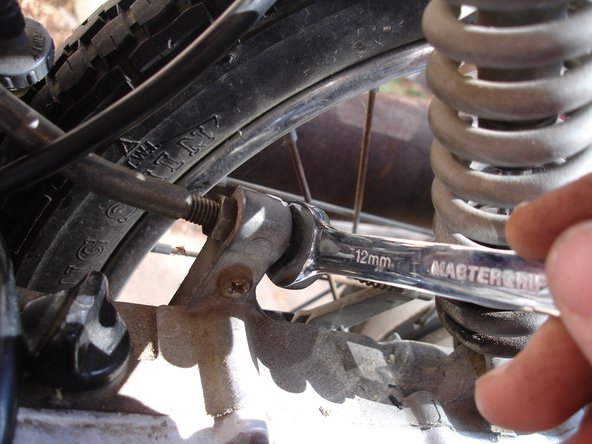
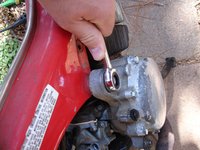
The rear spring gets unsprung using a 14 mm socket wrench.
-
Nothing crazy happened when I disconnected it, however.
-
-
-
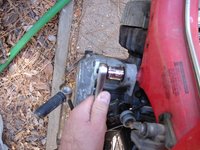
Finally, the large frame screw can be removed. This is the last piece of hardware holding the frame to the rear wheel / engine.
-
I had to use two 17 mm wrenches -- a socket on one side, and a ratcheting wrench on the other.
-
-
-
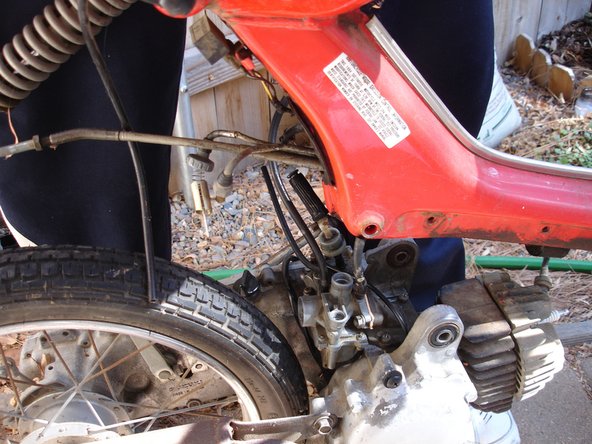
And just like that, the frame comes off!
-
-
-
A 12 mm and 10 mm hex socket take care of the muffler.
-
-
-
Now on to the engine.
-
Spark plug comes out with a strong flick of the wrist.
-
The plug looked like it was the original one that came with the moped. Dirty dirty!
-
-
-
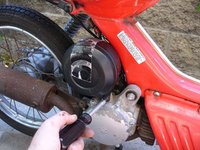
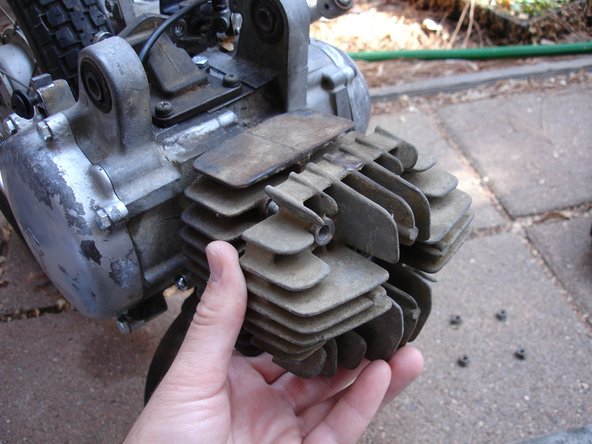
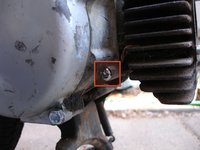
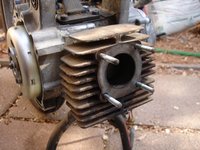
I continued by removing the front part of the engine using a 10 mm socket wrench. I found plenty of buildup inside.
-
-
-
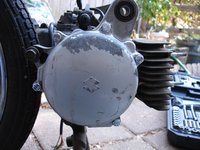
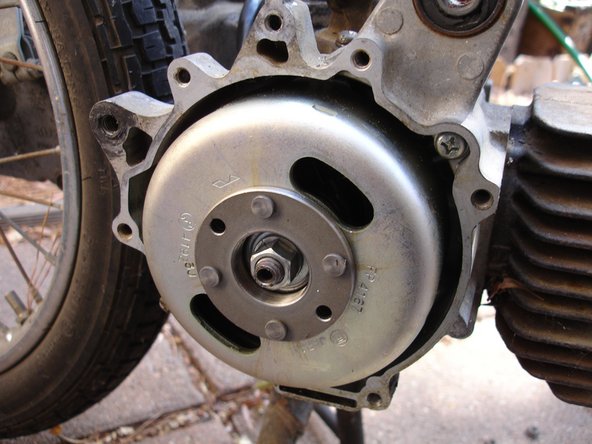
I wanted to see what a "flywheel magneto" looked like, so I decided to remove this cover. I figured anything named after an X-Man is worth a look...
-
I stripped the Phillips originals while taking the cover off. I replaced them with appropriately-sized 20 mm hex-head screws.
-
This is a 65 mm replacement I ordered online, along with news seals and stuff.
Heya - i'm trying to get the cover off but the screws are stripping. What method did you use to get them out? Thanks
How did u take out the screws I can't get the cover off? Thank you
The only reliable way to get those large philips head screws out is to use an impact screwdriver.
If you don't have one, you can use a normal, good quality philips screwdriver of the right size, and a hammer. Place the tip of the screwdriver firmly in the screwhead, grab the handle firmly with one hand, and hit the end of the handle with the hammer while you torque the handle counterclockwise. Apply torque only the moment the hammer hits the handle. Takes a bit of practice but generally works well.
Right when I seen magneto in your comment I said"noooo" lol
I did the same
And if your moped isnt running it's scary but do the same
Give the magneto a good turn (clock wise) and if it spins your good if it doesn't
Get a new one or good luck with that
Videos on YouTube help as well
What size replacement bolts did you use? 20mm hex heads with what size threads.
-
-
-
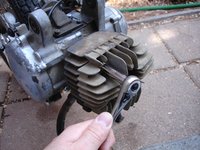
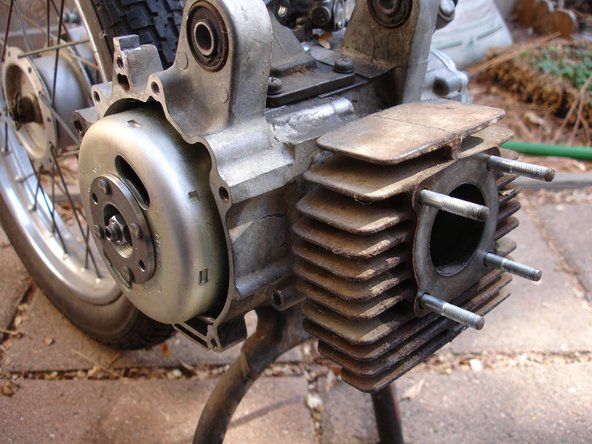
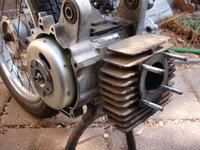
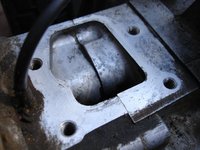
The reed valve comes right off. You can see the engine internals from the hole -- cool!
-
-
-
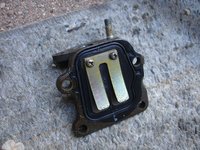
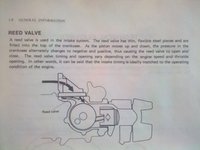
The reed valve is a very important part of the moped, according to the service manual. The metal bars have to be bent a certain way, and other stuff.
-
-
-
I had quite a difficult time shooting a "final layout" shot. I gave up after 5-10 pictures; this one was the best of the bunch.
-
That's it! Hope you enjoyed my teardown!
-


crwdns2947412:08crwdne2947412:0
I am looking for some close up pictures of where exactly the wiring harness runs, I am putting a shuttle back together that I did not take apart, both front and rear photos would be helpful
I am looking for a manual how to replace my spark plug of my Suzuki FA50. Can you help me?
Do you know if the crank case would be the same for a 84 as it would be for a 83 im purchasing a new crank case for my 83 but found a 84 crank case for cheap
Hello everyone my Suzuki FA 50 has a rubber line plugged exactly under the carburetor but i have no idea where other ends goes on the top
Cam anyone help?? Here is my email Gemini54302@aol.com
Thank you
that’s like A overflow it does not go anywhere except for the ground that it rides on!
Awesome, great work, appreciate it.
Nice job VERY helpful, THANK YOU. Here is the MANUAL for free https://mob50.fr/doc/manuel-atel-suz-fa5...
In my case, I cannot find the PCI (no spark). Everyone talks about it but no one says where it is.
Mine is a different model. The FA50 graphic on the side looks older. I would get it running if I knew how. Still it's probably an older one or maybe you have a special edition.
duuude - crwdns2934203:0crwdne2934203:0