crwdns2915892:0crwdne2915892:0
Introduction
Disassembly outline
- Battery
- Optical Drive
- Memory Cover
- RAM Memory
- Keyboard/Trackpad/Top Cover
- Hard Drive
- Mini-PCI Slot
- Wi-Fi Card
- Internal Battery
- Display
- Side Bezel
- Fan
- Processor
- Fan
- Plastics
- Motherboard
crwdns2942213:0crwdne2942213:0
crwdns2931587:0crwdne2931587:0
-
-
Unplug the power cable before removing the battery.
-
Slide the 2 sliders on the under side of the laptop to the unlock position, as shown.
-
Grasp the battery and tilt it out at an angle - not straight out.
-
-
-
Unscrew the pictured screwed holding the memory cover in place.
-
Pry the cover open carefully (flathead screwdriver might help)
-
To remove the RAM memory sticks, push both metal pieces holding them in place outwards, and the sticks will pop up. -picture of RAM inside -
-
Pull the sticks out carefully. - Picture of the RAM stick -
-
Using a small spudger, pry up the two rubber feet to reveal the screw holes underneath.
-
-
-
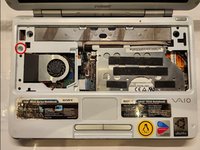
Unscrew the rest of the screws on the underside of the PCG-TR3A.
-
Note: for ease of reassembly, keep track of which screws go where.
-
-
-
-
Flip the laptop over and open the display carefully - the keyboard and bezel will be loose.
-
Lift the keyboard away from the top carefully.
-
**WARNING** The keyboard has a connector to the motherboard. Disconnect this before completely removing it.
-
-
-
Remove the one screw holding the top assembly on.
-
Unplug the trackpad connector from the board.
-
Maneuver the palm rest away from the bottom half of the machine. Both the palm rest and trackpad will come off together.
-
-
-
Remove the three screws holding the hard drive and optical drive in place.
-
Lift up on the connectors connecting the drives to the board and lift the drives up to remove them.
-
-
-
To remove Wi-Fi card, first disconnect both display wires on the top right.
-
Then slide both of the metal pieces holding it down outwards, and it will pop up.
-
Carefully pull it out.
-
-
-
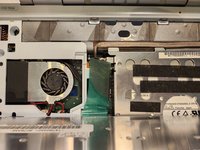
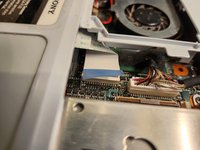
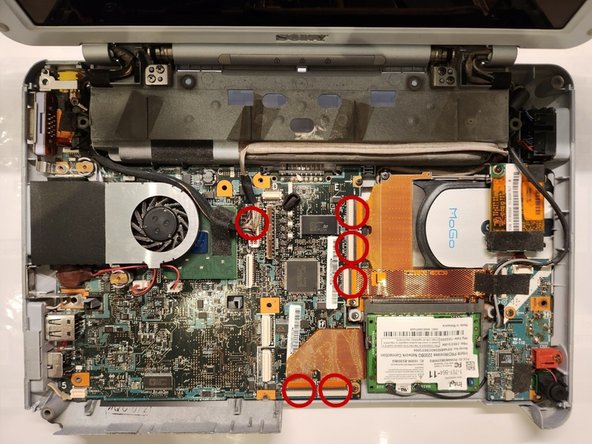
Remove the three screws holding the board in place.
-
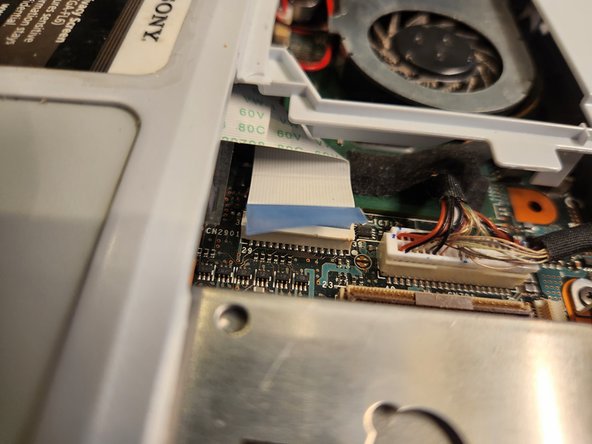
Disconnect the ribbon cables connecting the daughterboards to the motherboard and the large connector in the middle of the board.
-
Lift up the board gently. There will be two connectors on the underside of the board. Disconnect them before completely removing the board.
-


To reassemble your device, follow these instructions in reverse order.
To reassemble your device, follow these instructions in reverse order.
crwdns2935221:0crwdne2935221:0
crwdns2935229:02crwdne2935229:0
crwdns2935103:0crwdne2935103:0
crwdns2947410:01crwdne2947410:0
I've used this info at least twice over many years to disassemble a Sony TR3.. thank you to those who provided it!