crwdns2933423:0crwdne2933423:0

crwdns2942213:0crwdne2942213:0

crwdns2935311:0crwdnd2935311:0crwdne2935311:0 crwdns2935313:0PlayStationcrwdnd2935313:0crwdnd2935313:0crwdne2935313:0

  1. Sony PlayStation SCPH-9002 Teardown, Sony PlayStation SCPH-9002 Teardown: crwdns2935265:01crwdnd2935265:01crwdnd2935265:02crwdne2935265:0 Sony PlayStation SCPH-9002 Teardown, Sony PlayStation SCPH-9002 Teardown: crwdns2935265:01crwdnd2935265:02crwdnd2935265:02crwdne2935265:0
    • Here's the PS1.

    • Turn the PS1 over and remove the six screws.

    • Note: part number +BV 3X14

  2. Sony PlayStation SCPH-9002 Teardown: crwdns2935265:02crwdnd2935265:01crwdnd2935265:01crwdne2935265:0
    • Remove the top cover. It's very easy.

  3. Sony PlayStation SCPH-9002 Teardown: crwdns2935265:03crwdnd2935265:01crwdnd2935265:01crwdne2935265:0
    • Disconnect both CD-ROM connectors.

    • CD connector one and the socket it connects to.

    • CD connector two and the socket it connects to.

    • Note: part number DEVICE OPTICAL KSM-440AEM

  4. Sony PlayStation SCPH-9002 Teardown: crwdns2935265:04crwdnd2935265:01crwdnd2935265:02crwdne2935265:0 Sony PlayStation SCPH-9002 Teardown: crwdns2935265:04crwdnd2935265:02crwdnd2935265:02crwdne2935265:0
    • Remove the CD-ROM reader. You should be able to pull it out gently, although you may have to wiggle it around a bit to loosen the rubber holders.

  5. Sony PlayStation SCPH-9002 Teardown: crwdns2935265:05crwdnd2935265:01crwdnd2935265:01crwdne2935265:0
    • Detach both cables. They go to the power supply and to the memory cards and controller connectors.

  6. Sony PlayStation SCPH-9002 Teardown: crwdns2935265:06crwdnd2935265:01crwdnd2935265:01crwdne2935265:0
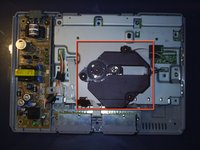
    • Remove the four screws and the metal cover.

  7. Sony PlayStation SCPH-9002 Teardown: crwdns2935265:07crwdnd2935265:01crwdnd2935265:02crwdne2935265:0 Sony PlayStation SCPH-9002 Teardown: crwdns2935265:07crwdnd2935265:02crwdnd2935265:02crwdne2935265:0
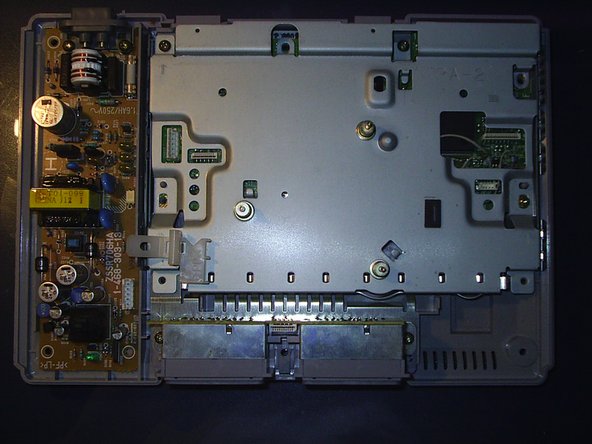
    • Now you have the motherboard!

    • And the power supply.

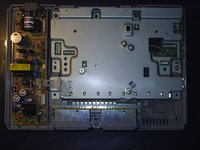
    • Remove the four screws from the motherboard and the power supply.

  8. Sony PlayStation SCPH-9002 Teardown: crwdns2935265:08crwdnd2935265:01crwdnd2935265:01crwdne2935265:0
    • Once the screws are removed, remove the power supply.

  9. Sony PlayStation SCPH-9002 Teardown: crwdns2935265:09crwdnd2935265:01crwdnd2935265:01crwdne2935265:0
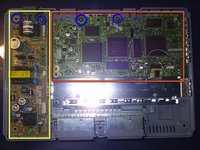
    • Remove the motherboard, and both of the screws from the memory card/ controller connection mechanism.

  10. Sony PlayStation SCPH-9002 Teardown: crwdns2935265:010crwdnd2935265:01crwdnd2935265:01crwdne2935265:0
    • Now, you have all your PlayStation 1 parts!

    • Main Board

    • Lower Casing

    • EMI Shield

    • Power Supply

    • Disk Reader

    • Memory Card/ Controller Mechanism

imacg517

crwdns2935283:005/06/10crwdne2935283:0

182 crwdns2915208:0crwdne2915208:0

crwdns2935295:0crwdne2935295:0

crwdns2917034:0crwdne2917034:0

That’s a PAL PS1. May be different from NTSC models.

Daniel Powers - crwdns2934203:0crwdne2934203:0

crwdns2917038:0crwdne2917038:0

crwdns2936625:0crwdne2936625:0:

crwdns2936751:024crwdne2936751:0 6

crwdns2936753:07crwdne2936753:0 26

crwdns2936753:030crwdne2936753:0 135

crwdns2942667:0crwdne2942667:0 27,804