crwdns2915892:0crwdne2915892:0
In this guide I tear down and repair an Ozito SSH-2440 Garden Shredder where the cutting blade shaft has rusted in place.
-
-
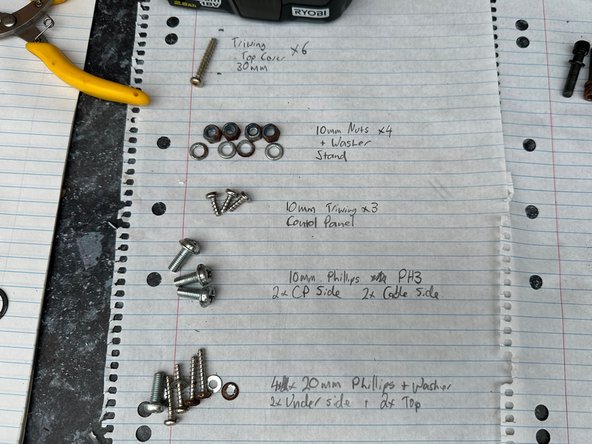
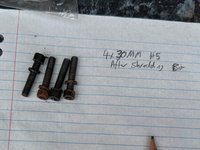
There's 6x30mm long triwing screws holding the top on. They're very deep (About 120mm).
-
-
-
Holding the base on is 4x10mm nuts (with washers). This just comes off.
-
-
-
There's 3x 10mm triwing screws holding the power switch on, one may be hidden under the Forward/Back switch label. Don't worry about the 2 screws on the reset button.
-
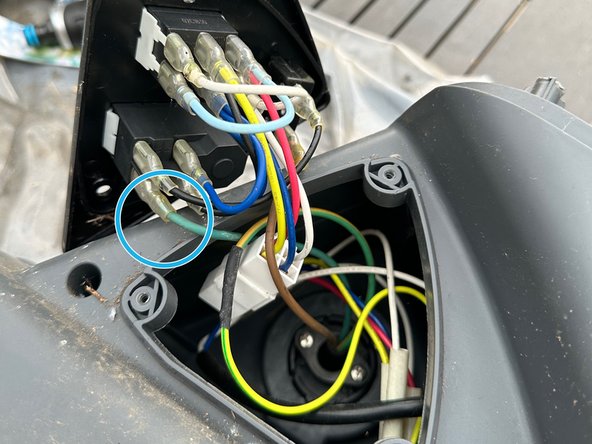
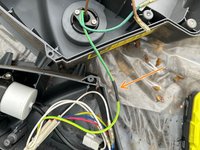
Pull the whole thing out, but note that there are wires on the back that're still connected to things.
-
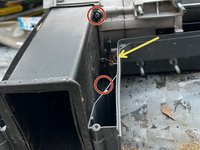
Coming from the power plug on the other side, there's a Light Blue wire and a Brown wire that are clipped on to the switches. Note that they may be held in with a retention clip (look closely before you just pull at it).
-
-
-
Undo the big red knob until it comes out and put it aside.
-
There are only 2 other screws on this side, the rest are on the other side - 2x10mm PH3 Machine Screws
-
-
-
Flip the unit over so the power cable is facing you.
-
Remove the two screws from the underside and two from the top side - 4x20mm PH2 + Washer
-
Remove the 2x10mm PH3 screws from the middle
-
Remove the 6x20mm PH2 screws from the holes. These are moderately deep and may be filled with dust/debris/wasp nests - you may need to clear them out a bit first (but they're not as bad as the ones in Step 1!)
-
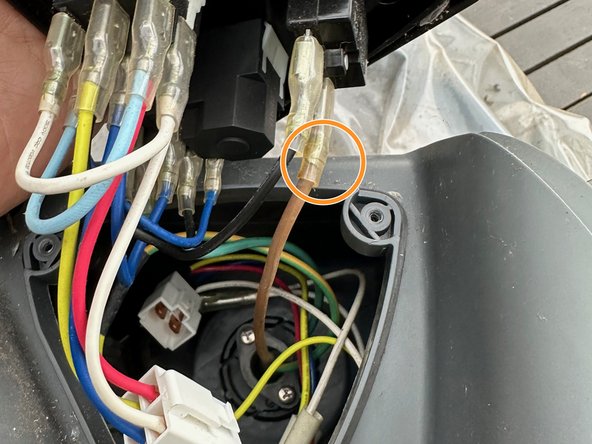
Remove the cover, but note there will be a wire from the power plug still attached.
-
-
-
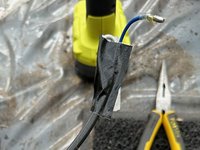
The earth wire going from the power plug to the motor is crimped together, If you still need to get this side off, just cut the wire and rejoin it when you reassemble.
-
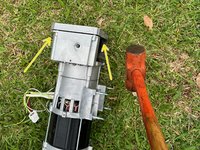
Undo the 2x20mm PH2 screws from the Capacitor bracket and put the capacitor out of the way for now.
-
-
-
-
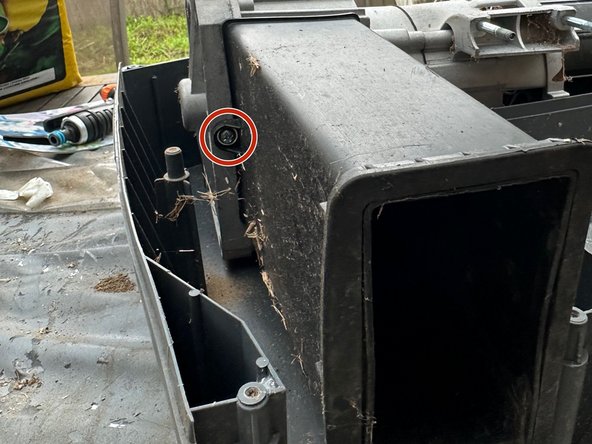
Remove the outlet chute now as it'll make getting the motor out a lot easier. It's held in with 3x15mm PH3 Screws
-
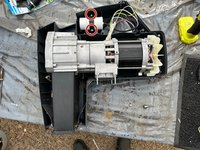
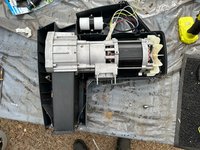
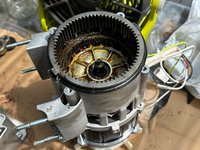
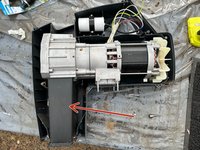
The motor is a bit unwieldy, keep wiggling it until you can get it free from the rest of the case - the two screws that held on the base/wheels are the trickiest part to get past.
-
-
-
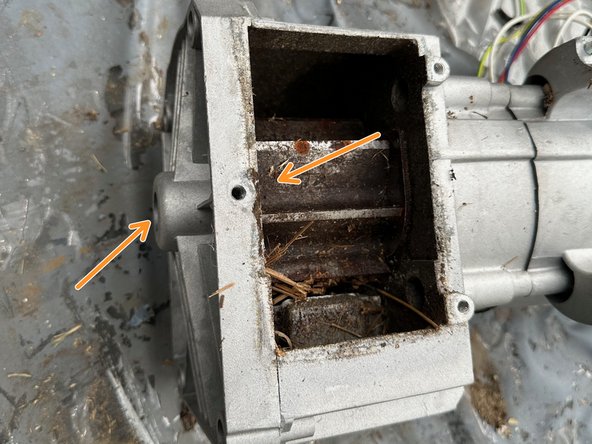
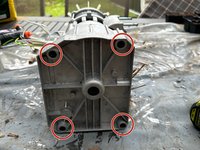
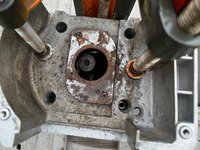
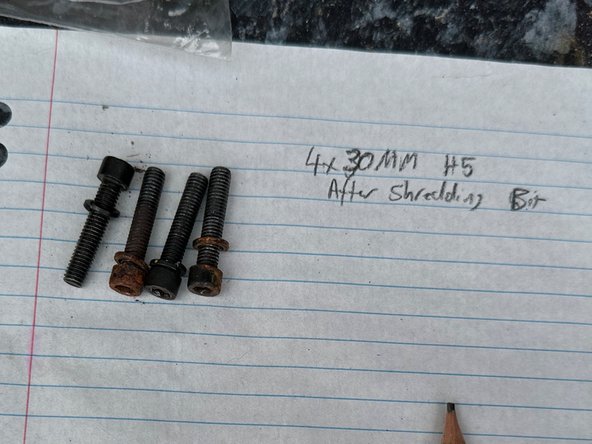
Remove the 4xH5 22mm Screws from the end.
-
If the shredder is siezed, spray in the marked locations with some penetrating spray and give it a few minutes to soak in.
-
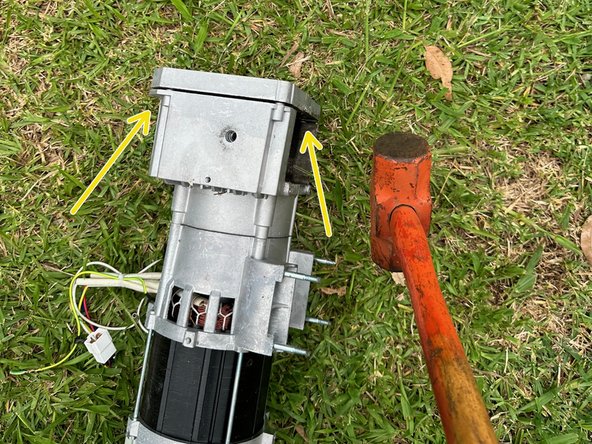
Take a big hammer and tap on alternating sides to try get the end cap off. The amount of force you need will vary from "just a light tap" to "am I going to break this?" depending on how rusted in it is.
-
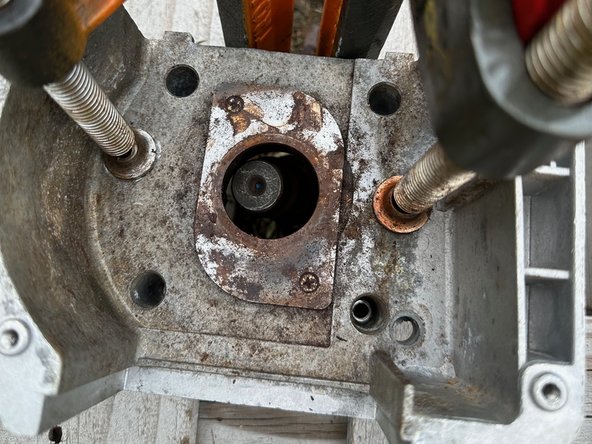
Once you get the end off you can take out the adjustment piece - note there's a plastic spacer and a nut that goes onto the red adjustment knob, put these aside so you don't lose them!
-
-
-
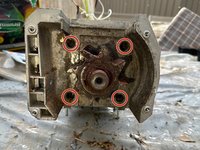
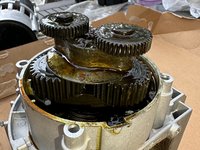
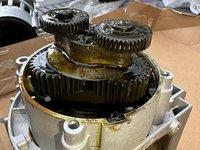
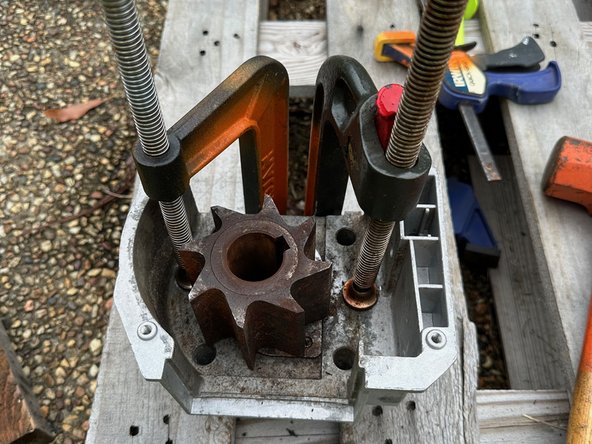
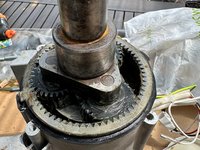
Remove the 4xH5 Bolts from around the shredder blade, the gear box will come off the motor with a light tap/wiggle.
-
Once this comes off the gears will be loose, so make sure you don't lose any!
-
-
-
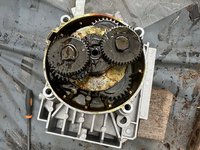
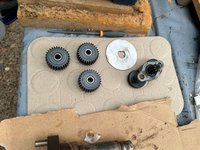
Take the gears out one by one - I cleaned the grease off as I went as I will be regreasing them with fresh grease when I put it back together.
-
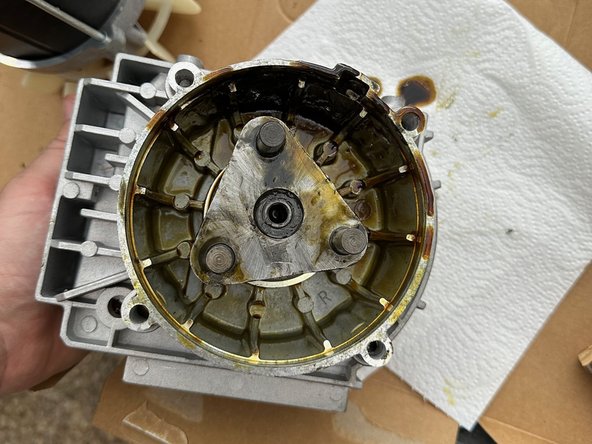
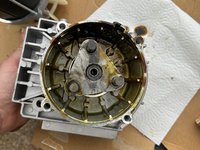
Once you're down to the last piece with the two spokes, see if you can spin the shredder blade. If it spins freely, then luck is on your side and you can probably skip removing the shredder blade.
-
Luck was not on my side. It is solidly stuck in place.
-
-
-
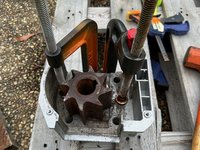
Load it up with penetrating spray (around the top of the blade + in the little hole and underneath the blade).
-
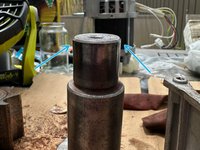
Find somewhere strong to rest it so it's sitting on the casing and not on the back end of the gears (I used an old pallet), clamp it down with C Clamps (the Irwin quickclamps can't handle it and will come off) and give it a good whack or two.
-
If you're lucky it'll go through and everything's all good. The first one I did I had to get out an SDS Drill on chisel mode (so it goes up and down and not spinning!) and give it a solid blast until it came out.
-
-
-
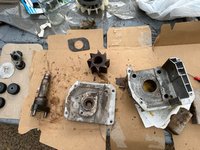
Now to clean all the pieces before reassembly!
-
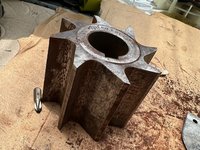
Shredder Blade - Wire brush to get the rust off and a bit of a sand to clean it up. If there's any really solid nicks in the blades you can clean them up with a file too. In the inside, give it a quick sand, it was mostly just light rust on the inside here.
-
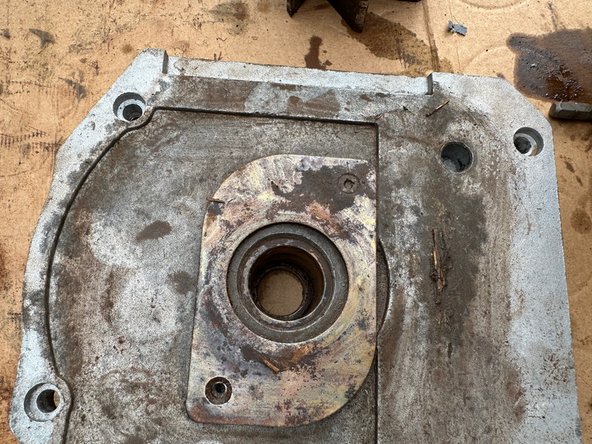
Casing - Quick scrub here - I used vinegar and steel wool to get any rust. Clean out the two openings with a bit of sandpaper to remove any rust.
-
-
-
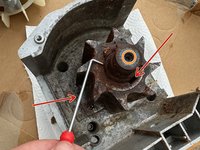
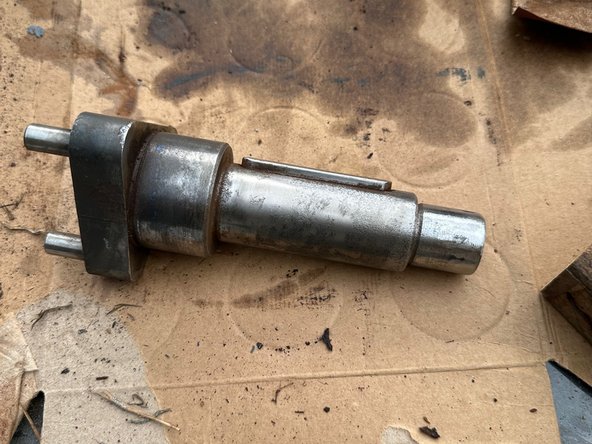
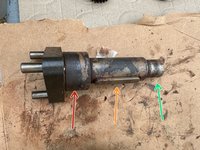
For the inner side - remove the rust and try to sand it as best you can. I hit it with a wire wheel to get rid of as much rust as I could.
-
You'll want this to be as smooth as possible. This will need to fit back into the housing and be able to freely spin with as little play as possible (this is a cheap shredder though, near enough is good enough!)
-
On the middle part - same deal, remove the rust (this part is less important about being perfectly smooth)
-
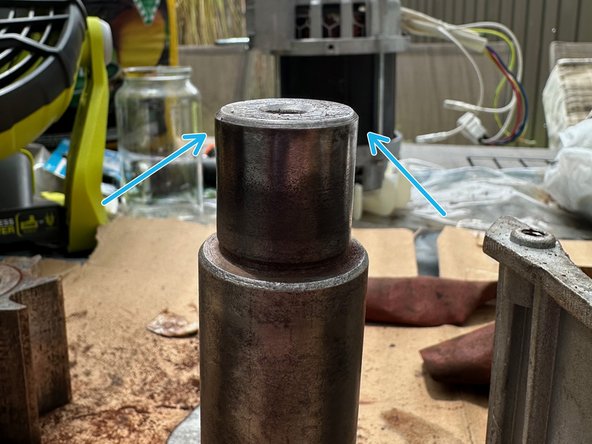
For the end, this part needs to fit into the end part of the housing.
-
If you hit it hard enough in Step 11, you'll notice it has mushroomed out a bit. You'll need to grind this back down so it can fit in the end housing. Keep grinding and testing until it'll fit and can spin.
-
I used an angle grinder to get it close then a hand file to get it closer and sandpaper to neaten it up.
-
-
-
For the most part - follow the instructions in reverse.
-
Here's some extra tips though to help with reassembly!
-
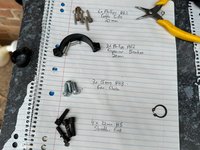
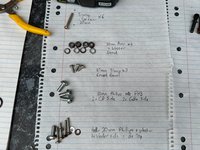
Here's all the screws laid out with poor handwriting...
-
-
-
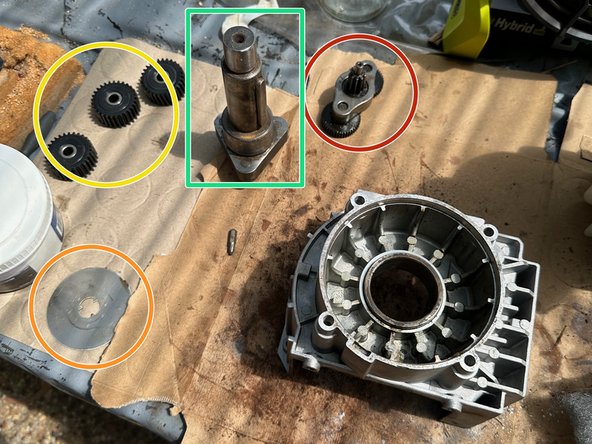
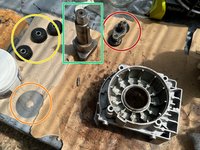
Assemble the gears starting from the motor side first. I slathered everything in grease before I put it back together.
-
Red Marked part first up against the motor (wiggle it until it falls into place)
-
Orange flat disc next
-
Green Axle with the 3 gears on it next, again wiggle it about it until it falls into place
-
Then you can put the cover part back on and screw it in.
-
-
-
The exit chute is actually not necessary, other people have mentioned removing it to make it clog up less.
-
Don't forget to give it a wipe down and maybe paint the wheel frame if it's looking a bit rusty!
-


To reassemble your device, follow these instructions in reverse order.
To reassemble your device, follow these instructions in reverse order.
crwdns2935221:0crwdne2935221:0
crwdns2935229:04crwdne2935229:0
crwdns2947412:04crwdne2947412:0
Thanks for the guide @duk242 . It was very helpful when replacing the Cutting Plate in my shredder.
I also found the Red Knob adjustment screw being so easy to use, resulted in the cutting plate wearing out prematurely, I have replaced it with a stainless M10 x 65mm hex bolt so I have to use an 18mm spanner to adjust it in the future, resulting in the cutting plate lasting longer.
Very detailed and makes servicing the shredder much easier, less prone to errors and damage to the shredder.
Mate absolutely entertaining and helpful, admittedly I had already disassembled mine already and yes it was seized both end and did not want to comply, but some penetrating oil a lot of heat and a hydraulic press later it all came apart easily, what I really needed was whichich wires go where and putting them back ( no I did not take any photos 😭😭😭).
Anyway I am not putting mine back together as a shredder, it will become a lifting hoist, the bushes are being replaced with bearing and the face plate replaced with steel bit involved but good project.
Again thank you for your time.
Excellent guide @duk242 appreciate you posting it with such great detail. I've linked to it from an Australian silent shredder forum in case it can help others :) We've been entertaining each other for around twelve years now on most of the silent shredder brands available in Au. Feel free to stop by. https://forums.whirlpool.net.au/thread/9... Cheers and thanks again.