crwdns2933423:0crwdne2933423:0

crwdns2942213:0crwdne2942213:0

crwdns2935311:0crwdnd2935311:0crwdne2935311:0 crwdns2935313:0OWC Thunderbolt 3 Pro Dockcrwdnd2935313:0crwdnd2935313:0crwdne2935313:0

  1. OWC Thunderbolt 3 Pro Dock Teardown, The start: crwdns2935265:01crwdnd2935265:01crwdnd2935265:03crwdne2935265:0 OWC Thunderbolt 3 Pro Dock Teardown, The start: crwdns2935265:01crwdnd2935265:02crwdnd2935265:03crwdne2935265:0 OWC Thunderbolt 3 Pro Dock Teardown, The start: crwdns2935265:01crwdnd2935265:03crwdnd2935265:03crwdne2935265:0
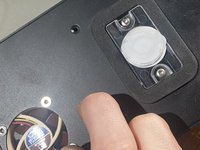
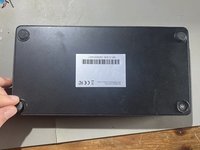
    • Flip dock upside down and remove rubber feet

  2. OWC Thunderbolt 3 Pro Dock Teardown, Removing bottom cover: crwdns2935265:02crwdnd2935265:01crwdnd2935265:03crwdne2935265:0 OWC Thunderbolt 3 Pro Dock Teardown, Removing bottom cover: crwdns2935265:02crwdnd2935265:02crwdnd2935265:03crwdne2935265:0 OWC Thunderbolt 3 Pro Dock Teardown, Removing bottom cover: crwdns2935265:02crwdnd2935265:03crwdnd2935265:03crwdne2935265:0
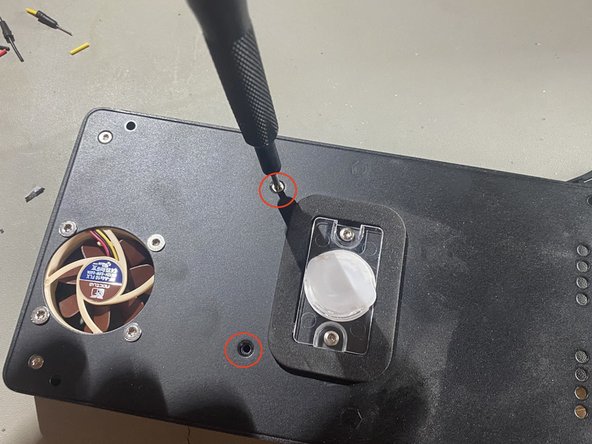
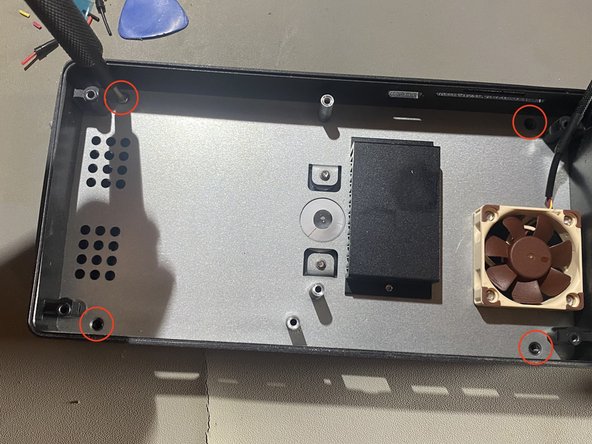
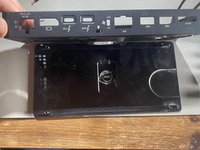
    • Remove bottom plate screws and remove bottom plate

    • Make sure to use a TORX TR8 head for the bottom screws

  3. OWC Thunderbolt 3 Pro Dock Teardown, Removing the mainboard: crwdns2935265:03crwdnd2935265:01crwdnd2935265:03crwdne2935265:0 OWC Thunderbolt 3 Pro Dock Teardown, Removing the mainboard: crwdns2935265:03crwdnd2935265:02crwdnd2935265:03crwdne2935265:0 OWC Thunderbolt 3 Pro Dock Teardown, Removing the mainboard: crwdns2935265:03crwdnd2935265:03crwdnd2935265:03crwdne2935265:0
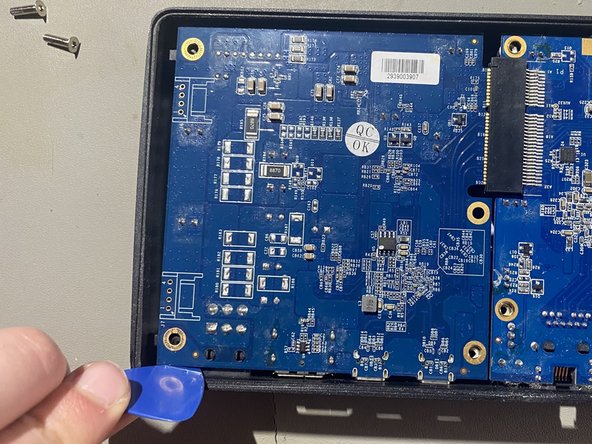
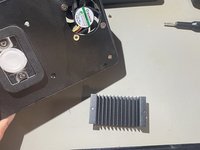
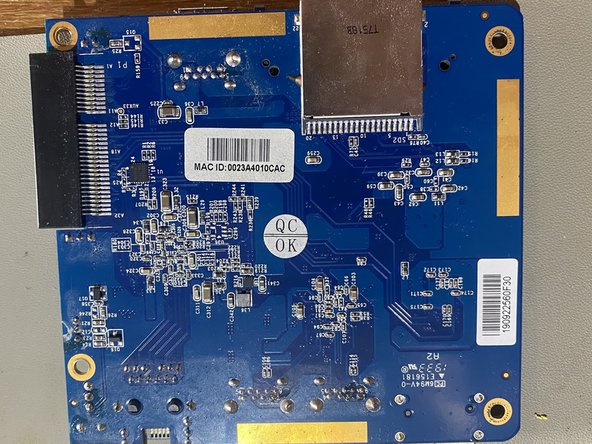
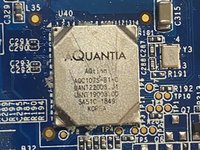
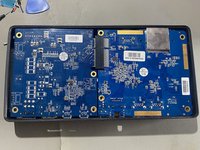
    • Remove the mainboard and its three screws

    • Use a TORX TR8 for all of these screws

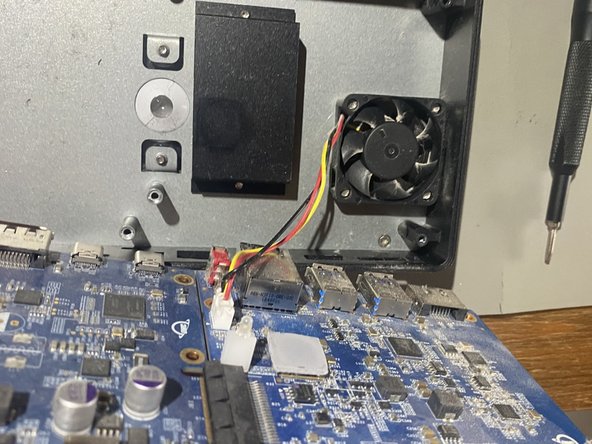
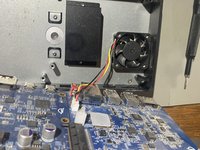
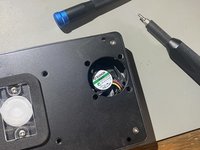
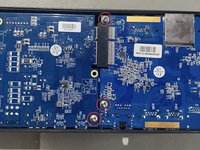
    • Make sure to unplug the fan on the other side as it is still connected to the chassis, it may need some persuasion as the connector is really in there

    • When removing the mainboard be gentle as the front I/O sits flush to the chassis otherwise you might damage it.

  4. OWC Thunderbolt 3 Pro Dock Teardown, Removing top plate: crwdns2935265:04crwdnd2935265:01crwdnd2935265:03crwdne2935265:0 OWC Thunderbolt 3 Pro Dock Teardown, Removing top plate: crwdns2935265:04crwdnd2935265:02crwdnd2935265:03crwdne2935265:0 OWC Thunderbolt 3 Pro Dock Teardown, Removing top plate: crwdns2935265:04crwdnd2935265:03crwdnd2935265:03crwdne2935265:0
    • Remove the four TORX TR8 screws

    • Pry the top plate away from the main chassis, this may take some persuasion as the top plate is glued in a bit

  5. OWC Thunderbolt 3 Pro Dock Teardown, Removing NIC heatsink: crwdns2935265:05crwdnd2935265:01crwdnd2935265:02crwdne2935265:0 OWC Thunderbolt 3 Pro Dock Teardown, Removing NIC heatsink: crwdns2935265:05crwdnd2935265:02crwdnd2935265:02crwdne2935265:0
    • Remove the two TORX TR8 screws to remove the heatsink

    • It is highly recommended to clean the surface from whatever residue the thermal pad has left behind to increase longevity of the dock

  6. OWC Thunderbolt 3 Pro Dock Teardown, Removing fan: crwdns2935265:06crwdnd2935265:01crwdnd2935265:03crwdne2935265:0 OWC Thunderbolt 3 Pro Dock Teardown, Removing fan: crwdns2935265:06crwdnd2935265:02crwdnd2935265:03crwdne2935265:0 OWC Thunderbolt 3 Pro Dock Teardown, Removing fan: crwdns2935265:06crwdnd2935265:03crwdnd2935265:03crwdne2935265:0
    • Switch to a TORX TR10 bit for the fan screws

    • The fan model is a sunon HA40101V4-1D070-G99

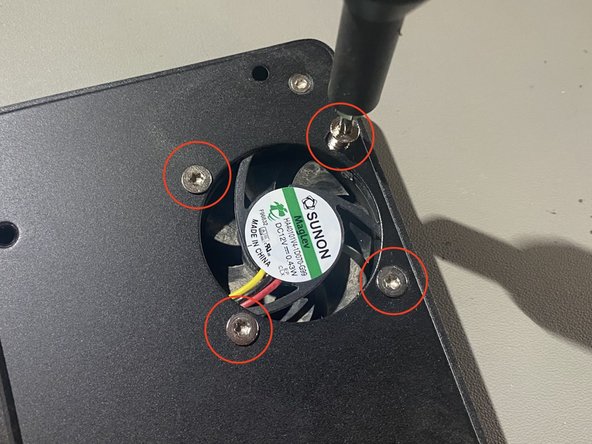
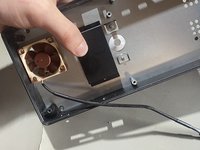
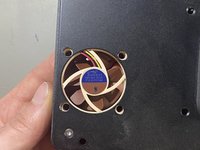
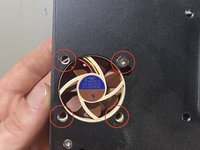
    • When the screws are out the fan should just fall out

  7. OWC Thunderbolt 3 Pro Dock Teardown, Everything spread out: crwdns2935265:07crwdnd2935265:01crwdnd2935265:01crwdne2935265:0
    • .

  8. OWC Thunderbolt 3 Pro Dock Teardown, A look at half of the mainboard: crwdns2935265:08crwdnd2935265:01crwdnd2935265:03crwdne2935265:0 OWC Thunderbolt 3 Pro Dock Teardown, A look at half of the mainboard: crwdns2935265:08crwdnd2935265:02crwdnd2935265:03crwdne2935265:0 OWC Thunderbolt 3 Pro Dock Teardown, A look at half of the mainboard: crwdns2935265:08crwdnd2935265:03crwdnd2935265:03crwdne2935265:0
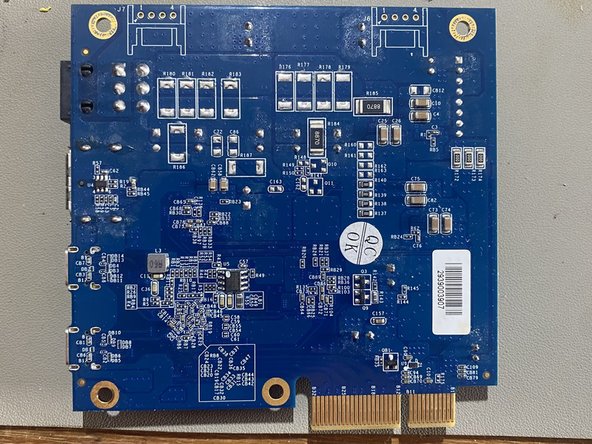
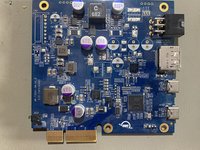
    • sample text, the photos speak for themselves

    • The 10Gbe NIC is the Aquantia AQC107S-B1-C

  9. OWC Thunderbolt 3 Pro Dock Teardown, A look at the other half: crwdns2935265:09crwdnd2935265:01crwdnd2935265:02crwdne2935265:0 OWC Thunderbolt 3 Pro Dock Teardown, A look at the other half: crwdns2935265:09crwdnd2935265:02crwdnd2935265:02crwdne2935265:0
    • Insert wisdom here. - indeed

  10. OWC Thunderbolt 3 Pro Dock Teardown, Measurements of the NIC: crwdns2935265:010crwdnd2935265:01crwdnd2935265:02crwdne2935265:0 OWC Thunderbolt 3 Pro Dock Teardown, Measurements of the NIC: crwdns2935265:010crwdnd2935265:02crwdnd2935265:02crwdne2935265:0
    • I cant figure out how to put more than 3 pics in one step, so the ended up here.

  11. OWC Thunderbolt 3 Pro Dock Teardown, Putting the heatsink back: crwdns2935265:011crwdnd2935265:01crwdnd2935265:03crwdne2935265:0 OWC Thunderbolt 3 Pro Dock Teardown, Putting the heatsink back: crwdns2935265:011crwdnd2935265:02crwdnd2935265:03crwdne2935265:0 OWC Thunderbolt 3 Pro Dock Teardown, Putting the heatsink back: crwdns2935265:011crwdnd2935265:03crwdnd2935265:03crwdne2935265:0
    • Support the heatsink and line it up with the holes on the top of the chassis

    • Re-install the two TORX TR8 screws to hold in the heatsink

  12. OWC Thunderbolt 3 Pro Dock Teardown, Re-installing fan: crwdns2935265:012crwdnd2935265:01crwdnd2935265:02crwdne2935265:0 OWC Thunderbolt 3 Pro Dock Teardown, Re-installing fan: crwdns2935265:012crwdnd2935265:02crwdnd2935265:02crwdne2935265:0
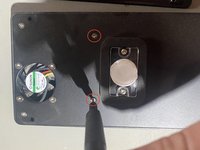
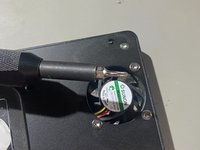
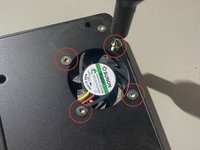
    • Line up the fan with the holes

    • Screw the fan back in with the TORX TR10 screws

  13. OWC Thunderbolt 3 Pro Dock Teardown, Re-installing the top lid: crwdns2935265:013crwdnd2935265:01crwdnd2935265:02crwdne2935265:0 OWC Thunderbolt 3 Pro Dock Teardown, Re-installing the top lid: crwdns2935265:013crwdnd2935265:02crwdnd2935265:02crwdne2935265:0
    • Line up the top lid with the main chassis, make sure to have the fan vent in the correct orientation so it can breathe.

    • Screw the lid back in with the four TORX TR8 screws

  14. OWC Thunderbolt 3 Pro Dock Teardown, Re-installing mainboard: crwdns2935265:014crwdnd2935265:01crwdnd2935265:03crwdne2935265:0 OWC Thunderbolt 3 Pro Dock Teardown, Re-installing mainboard: crwdns2935265:014crwdnd2935265:02crwdnd2935265:03crwdne2935265:0 OWC Thunderbolt 3 Pro Dock Teardown, Re-installing mainboard: crwdns2935265:014crwdnd2935265:03crwdnd2935265:03crwdne2935265:0
    • Put the mainboard back into the main chassis, make sure to be gentile and line up the rear I/O first and then slowly lower in the other side.

    • Secure the mainboard with the 3 TORX TR8 screws. - no you arent missing any the rest of the screws go through the bottom cover

  15. OWC Thunderbolt 3 Pro Dock Teardown: crwdns2935265:015crwdnd2935265:01crwdnd2935265:03crwdne2935265:0 OWC Thunderbolt 3 Pro Dock Teardown: crwdns2935265:015crwdnd2935265:02crwdnd2935265:03crwdne2935265:0 OWC Thunderbolt 3 Pro Dock Teardown: crwdns2935265:015crwdnd2935265:03crwdnd2935265:03crwdne2935265:0
    • Line up the bottom cover, !make sure to use the orientation that is shown in the photo otherwise it will not line up!

    • Secure the bottom cover with the four TORX TR8 screws

    • Re-install the rubber feet, you might want to put a bit of glue on these to keep them on when moving around

Robust

crwdns2935283:004/26/21crwdne2935283:0

688 crwdns2915208:0crwdne2915208:0

crwdns2935297:03crwdne2935297:0

crwdns2947412:00crwdne2947412:0

crwdns2917038:0crwdne2917038:0

crwdns2936625:0crwdne2936625:0:

crwdns2936751:024crwdne2936751:0 0

crwdns2936753:07crwdne2936753:0 7

crwdns2936753:030crwdne2936753:0 32

crwdns2942667:0crwdne2942667:0 739