crwdns2915892:0crwdne2915892:0
My EE senior project group was given the task of reverse engineering an electrical product, and here is the documentation of the process.
Find a spacious table or workbench to do this teardown since there are a lot of components inside the oven.
crwdns2942213:0crwdne2942213:0
-
-
Before beginning with the disassembly, open the microwave oven door and remove the food plate and the turntable it sits on so they aren't sliding around during the rest of the teardown.
-
-
-
The LEFT side of the oven has a single black phillips screw that needs to be removed.
-
On the RIGHT side there are two identical black screws; remove these as well.
-
-
-
On the BACK side of the oven you'll find a T8 torx screw on each corner; remove all four.
-
-
-
On the bottom of the microwave you'll find 9 more phillips screws. Remove the four on the top and bottom of the casing, and four more on the right side which are holding the transformer to the inside of the case. Leave the last screw, which is located in the raised rectangle in the middle of the bottom panel,
-
-
-
Lift the vented metal plate from the back side at an angle until the clips on the front side by the oven door are no longer holding the plate. Set bottom plate aside and the oven's contents are accessible.
-
-
-
-
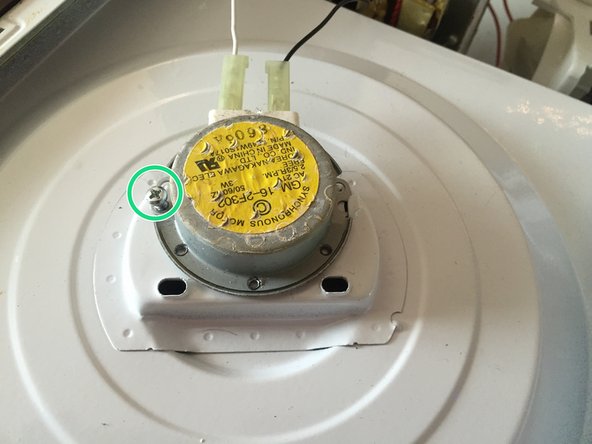
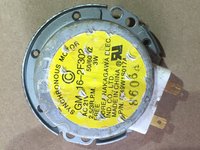
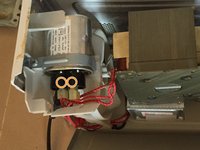
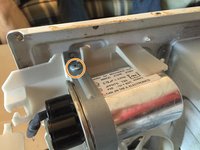
Unplug the two power wires for the motor with a yellow sticker on it.
-
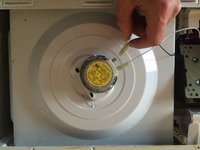
Disconnect single phillips screw on motor, pull motor off white microwave mounting, and set aside.
-
-
-
Bend the right side of sheet metal around side tabs on front. To do so, apply medium force until the sheet metal is out of its bracket grooves
-
Carefully bend the sheet metal down flat onto the work surface to allow complete access to internal electronics.
-
-
-
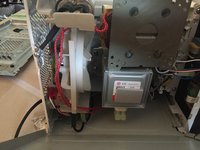
The high-voltage capacitor is located on the upper left corner of the side view.
-
-
-
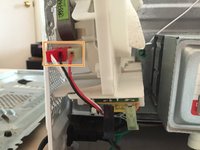
Move the loose plastic harness, which is holding the red wires in place, out of the way.
-
Disconnect the two plugs with red wires from the capacitor.
-
Remove the phillips screw for the metal bracket holding the capacitor in place, and remove the bracket.
-
-
-
Remove the screw holding the capacitor ground on the left side of the oven. and set the capacitor aside.
-
-
-
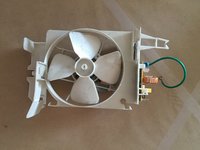
Disconnect the three plugs in the front of the fan.
-
Disconnect the two power plugs on the circuit board on the bottom of the fan system.
-
Remove the two phillips screws securing the ground wires, and put the fan system aside
-
-
-
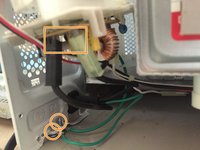
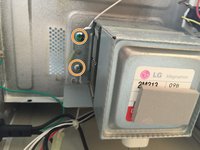
The transformer is labeled "Danger High Voltage" in red letters, and will be already disconnected from the oven's bottom grate which was removed in steps 4 and 5.
-
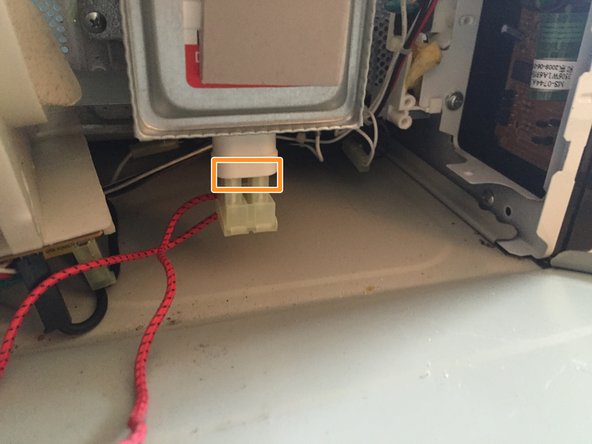
Two red wire connectors go to the magnetron, which is directly below the transformer. Unplug these and set the transformer aside.
-
-
-
The magnetron is the heart of the microwave oven, since it ultimately converts voltage to microwaves.
-
Disconnect the red wire connector protruding from the bottom of the magnetron.
-
Remove 4 phillips screws holding the magnetron to the food compartment. Set the magnetron aside.
-
-
-
The PCB for the keyboard and the LED display has two phillips screws hidden between on-board components. The board also has several connectors that cannot be removed reliably without jeopardizing the functionality of the oven, so it is recommended to leave the board connected unless it must be replaced.
-


crwdns2947412:05crwdne2947412:0
really cool teardown and also dangerous you are really brave congrats!!!!
Very good and interesting teardown well presented in a logical sequence. Well done
Hi, what's the best way to safely discharge the capacitor? Thanks.
Hi Doug and Others, I’d like your opinion on something please. I have never made or built anything before but I’m looking into making a biltong maker and I think converting an old microwave will be perfect as it already has a fan and vents. I would need to get an electrician to remove the magnetron and whatever else needs removing- and add a heat source. I’d like your feedback on this please. I’ve seen fridges converted to biltong makers on Youtube but I can’t find converted microwaves anywhere.
I have a Jennair over range microwave. Sometimes it works fine , sometimes it just beeps and a message shows on the screen F1E2 . Any ideas from anyone on solution ? I already unplugged it however problem persists.