crwdns2915892:0crwdne2915892:0
Like a lot of LG devices I wasn't able to find a teardown guide for general knowledge, and if i needed to replace something. I decided to use my personal LG G2 (D800) and make a quick teardown like the one I made for the LG Nitro (P930) on the XDA forums.
crwdns2942213:0crwdne2942213:0
-
-
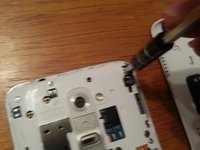
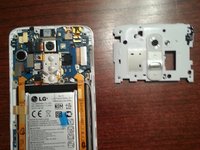
Well how about removing the SIM tray...it's the little teardown victories
-
Now peering into the SIM tray slot at an angle you can kinda see the back is separate from the metal bezel
-
-
-
Starting from the bottom corner, use the thin blunt side of a Spudger to separate the back from the metal bezel. THIS CAN CAUSE COSMETIC & INTERNAL DAMAGE if you are not careful.
-
Use a thumb nail, plastic spudger, or pry tool to raise one side releasing the plastic clips. Then raise the other side and the top should pull off with ease.
-
-
-
Use a Phillips #00 screwdriver remove all visible screws.
-
-
-
Use a thumb nail or plastic prying tool to pop off the black plastic shield on the bottom.
-
Do the same thing to remove the white plastic shield around the top of the device.
-
-
-
-
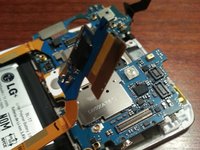
With the logic board exposed using a plastic pry tool unhook the flex cable clips and the 2 antennas.
-
Start with the battery connector.
-
Camera & Volume keys
-
Front camera & Prox. Sensor/LED
-
Digitizer
-
2 antenna wires (NOTE: these antenna and flex connectors are heavy duty.)
-
2 flex cables joining the bottom board to the logic board
-
-
-
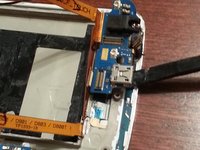
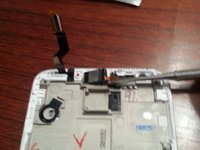
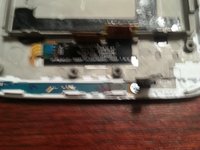
The flex cable running up the right side of the battery is connected to a smaller board, which is held to an EMI shield on the logic board with a small amount of adhesive; it can be carefully pried up.
-
The same thing can be done to the other side. Peel up the tape holding the flex cables down remembering where they went.
-
-
-
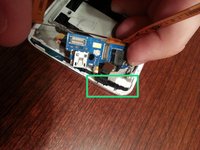
At the other end, 2 big flex cables are brought together by a small control board. Disconnect the 2 clips (Green - LCD and Orange - Digitizer) and the other ends of the antennas. Then remove the antenna wires completely.
-
This small control board is also held down by a little adhesive, but can be carefully pried up.
-
-
-
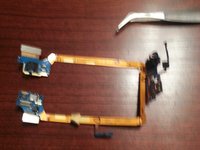
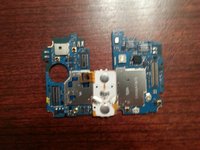
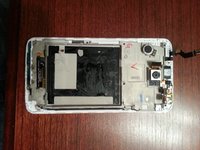
We should now have removed the 2 big flex cables attached to their respective mutual boards, the 2 antenna wires and the main logic board.
-
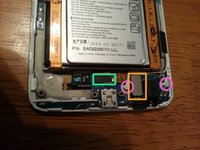
We can now start the process of removing the battery. Using a flat plastic pry tool, pry up the edges of the battery and work your way to the middle from all sides.
-
The third pic is what we should have after the battery is removed.
-
-
-
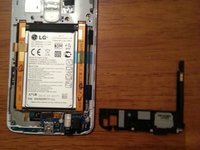
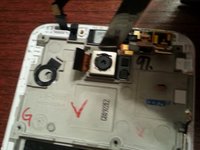
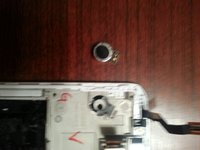
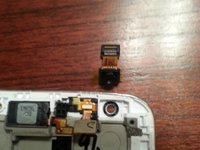
We can now remove the rest of the components: rear camera, vibration motor, and the front camera.
-
-
-
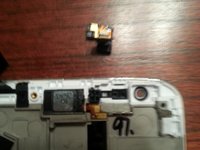
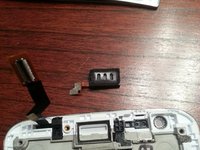
Components cont'd: prox. sensor/ LED, ear speaker.
-
-
-
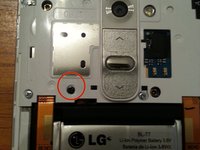
At the bottom of the phone is another very small board almost like a piece of metal tape. It's held down by a small screw. Remove the screw, and peel up the piece. I'm 99% sure it's strictly for grounding purposes, but none the less is still important.
-
TIP: When prying up circuit, logic boards, or small pieces like this it's best to start where a screw was removed, because often the area is reinforced and protected.
-
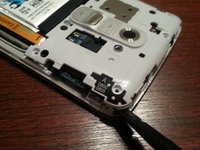
You should now have just the screen assembly. I didn't remove the LCD or digitizer. I've found separate, and full screen assemblies on the web, but I've also read LG is making it quite affordable to repair the screen by sending it to them.
-
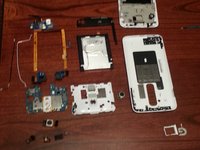
As always here's a look at it all.
-
For reassembly start from the very last step, and go back in order. REMEMBER fellow fixers, either repair or recycle.
-


crwdns2947412:047crwdne2947412:0
Very bad quality photo and insufficient description.
Which part controls the speaker? Mine has stopped working
Speaker's on the mobo and fairly exposed to water damage if it so occurs - other than cleaning the goldfingers/contact pads and tightening the ~6 screws on the upper plastic shield (the plastic shield is required to be in-place for sound to work), you might be out of luck.
Tai -
Hi there.
I´m, having also Problems with Speaker. After Replace the Screen Speaker doesn´t work. I had changed the Flex Cable and Speaker (lower Plastic Part). But it doesn´t work :(
Why must be the upper Plastic Part installed to work speaker?
Hi Yvette,
I had the same problem you have. It turns out that the speaker is in the lower cover. Not the upper cover mentioned elsewhere. Here's a picture to help me explain: http://imgur.com/akIB9Cy The upper piece in the photo contains the speaker. You'll notice the contacts on the thin portion. The lower piece is the ribbon cable that goes up the left side of the battery. Notice the contacts on the piece that hangs off of the cable. Apparently a lot of us end up compressing those contacts in the process of removing the cover that contains the speaker. What you need to do is use some tool to carefully uncompress the contacts on the ribbon cable. That should let them make contact with the speaker contacts and fix your sound problem.
terryb -