crwdns2915892:0crwdne2915892:0
This is the first digital camera I've ever owned. I've kept 4,662 photos taken by the Kodak. I deleted countless more. It marked the beginning of my continuing interest in digital photography.
While it is an ancient relic compared to what's made today, this camera still surprisingly contains all the hallmarks of modern digital photographic technology. See for yourself and take a teardown adventure with me.
crwdns2942213:0crwdne2942213:0
-
-
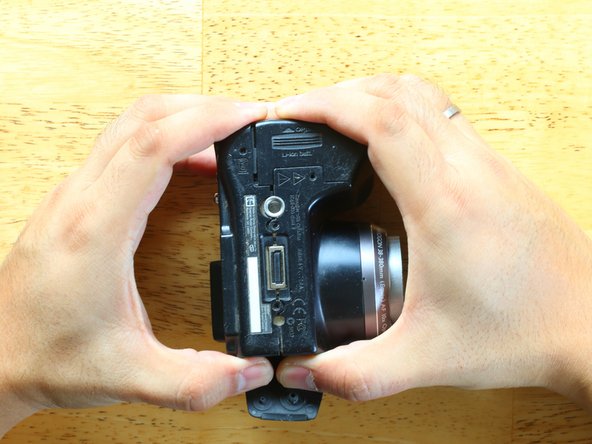
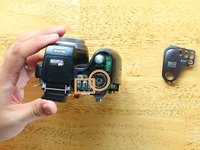
Remove the li-ion battery, memory card, and any external straps.
-
Before disassembly, you should remove the battery and wait a few hours before proceeding to allow the high voltage circuitry to de-energize .
-
-
-
Unscrew the seven #00 Phillips body screws.
-
-
-
Remove the rubbery port cover.
-
Gently tug on the cover. It is held on by two rubber tags which can be pushed into slots to be released.
-
-
-
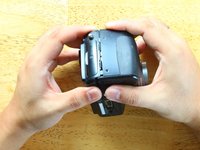
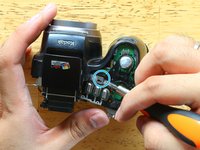
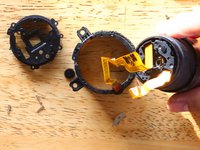
Firmly grip the camera body with both hands and wiggle. A seam should start appearing as shown.
-
Continue to work carefully around all four edges of the camera. There are no more screws holding the body together and the body does not use breakable tabs.
-
-
-
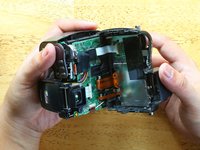
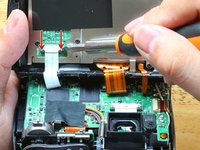
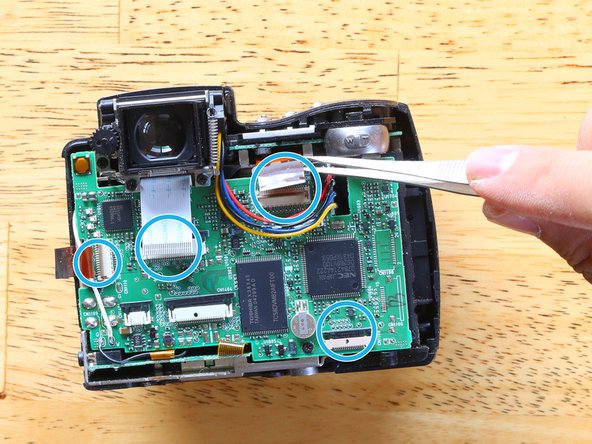
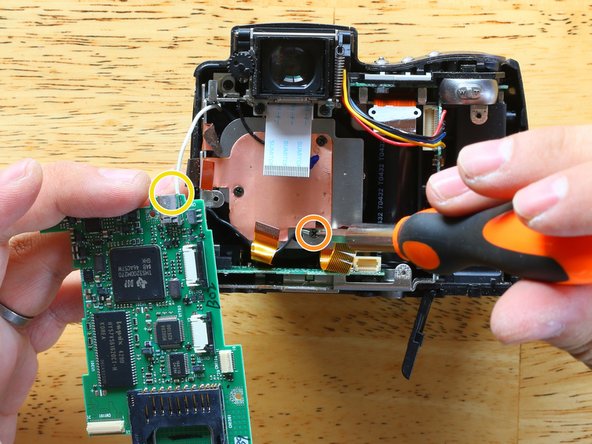
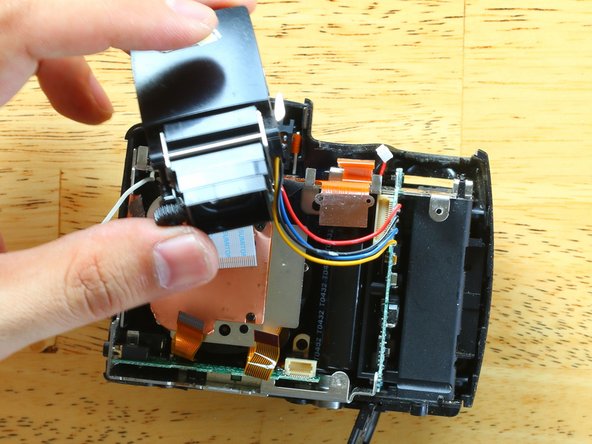
Gently push down on the two black cable release tabs. The flex-cable should be loose and detachable after that. Gently move the cable out of the socket.
-
Repeat the process for all the marked cables.
-
-
-
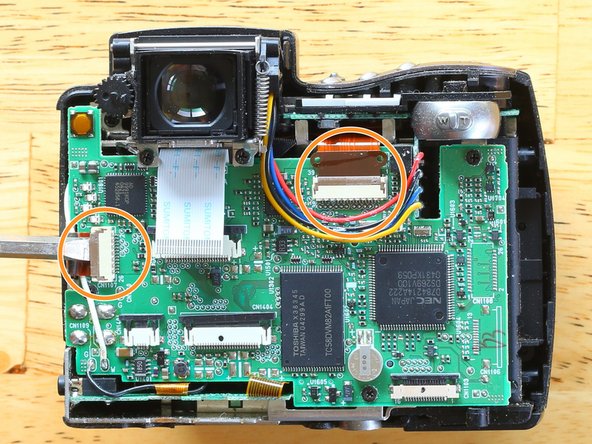
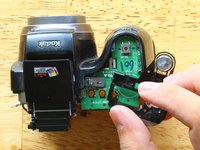
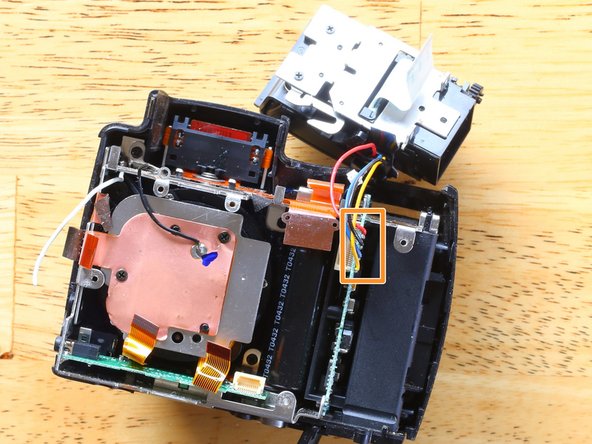
This is the main board. It handles tasks such as image processing, card reading/writing, and user input.
-
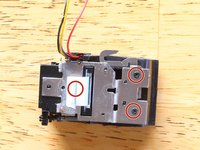
These 4 soldered points supply high voltage power from the power board to the flash unit.
-
This is the backup battery that is used to retain time and settings when the main power source is removed.
-
This is the remote flash trigger wire which connects to the remote flash port.
-
This flex-cable connects to the camera's electronic viewfinder (EVF).
-
This flex-cable connects to the camera's image sensor.
-
This flex-cable connects to the top button array as well as the light metering sensors.
-
-
-
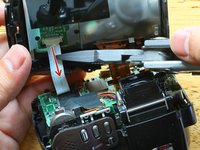
Push both cable locks to release the back panel and EVF flex-cables.
-
Gently pry the tan bar up to release the sensor flex-cable. Repeat the procedure for the top panel flex-cable.
-
Gently move all cables out of their sockets.
-
-
-
-
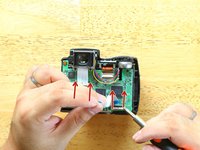
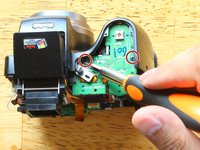
Unscrew the three #00 Phillips holding the main board.
-
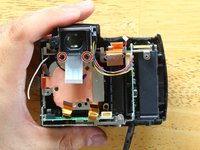
Lift the board gently away from the chassis.
-
-
-
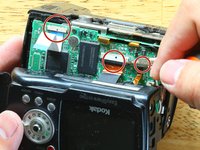
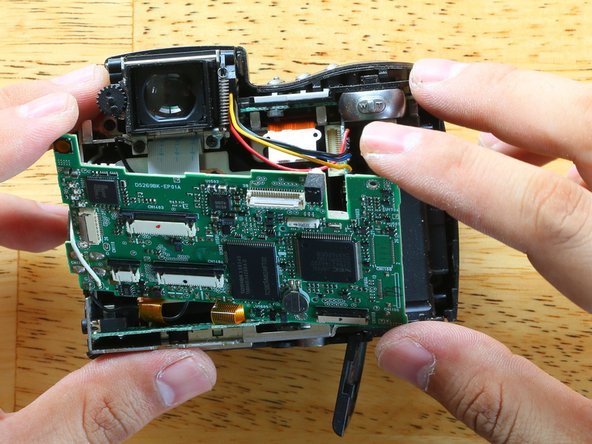
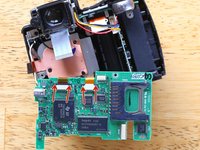
Let's take a moment to gaze at the back side of the main board:
-
SD card slot that is accessible externally.
-
Hynnix brand 32MB SDRAM.
-
Texas Instrument TMS320DM270 image processor. This is the brains of the camera.
-
Kodak proprietary USB connector.
-
Boy, the times sure have changed since this camera was top of the line...
-
-
-
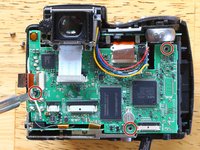
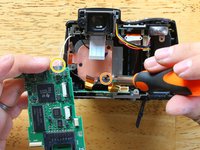
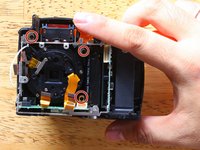
Push the locks up to release the lens servo motor cables. Gently remove the cables out of their sockets.
-
Unscrew the #00 Phillips holding a grounding wire against sensor shield.
-
At this point, you can choose to cut or de-solder the white wire from the board. It is the remote flash sync wire.
-
-
-
Gently wiggle the top plastic plate off in the direction shown by the arrow.
-
Remove the exposed speaker and plastic buttons.
-
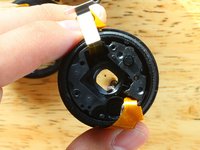
Slide a flat head/prybar underneath the silver latch and push up slightly to release the mechanical flash switch.
-
-
-
Once the mechanical flash switch is loose, you can remove the top black plastic part.
-
Unscrew the two #00 Phillips that are securing the top board. The board should now be loose enough to flip but is still connected with wires.
-
Flip the board over. Look for a two-wire socket. Gently pull the plug out of the socket.
-
-
-
Let's look at the top board. It doesn't contain anything too fancy:
-
Toggle switch, used for zooming in and out.
-
"Camera battery inserted" sensor switch.
-
Radial switch used for various menu options.
-
Main power button.
-
Tiny mysterious contact sensor (probably the "flash unit is up" sensor).
-
-
-
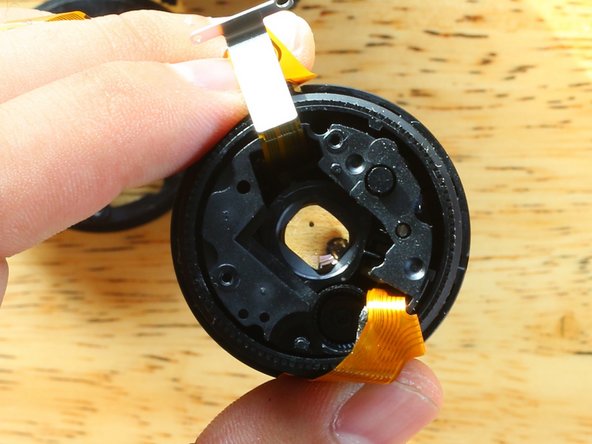
Unscrew the two #00 Phillips holding the EVF onto the chassis.
-
Swing the EVF module free from the chassis.
-
You can choose to cut or de-solder the four wires connecting the EVF module to the power board.
-
-
crwdns2935267:0crwdne2935267:0Tweezers$4.99
-
Remove the three #00 Phillips and remove the metal plate.
-
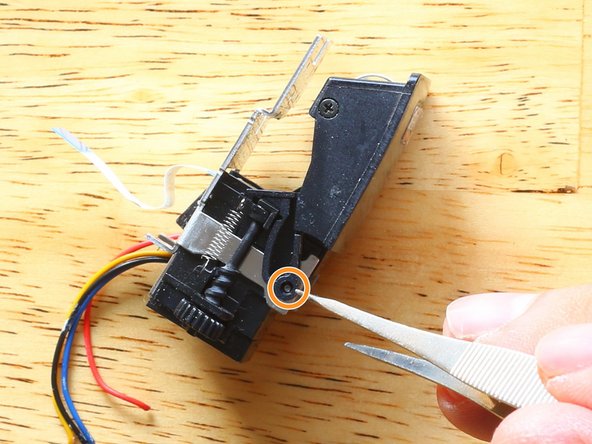
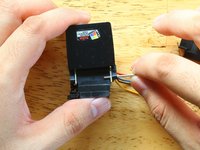
Using a paper clip or tweezers, push the silver pin inwards.
-
Remove the pin to separate the flash from the EVF.
-
-
-
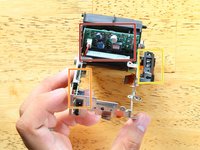
You can now separate the EVF housing, which contains a series of plastic lens and a tiny screen.
-
How tiny is it? Well, it's 0.26 inches diagonally and contains a whopping 0.3 mega-pixels!
-
-
-
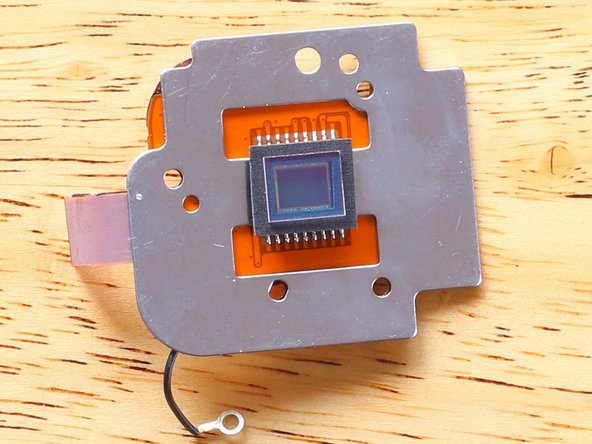
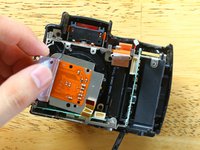
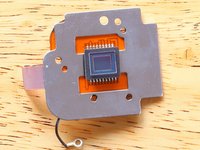
Unscrew the two #00 Phillips holding the image sensor in place. You can now remove the sensor bracket.
-
You can peel the shield to see what's behind it- a circuit board that services the sensor.
-
-
-
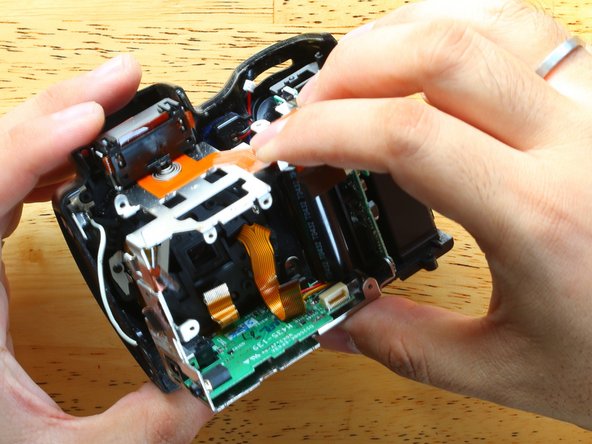
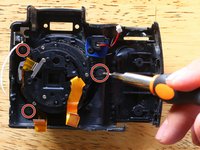
Remove the three #00 Phillips holding the bracket to the plastic chassis.
-
Gently wiggle the bracket out of the chassis.
-
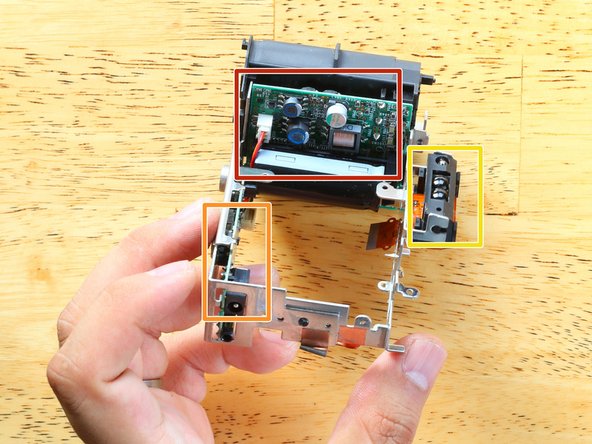
Here are a few things to note:
-
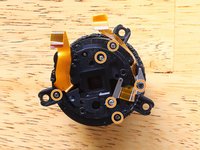
See the beefy capacitor? That, and the circuit it is connected to are used to generate high voltages necessary to discharge the flash bulb. Touching exposed contacts on that board can lead to electrical shock if the circuit has not been sufficiently de-energized.
-
This houses the light metering sensors as well as an auto-focus assist lamp.
-
This is also circuitry related to power regulation, possibly the portion which allows the camera to charge its battery on-board without the need for an external charger.
-
-
-
Unscrew the three #00 Phillips holding the lens assembly to the chassis. You can simply lift the lens assembly out once the screws are removed.
-
Remove the six #00 Phillips which hold the lens assembly together. Once that is done, you can remove the lens housing.
-
Here are some details on the lens:
-
It has a focal length of 6.32-63.2mm (38-380mm equivalent in 35mm size).
-
It has a f/2.8-3.7 aperture.
-
Its minimum focal distance is 23.6 inches.
-
-
-
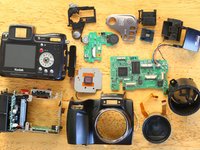
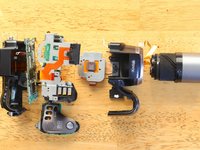
That's it folks! That's what a 16+ year old camera looks like on the inside.
-
Newer cameras actually don't look that much different on the inside. Components may have shrunk and newer sensors may boast 5-6 times more mega-pixels, but the technological concepts embodied in this camera are still widely used today.
-


crwdns2947412:011crwdne2947412:0
i want to try this do y9u have the replacement parts
Sorry Fred, I don’t have all the camera anymore.
Thanks for the information. I have this camera and love it but it suddenly stopped working. Thought the battery was bad so I ordered another and charged it, then put it in the camera, still won’t turn on. Do you have any suggestions that I could check to see what is wrong with it?
Thanks,
B. E.
Hi Bonnie,
Does the camera power up when you plug in the USB cable? If it does, check/clean the battery contacts in the camera. If it doesn’t, there may be a problem with the circuit board.
I have a DX7590 Easyshare and the flash window won't stay open or in up position when move the open lever, what can I do to fix it or is the pop up because battery may be to old??