crwdns2942213:0crwdne2942213:0
-
-
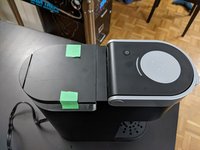
Unplug machine from the mains electricity.
-
Tape down the water refill cover.
-
-
-
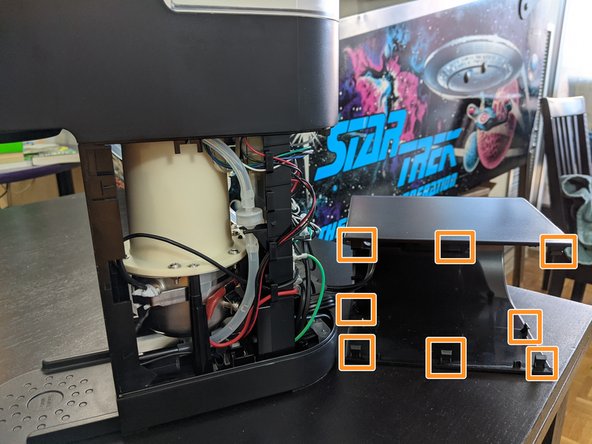
Remove two phillips screws on the base.
This step needs a Philips #1 screwdriver, #0 was too small when I tried.
-
-
-
Insert pry bar and slowly work your way down the side of unit popping out the clips.
-
Repeat on the other side.
-
-
-
This clip on the rear of the unit is particularly tricky to pop off, but popped off when the other chassis clips were all removed and held open, while pulling it backwards.
-
There are 3 clips down each vertical side, 2 on the top middle and 2 on the bottom middle.
-
This is where the screws screw in to. They need to be unhooked from the base to be able to pull it backwards and off.
-
Getting the chassis off was particularly tricky, I recommend borrowing a second pair of hands if you can.
Got chassis OFF. Want to find clog or whatever has made it stop working. What is next step,after #4?
-
-
-
-
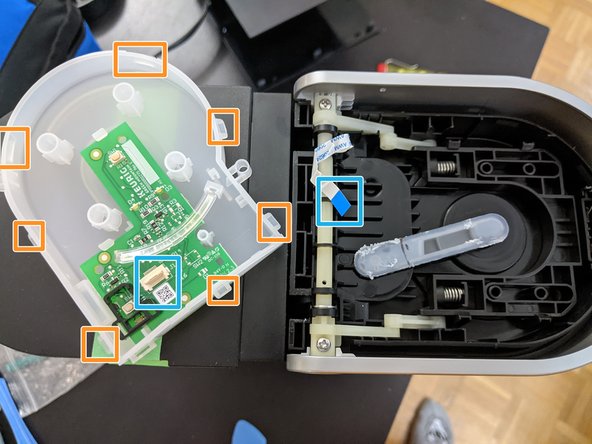
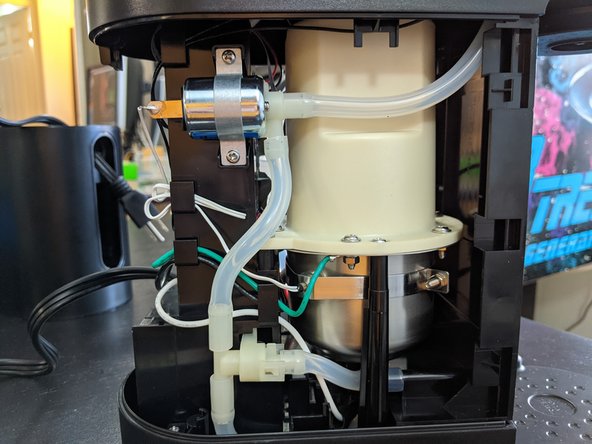
Before separating the top section, unplug the water pump from the rear circuit board.
What is the Blue capacitor like in the above photo (MOV1)? Is it a thermistor or varistor? and what is its value? The above photo is blue, But mine is red. It got burned and its face was blown away, so identifying its value cannot be made.
Hello, does anyone know how to reset the thermostat? my keurig doesn't turn on
-
-
-
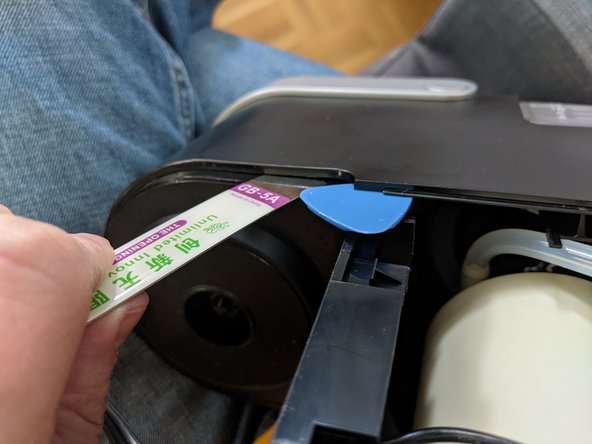
Flip the unit upside down.
-
The top of the unit is held in by one clip near the circuit board and clips around the cup spout
-
Holding the unit upside down, work pry bars around the curve and the top will pop off.
-
Once the front is popped off, you can wiggle the top section and it will separate from the base
-
-
-
The ribbon cable for the lid is glued in place and the lid can not be removed unless there is slack to pull.
-
Gently pick at the silicon glue blob and it will come up at the edges. Slide it down the ribbon cable.
-
-
-
There are six clips around the curved section and four clips along the hinge holding the top of the lid in place.
-
Apply pry bars around the curved section of the lid until the middle can be pulled out.
-
Once the curved section has popped off, the lid will still be attached at the hinge section. Close the lid and pry along the back of the hinge section, pushing the lid top away from the water refill area until the lid pops off.
where can I get the pry-tools? thx.
Randy
Right here on the iFixIt store. They are included in most kits.
-
-
-
The white box has clips around the edge which can be easily popped off with a pry bar.
-
Remove the K and power buttons. There are four springs under the K button to stabilize it.
-
Under the white rubber cover it's the small latching connector for the lid ribbon cable.
it takes me sometimes like 10 times to open/close the lid before K button is activated. Has anybody run into the same problem?
-
-
-
Side views of the internals.
-
The lid ribbon cable has a little clip in the top of the chassis to keep it tucked away.
Have NO energy left to try to solve problem on this cheap plastic piece of junk. Waste of $. No wonder there are so MANY used, for sale.am throwing it OUT
Circuit marked D8 components part value
-


crwdns2947412:021crwdne2947412:0
I plugged mine into 220V
Can I change the fuse?
How ?
and where can I find the part
There is a heavy current heater circuit. These machine are not dual voltage. Machine is made for local voltage and modification is unlikely possible. There is a thermal fuse for safely right after the main, hiding in red sleeve, but I did not open and inspect the rating. Circuit continuity can be verified easily.
I don’t recall seeing a fuse, but maybe it’s there. Take it apart and find out.. then document it here ;-)
Took it apart, power button and strong button comes on but brewing button does not work (no light seen). Can this be the board that controls the switches or is it a defective strip?
I accidentally plugged my Keurig K-mini to 220V. when I opened it, I found out that the R7 resistor (10 ohms) and the MOV1 parts got burned and blown, makings its identity no longer visible. Does anyone know if this is a thermistor or a varistor? and its correct value? I couldn't find a Keurig K-mini circuit diagram online. Would highly appreciate a response. Thank you in advance.
I looked on mine and it's a S10 K150 Varistor
My mini works, but no lights. Good thing I remembered the sequence. My neighbor gave me his old unit for parts, but it too works, but no lights. In your tear down did you notice a low voltage circuit on the main PCB? Maybe a DC rectifier? Do you know of this problem?
Hi, I think my K mini has the water reservoir filter broken. I tested it unplugged and it liked on the side (the black plastic thing were the water from the reservoir gets in the heating circuit). Any ideas how to FIY? Warranty is expired.
Where do I plug in the ribbon cable on the bottom section? Is that why my power would stop working?
Thanks for this! I haven't taken it all the way apart yet, I assumed I would see trash in the tubes but I don't. The symptom of hours is that the pump seems weak. Any idea where I should try first?
I inherited a k-mini that leaked the water out the top, after heating and before the cup. Your instructions were instrumental to opening the unit and finding the loose hose. It now works like it was new, and I didn't break anything in the process. Thank you, James.
My mini is not powering on. There is a small panel on the bottom that can be uncapped. You can see an empty plug in it. Is this where some sort of fuse should be?
I'm wondering too! I can't find any info on it
Hi. I just found this. My Keurig mini Jonathon Adler version power button does not turn on. What should we do
I diligently but too robustly cleaned my K-mini. It now blows the wall fuse after taking the water from the reservoir. I would imagine I got water inside the electronics causing the shorting of the unit. I will try disassembling it using your instructions but maybe it might be time to buy another unit that can give me more than 1 cup at a time. Thoughts?
Hi. I have a Keurig K mini that was accidentally plugged to 220V. I have replaced the MOV and the 10-ohm resistor. After I plug the unit the 10 ohm resistor burns. I discovered that D2 is shorted. Does anybody know the value of D2? Would appreciate it if anybody could share the schematic diagram.
Hi, I am looking to access the limit switch for the handle (in order to trigger the circuit from an Arduino), assuming I've already got control of the power and brew buttons. Can I get to this by just prying the top cover off? Thanks.
Hi. There is some sort of gasket in the top around the pod cover. Our is ripped. Is there any way to replace it?
I'm looking for a repair guide for replacing the handle on my Keurig MINI K900. Thank you for all your help
Hi. My Keurig K mini is not working. Is it possible to have a replacement board? Where can I buy from?
Is it possible that the circuit board on my Keurg single serve brewer has burned out.