crwdns2933423:0crwdne2933423:0

crwdns2942213:0crwdne2942213:0

crwdns2935311:0crwdnd2935311:0crwdne2935311:0 crwdns2935313:0TechniSat DigitRadio 220crwdnd2935313:0crwdnd2935313:0crwdne2935313:0

  1. DigitalRadio 220 Teardown, DigitalRadio 220 Teardown: crwdns2935265:01crwdnd2935265:01crwdnd2935265:03crwdne2935265:0 DigitalRadio 220 Teardown, DigitalRadio 220 Teardown: crwdns2935265:01crwdnd2935265:02crwdnd2935265:03crwdne2935265:0 DigitalRadio 220 Teardown, DigitalRadio 220 Teardown: crwdns2935265:01crwdnd2935265:03crwdnd2935265:03crwdne2935265:0
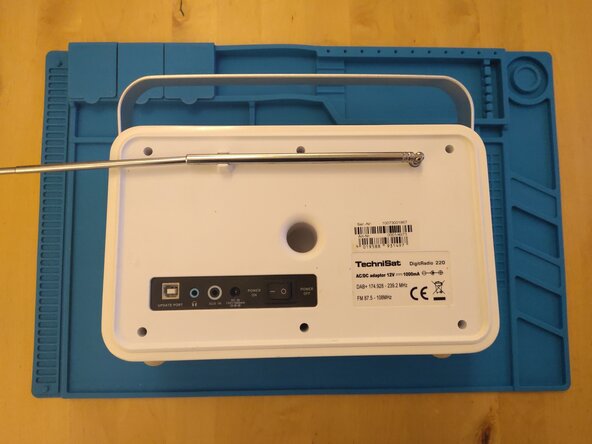
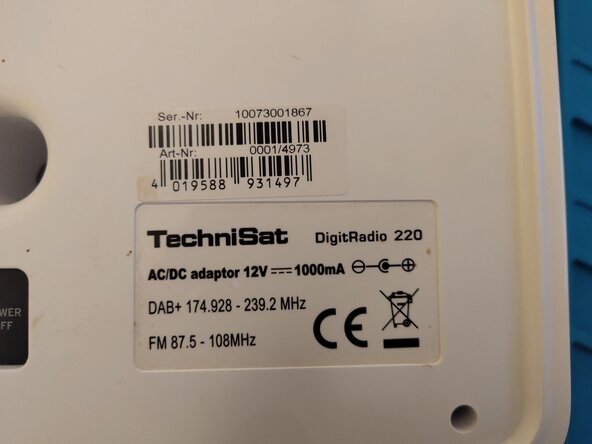
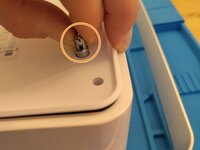
    • Pictures of the device and the type plate

  2. DigitalRadio 220 Teardown, Opening the housing: crwdns2935265:02crwdnd2935265:01crwdnd2935265:03crwdne2935265:0 DigitalRadio 220 Teardown, Opening the housing: crwdns2935265:02crwdnd2935265:02crwdnd2935265:03crwdne2935265:0 DigitalRadio 220 Teardown, Opening the housing: crwdns2935265:02crwdnd2935265:03crwdnd2935265:03crwdne2935265:0
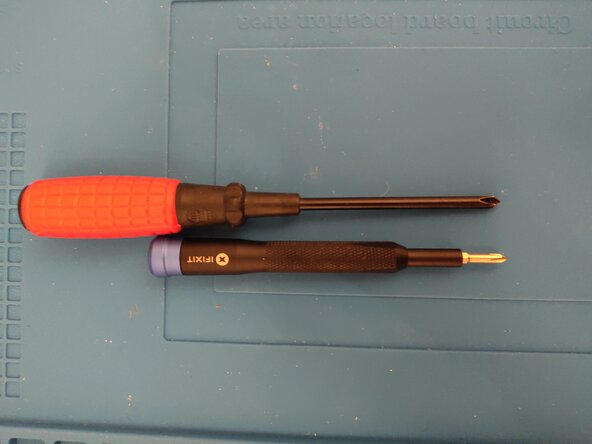
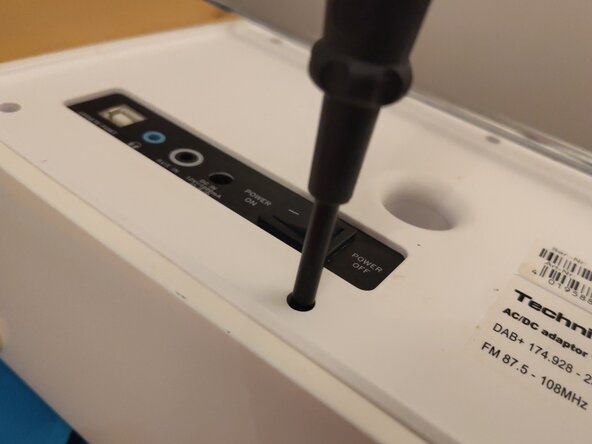
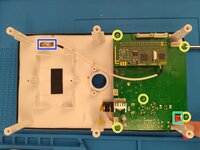
    • Remove the marked Phillips screws - PH0 or PH1. Due to the hole depth and diameter, you cannot reach the screw head with the iFixit bit sets. A screwdriver with a longer shaft length is required, see middle image.

  3. DigitalRadio 220 Teardown, Loosening the ribbon connectors: crwdns2935265:03crwdnd2935265:01crwdnd2935265:03crwdne2935265:0 DigitalRadio 220 Teardown, Loosening the ribbon connectors: crwdns2935265:03crwdnd2935265:02crwdnd2935265:03crwdne2935265:0 DigitalRadio 220 Teardown, Loosening the ribbon connectors: crwdns2935265:03crwdnd2935265:03crwdnd2935265:03crwdne2935265:0
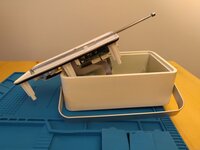
    • The cover can be opened by gently pulling on the antenna, see first picture.

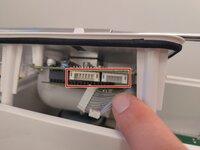
    • The ribbon connectors can be removed by gently levering them downwards.

  4. DigitalRadio 220 Teardown, Further disassembly: crwdns2935265:04crwdnd2935265:01crwdnd2935265:02crwdne2935265:0 DigitalRadio 220 Teardown, Further disassembly: crwdns2935265:04crwdnd2935265:02crwdnd2935265:02crwdne2935265:0
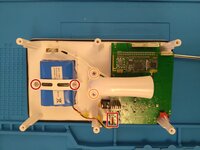
    • Removing the battery holder - PH0 or PH1 - and the ribbon connector

    • Removing the PH0 or PH1 attachment part

    • Remove the PH0 or PH1 screws on the main board

    • Removing the red ribbon cable plug

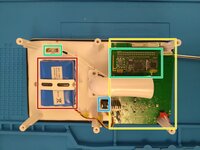
    • Removing the antenna connection or careful handling

  5. DigitalRadio 220 Teardown, Overview of modules: crwdns2935265:05crwdnd2935265:01crwdnd2935265:03crwdne2935265:0 DigitalRadio 220 Teardown, Overview of modules: crwdns2935265:05crwdnd2935265:02crwdnd2935265:03crwdne2935265:0 DigitalRadio 220 Teardown, Overview of modules: crwdns2935265:05crwdnd2935265:03crwdnd2935265:03crwdne2935265:0
    • Rechargeable battery: 5000 mAh 7.4 V 37 Wh
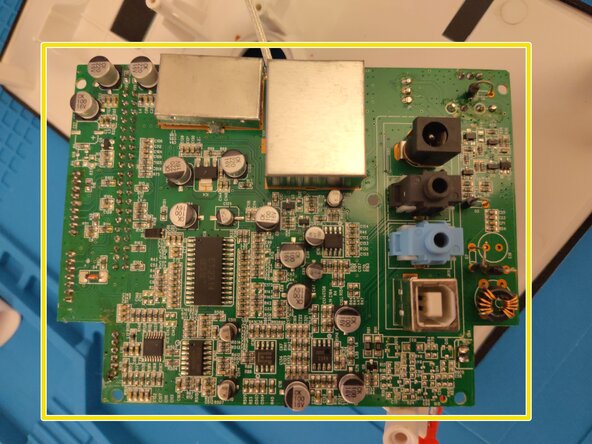
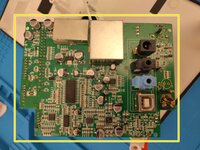
    • Mainboard

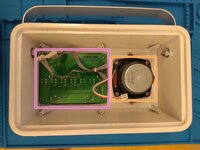
    • Radio receiver board and DAB/UKW telescopic antenna

    • Main switch

    • Circuit board and 2-line 2.8 inch LCD display

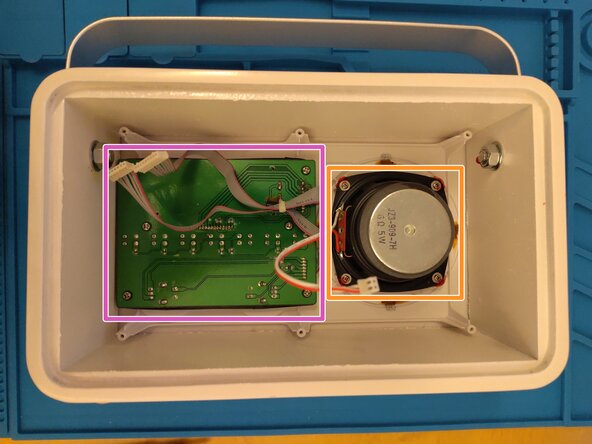
    • Loudspeaker: 6 Ohm 5 W

crwdns2934873:0crwdne2934873:0

de en

100%

crwdns2934883:0Justus Klinglercrwdne2934883:0 crwdns2934875:0crwdne2934875:0
crwdns2934877:0crwdne2934877:0 ›

Justus Klingler

crwdns2935283:012/23/20crwdne2935283:0

531 crwdns2915208:0crwdne2915208:0

crwdns2935297:02crwdne2935297:0

crwdns2947412:00crwdne2947412:0

crwdns2917038:0crwdne2917038:0

crwdns2936625:0crwdne2936625:0:

crwdns2936751:024crwdne2936751:0 3

crwdns2936753:07crwdne2936753:0 15

crwdns2936753:030crwdne2936753:0 59

crwdns2942667:0crwdne2942667:0 83