crwdns2915892:0crwdne2915892:0
This guide will show you how to replace the keyboard. Because the keyboard can only be replaced from the insde this is close to a teardown.
Don't be scared, its mostly unscrewing stuff. Work methodically and lay down screws in the order you used them.
If you have questions: hit me up.
crwdns2942213:0crwdne2942213:0
-
-
remove 8x screws with PH1 Screwdriver
-
Use finger nail or operning pick between backplate and frame at the top of the device
-
-
-
remove battery connector by pulling up. make sure the pulling strap is turned upwards
-
remove 5x screws with PH1
-
-
-
remove speaker cable by pulling towards yourself horizontally
-
lift out the battery vertically.
-
-
-
open ribbon cable connectors by lifting up and away from you the black securing latch
-
carefully lift up ribbon cables and pull towards yourself
-
-
-
pull horizontally to the rigt
-
-
-
Use JIS00 or J00
-
display connector
-
wifi antenna connector
-
-
-
use JIS00 or J00
-
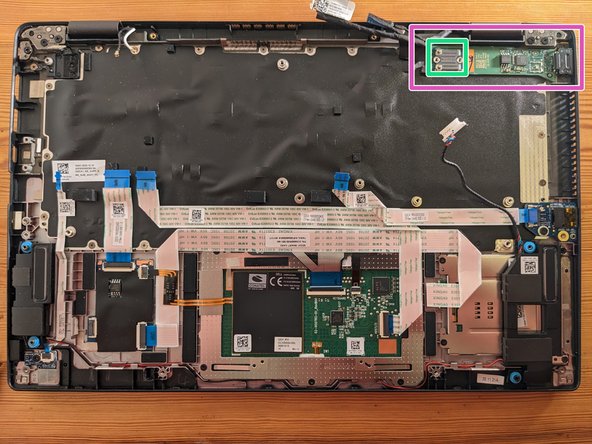
unscrew connector plate
-
-
-
-
lift upwards vertically
-
pull out horizontally away from you
-
-
-
remove 6x screws using PH1
-
remove cable sticker from heat sink
-
if the thermal paste has dried out the heat sink can be stuck on. carefully wiggle it horizontally until you can lift it up vertically
-
-
-
use PH1 for 2x mobo screws
-
-
-
remove 4x USB Screws with PH1
-
-
-
start on the right side at the USB C daughter board.
-
lift up the motherboard where the fan used to be
-
you should be able disconnect the daughterboard and mother board
-
the USB C port on the left might be tight. Use your fingers to slightly bend the laptop casing outward to the left above the usb c port
-
lift out the motherboard vertically
-
lift out USB C daughter board vertically. use the frame bending trick if necessary
-
-
-
remove 1x screw with PH1
-
lift out daughter board vertically
-
-
-
carefully unstick glued on ribbon cables. use are card and pull up at 45° angle
-
no need to remove headphone jack cable
-
disconnect ribbon cable
-
-
-
open connector as usual
-
open connector from smaller ribbon cable at the white flap. NOT on top of the ribbon cable!
-
pull out ribbon cables
-
-
-
use JIS00 or J00 to remove 19x screws
-
go around perimeter of the backplate in a orderly fashion when removing the screws to not miss any
-
-
-
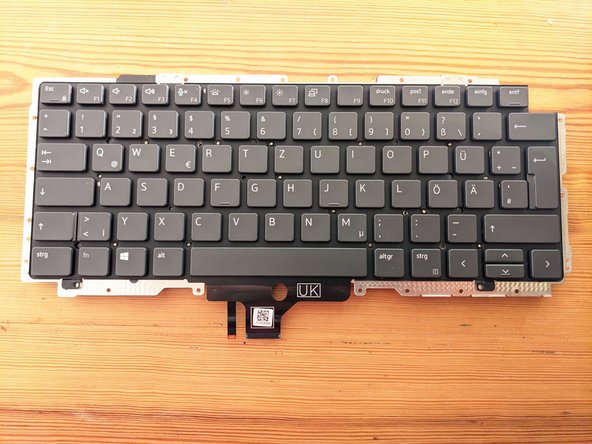
lift up keyboard vertically
-
be careful: ribbon cables might be sticky
-
-
-
use PH1 to unscrew backplate from front of keyboard
-
-
-
remove old thermal paste using isopropyl alcohol and a cloth
-
apply new thermal paste
-
-
-
when you are done with reassembly do not panic, the first boot takes a little longer after disconnecting the battery
-
after reassembly press inbetween keyboard keys to klick together backplate and notebook frame
-


To reassemble your device, follow these instructions in reverse order.
To reassemble your device, follow these instructions in reverse order.
crwdns2935221:0crwdne2935221:0
crwdns2935229:03crwdne2935229:0

crwdns2947412:02crwdne2947412:0
Steps 10 and 13 are not necessary (motherboard could be removed together with a head sink)
After following this very useful guide my new keyboard was not working, when you reconnect all the ribbon cable take some time to reconnect them better then I have done :-D
If something is not working double check the ribbon cables connection before doing anything else.