crwdns2915892:0crwdne2915892:0
We wanted to show off all the hard work the good folks at Blendtec have put into their machines, so we took apart their famous "Will it Blend?" blender!
We also made a video slideshow of the teardown!
crwdns2942213:0crwdne2942213:0
-
-
Our friends at Blendtec were awesome enough to lend us a blender for this teardown!
-
$400 gets you:
-
Their awesome "base" 1560W Total Blender (as if you can call anything with 1560 Watts "base")
-
Instruction manual
-
CD-ROM with product tour and video recipes
-
Lifestyles Recipe Book, good for many blenderiffic creations
-
-
-
Fully digital controls, along with an LCD display. None of that "push-button" stuff found on $30 blenders.
-
But will it blend?
-
We were so anxious to open up this puppy, we never found out. We'll take the word of thousands of satisfied customers, as well as Blendtec's hilarious videos.
-
A mechanical switch on the back of the unit stops any bad ideas from turning into deadly ideas.
-
-
-
You'll notice the absence of plastic. Other blenders use plastic shafts as a safety mechanism. If the blade gets stuck, the blade/motor connection will sever, as the plastic will either break or melt.
-
The Total Blender has several electronic monitors that enable it to have a full metal shaft. That's how it transfers all that power to your ice cubes.
-
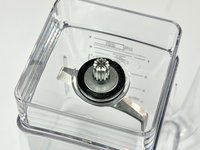
The splined connection between the motor shaft and the blades is perfectly suited to transfer the astronomical torque of the motor to the edge of the rotor blades.
-
-
-
The bottom of the blender. Best place to go if you need your serial number.
-
Remove the two Phillips screws (deeply) recessed into the bottom housing.
-
Four side tabs hold the plastic bottom housing in place. Opening the blender is as easy as one, two, three, four.
-
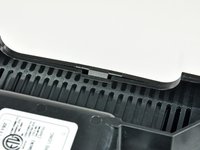
The bottom housing is very ventilated -- essential for cooling the 1560W motor housed within.
-
-
-
There's another thin plastic cover underneath the main cover. Nothing too exciting yet.
-
The cover most likely directs air toward the vents in the bottom housing.
-
Notice all the free space. This is the type of device mostly unaffected by the trend to shrink all components as much as possible.
-
-
-
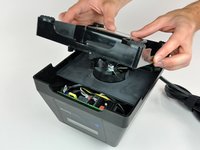
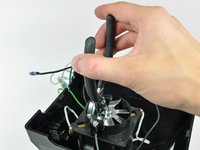
Now onto the fun stuff.
-
Connectors abound!
-
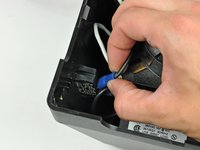
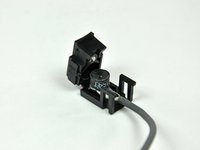
We begin by pulling out the power switch -- can't be too careful nowadays, especially with the recession and all...
-
Another spade connector lies underneath. We pulled that one out too.
-
Insert a spudger between the EMI power line filter and the case to separate the double sided tape. The unit comes right off after a couple of spudger twists.
-
-
-
-
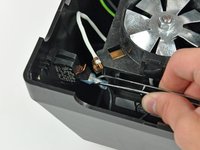
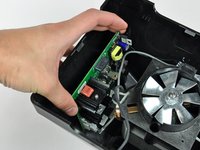
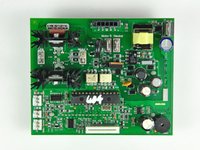
Onto the logic board, which may be the most important of all the internal goodies. It regulates all the aspects of operation and safety for the device.
-
The logic board simply sits on brackets molded into the plastic housing. No screws!
-
Disconnect a couple of spade connectors from it, and slide it out a bit to reach the control panel ribbon cable connector.
-
Disconnect the control panel ribbon cable from the board. This should almost free the logic board from the rest of the blender.
-
-
-
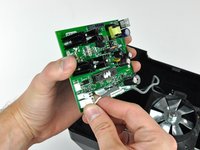
Two more connectors, and the logic board is free to roam about the country!
-
-
-
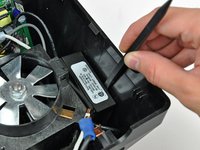
Removing the speed sensor.
-
Aptly named, the speed sensor monitors the speed of the spinning shaft. Should things get out of hand, the sensor will shut off the motor.
-
The speed sensor uses inductive pickup to tell the control circuitry how fast the shaft is spinning. Inductive pickup is triggered by ferrous metal passing by in close proximity, causing a current to be induced in the pickup. This is really the same effect used by an electric guitar to pick up the string vibrations.
-
Blendtec informed us that the Total Blender includes what they call a "hammer-fire" system. The main microprocessor will trigger this system if it detects that the blade stopped spinning. The processor will send a series of strong electric pulses with the intent to free the blades from the obstruction. If that fails, it will shut off the motor to prevent any damage.
-
-
-
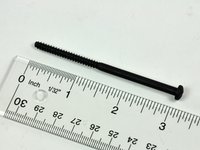
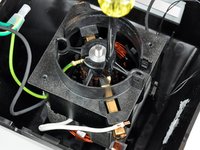
Remove two Phillips screws (of the four holding together the entire device) from the brush/slip ring housing.
-
These puppies didn't come out without a fight.
-
No wonder why -- they're over 3" long! Containing the inertia of the rotor spinning at 28,000 rpm is kind of important.
-
-
-
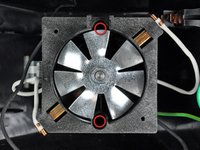
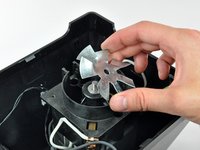
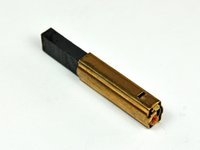
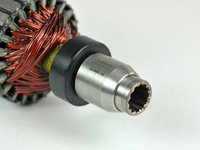
Remove the single nut from the fan end of the shaft.
-
A 3/8" Allen wrench conveniently fits into the splines at the other end of the shaft, making the nut removal a snap.
-
After removing the nut, the fan simply lifts off the shaft.
-
-
-
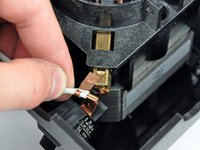
Use a flat blade screwdriver to 'walk' each of the two brass brush housings away from the motor shaft.
-
After the brass brush housings are separated from their housing, the brush spade connectors simply slide out.
-
-
-
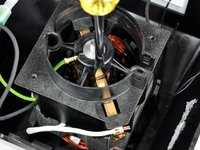
Removing the brush/slip ring housing exposes the support ball bearings at the tail of the motor shaft.
-
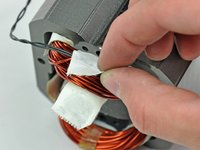
The brass brush housing is connected to the pure carbon brush with a braided copper wire.
-
The carbon brushes normally wear out before the rest of the motor.
-
-
-
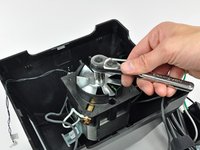
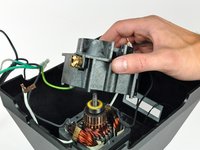
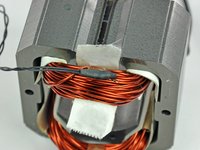
Lifting the stator out of the Blendtec.
-
The weld connecting the stack of metal plates creating the frame of the stator is just plain beautiful.
-
-
-
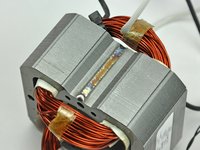
Tracing the small black wire to the bottom of the stator and peeling back the tape reveals...
-
A thermistor!
-
The thermistor is used to monitor the temperature of the windings to avoid meltdown.
-
We're told that the motor temperature has to reach a maximum of 130 degrees Celsius (266 degrees Fahrenheit) before being shut off!
-
-
-
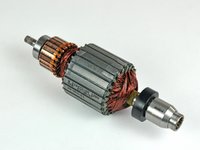
Just look at this rotor. If looks could kill, you just might get shot.
-
This a podracer engine is, hmm? Yeesssssss.
-
The two bearings are reported to be 608RS, which is a commonly available size. The upper bearing has a rubber sleeve over it in the photo.
-
-
-
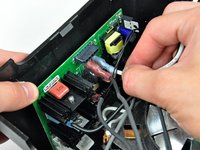
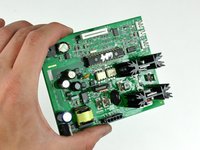
The logic board.
-
First picture shows the shininess of the logic board. The board is clear-coated to prevent condensation from attacking the electronics.
-
The hi-res version of the board shows all the intricate details -- inductive pickup/rotor sensor plugs, the thermistor plug, etc.
-
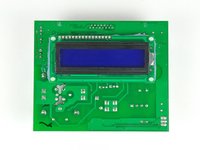
The LCD panel is located on the back of the board, thus eliminating the need for any extra circuit boards.
-
-
-
So ends the teardown of the Blendtec Total Blender. This is one of those devices that we are very leery about reassembling and using...
-
13 Amps, generating 28,000 RPM (that's a 270 MPH blade tip speed) on a slightly-unbalanced shaft just strikes us as a bad idea!
-
The PS3 Slim works just fine after our teardown -- but it doesn't have razor-sharp blades.
-


crwdns2947412:041crwdne2947412:0
I bought a used ibc7 with a bit over 13,000 15 second cycles. The upper bearing was pretty gummed up and there was bearing dust (a rusty powdery substance) I have seen before when a bearing goes out blown through the engine compartment. looking at removing the socket? (the thing that receives the pitcher) shown in step 16. I think I need a vice with a 3/8 allen.
Also, I would recommend lubing the two bearings shown in step 16 now and again to increase the life of the blender. It would not require a full teardown. The rubber seals should pop open and a little cleaning and lube and all set. The bearings are 608rs which is a common available size.
Has anyone figured out how to remove the drive socket so you can change out a rusty upper bearing. I've torn mine down to that point and now I'm stuck.
Justin -
Justin, There's a black plastic ring on the bottom that's sealed in place that holds a metal disk and the bearing in place. I used a dremel to remove the plastic ring and everything popped out easily. I'll have to epoxy it all back together.
what about fixing the 64 oz. Container when the metal cutter breaks which is often. A new container costs nearly $80 and we would love to know how to repair ours. You skip the cutter breaking in the jar. Can you help?
There is a new blender jar for Blendtec blenders which comes with a removable blade assembly easy to replace, creates versatility . It's the Alterna Jar.